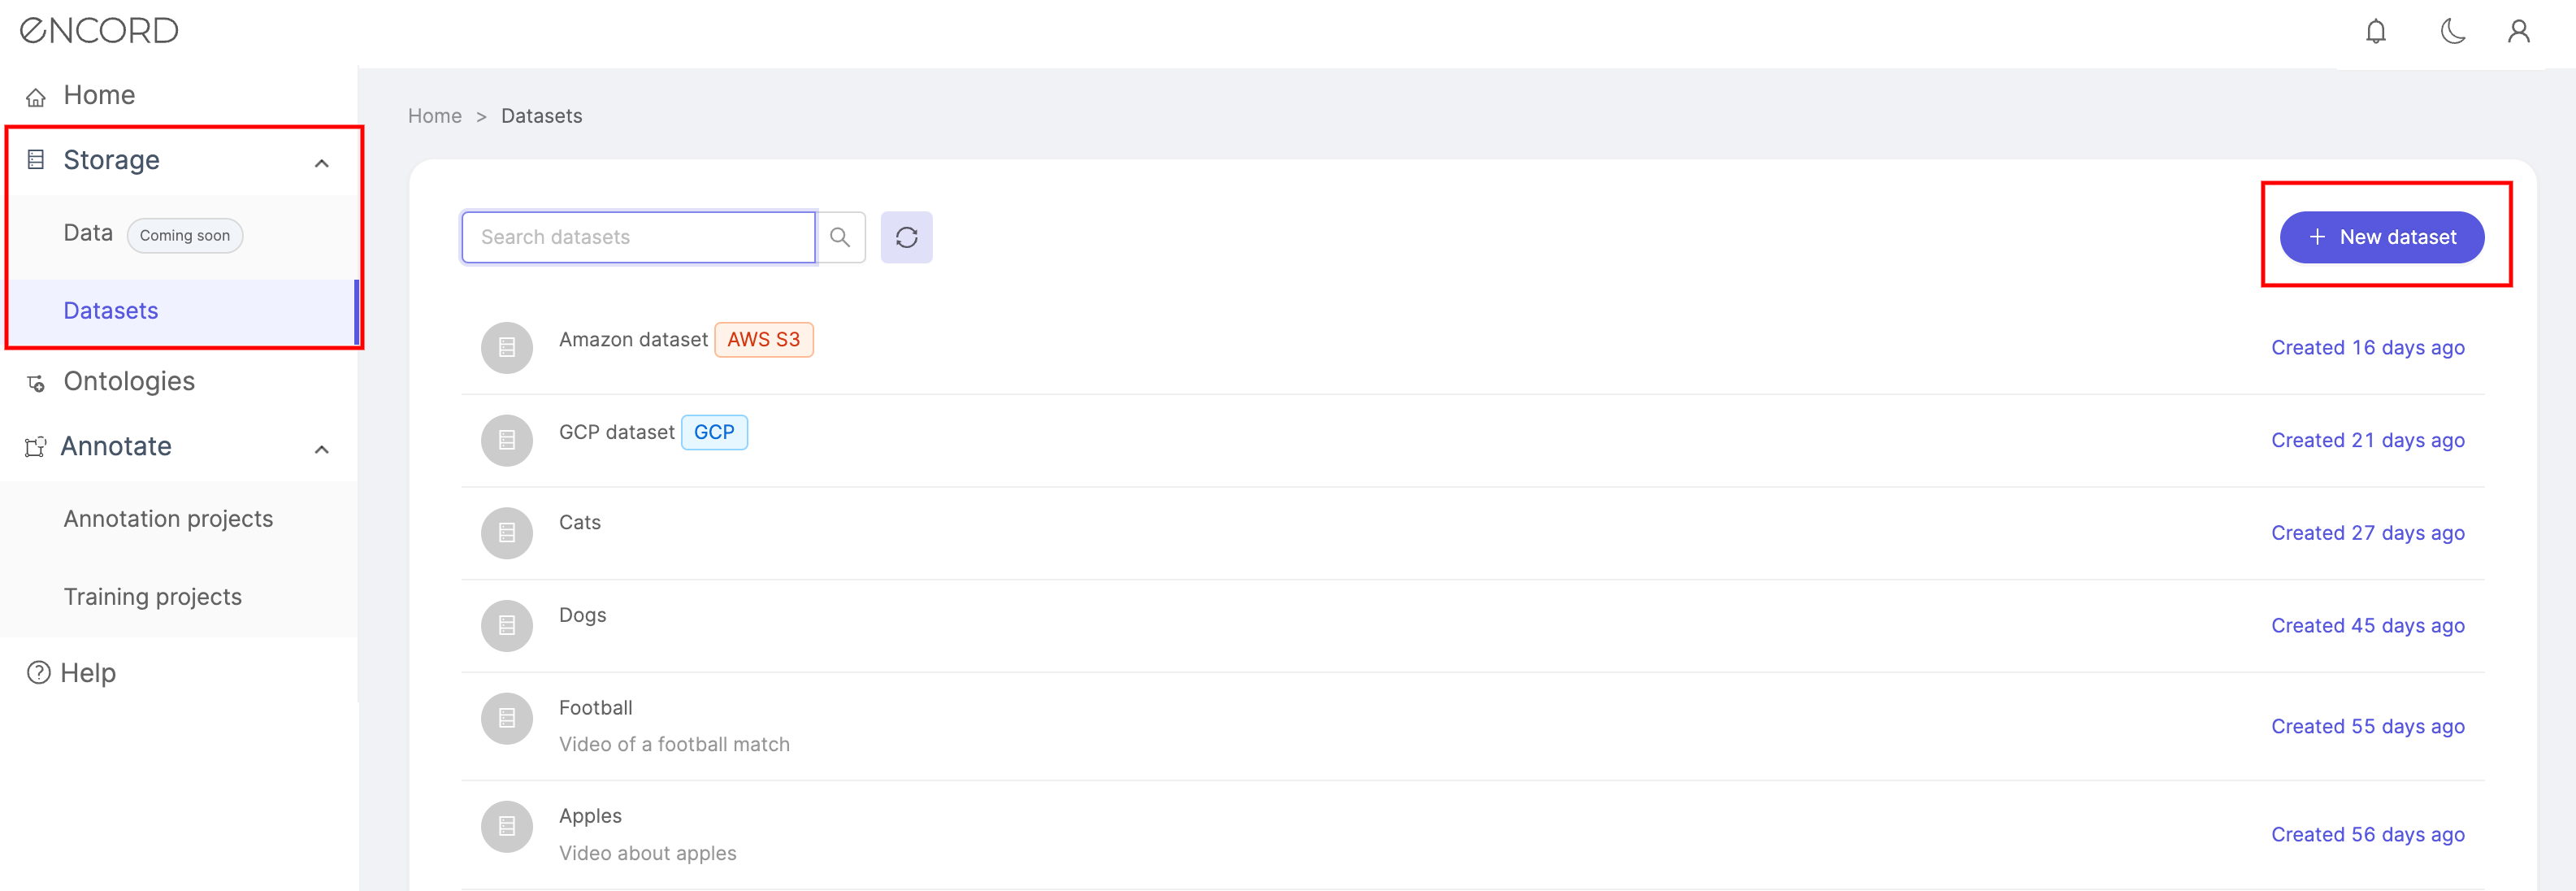
Creating datasets
Video Tutorial - Creating a dataset
Click the New dataset button in the List and search section to create a new dataset. This initiates a simple step-by-step process for turning your data files into datasets.
1. Enter details
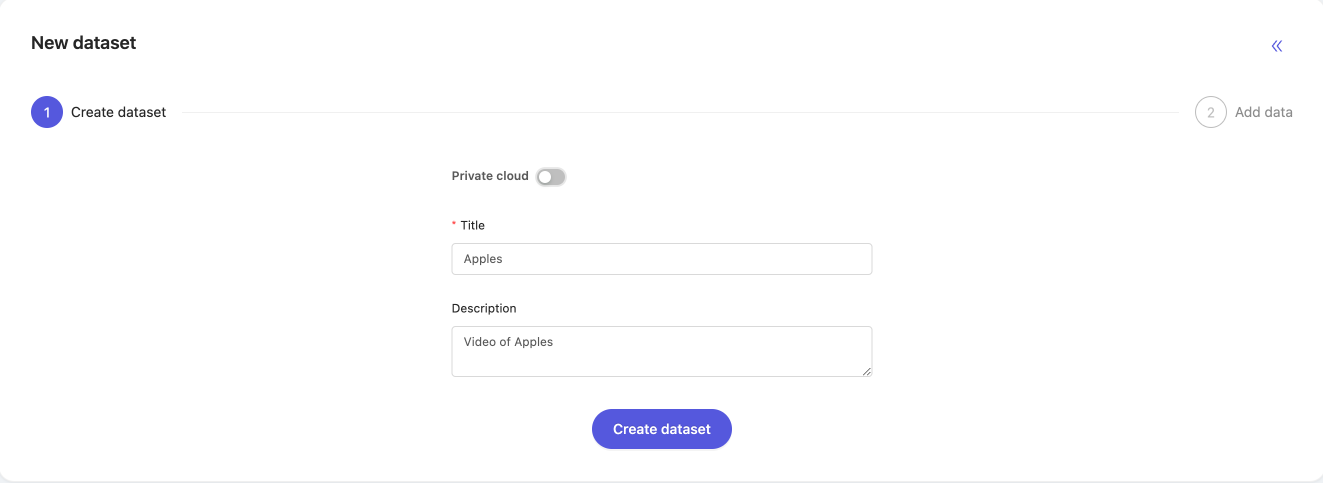
Give your dataset a title, and optionally a description. A clear title and description will keep your data organized and help collaborators find what they are looking for.
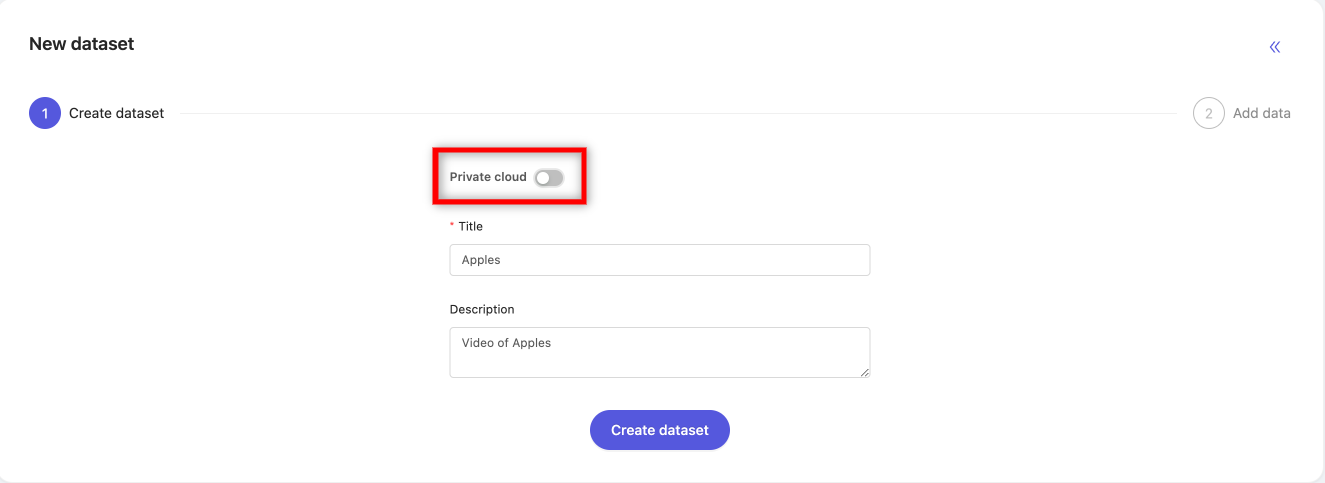
If you plan to use cloud storage data, be sure to toggle Private cloud. We provide integrations for Azure, Google Cloud Platform, Amazon's S3 and Open Telekom Cloud.
At least one integration is needed to toggle Private cloud. These can be added in the 'Integrations' tab within 'Settings'. Please refer to the Data integrations documentation for more information.
- If you are ready to proceed and upload your data click Create dataset.
2. Upload data
The next step is to upload data to your dataset. This can be done in two different ways:
Upload cloud storage data
- Create an appropriately formatted JSON or CSV file specifying the data you would like to add to the dataset.
- Click the upload area, or drag-and-drop the JSON or CSV files which specify which cloud storage data should be uploaded. Your stored objects may contain files which are not supported by Encord and which may produce errors on upload - toggle the Ignore individual file errors toggle to ignore these. Click Add data when you're ready.
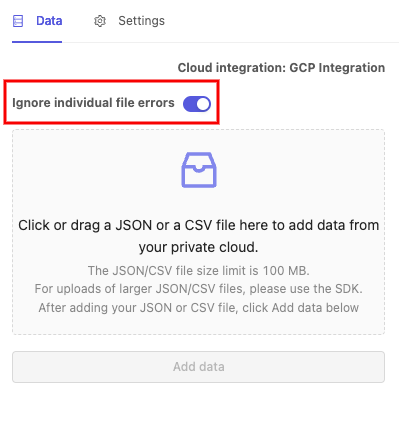
The data will now be fetched from your cloud storage and processed asynchronously. This processing involves fetching appropriate metadata and other file information to help us render the files appropriately and to check for any framerate inconsistencies. We do not store your files in any way.
For information on how to add data from your private cloud please see our documentation here
Upload local data
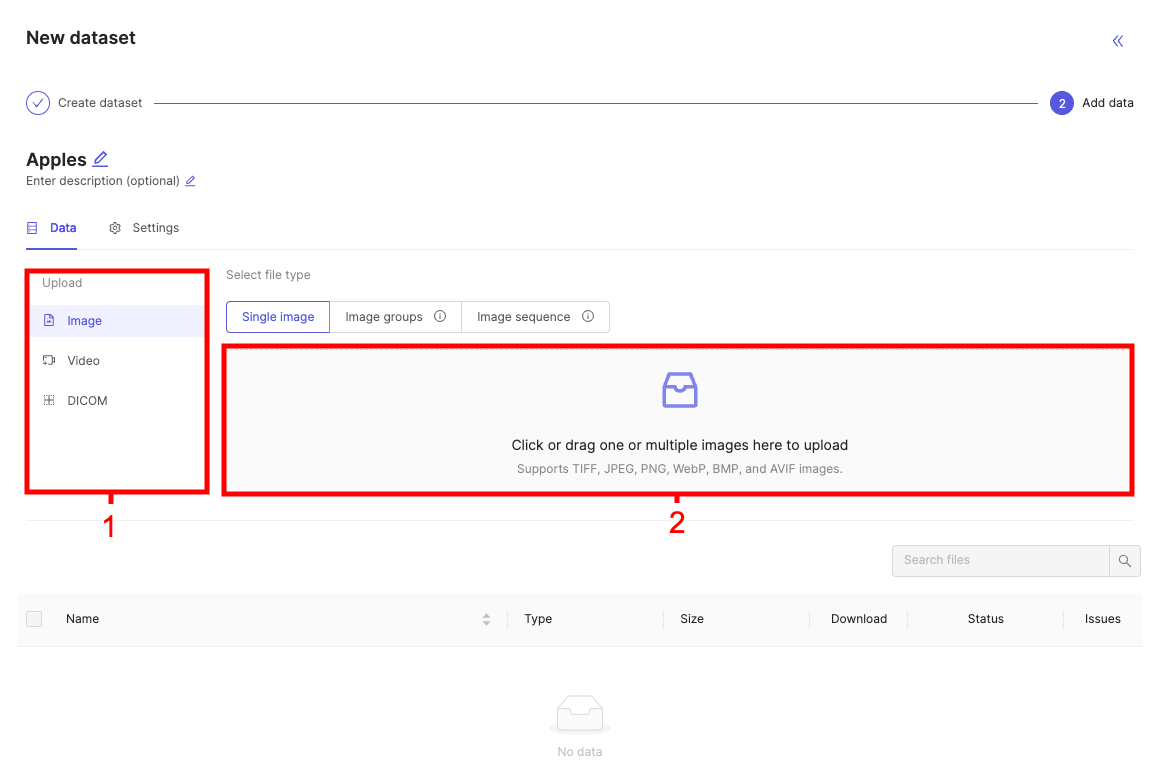
- Select the file type you wish to upload. The following file types are supported:
- Image. This includes single images, image groups, and image sequences.
- Video.
- DICOM.
The 'Add data' screen only allows you to upload your local data files if the Private Cloud toggle was not turned on in the previous step.
- Click the area highlighted in the screenshot above to select files you wish to upload. Drag-and-drop is also available.
- Unsuccessful uploads will result in a red cross
 being displayed.
 - Successful uploads will display a green tick
 . This means your dataset has been successfully created.
If a video containing audio is uploaded the ![]() symbol should appear signifying that the file needs to be re-encoded.
symbol should appear signifying that the file needs to be re-encoded.