AWS S3
- To create an AWS S3 integration, click the + Add integration button in the Integrations tab of the Encord web-app.
Strict client-only access can be added in step 4 below.
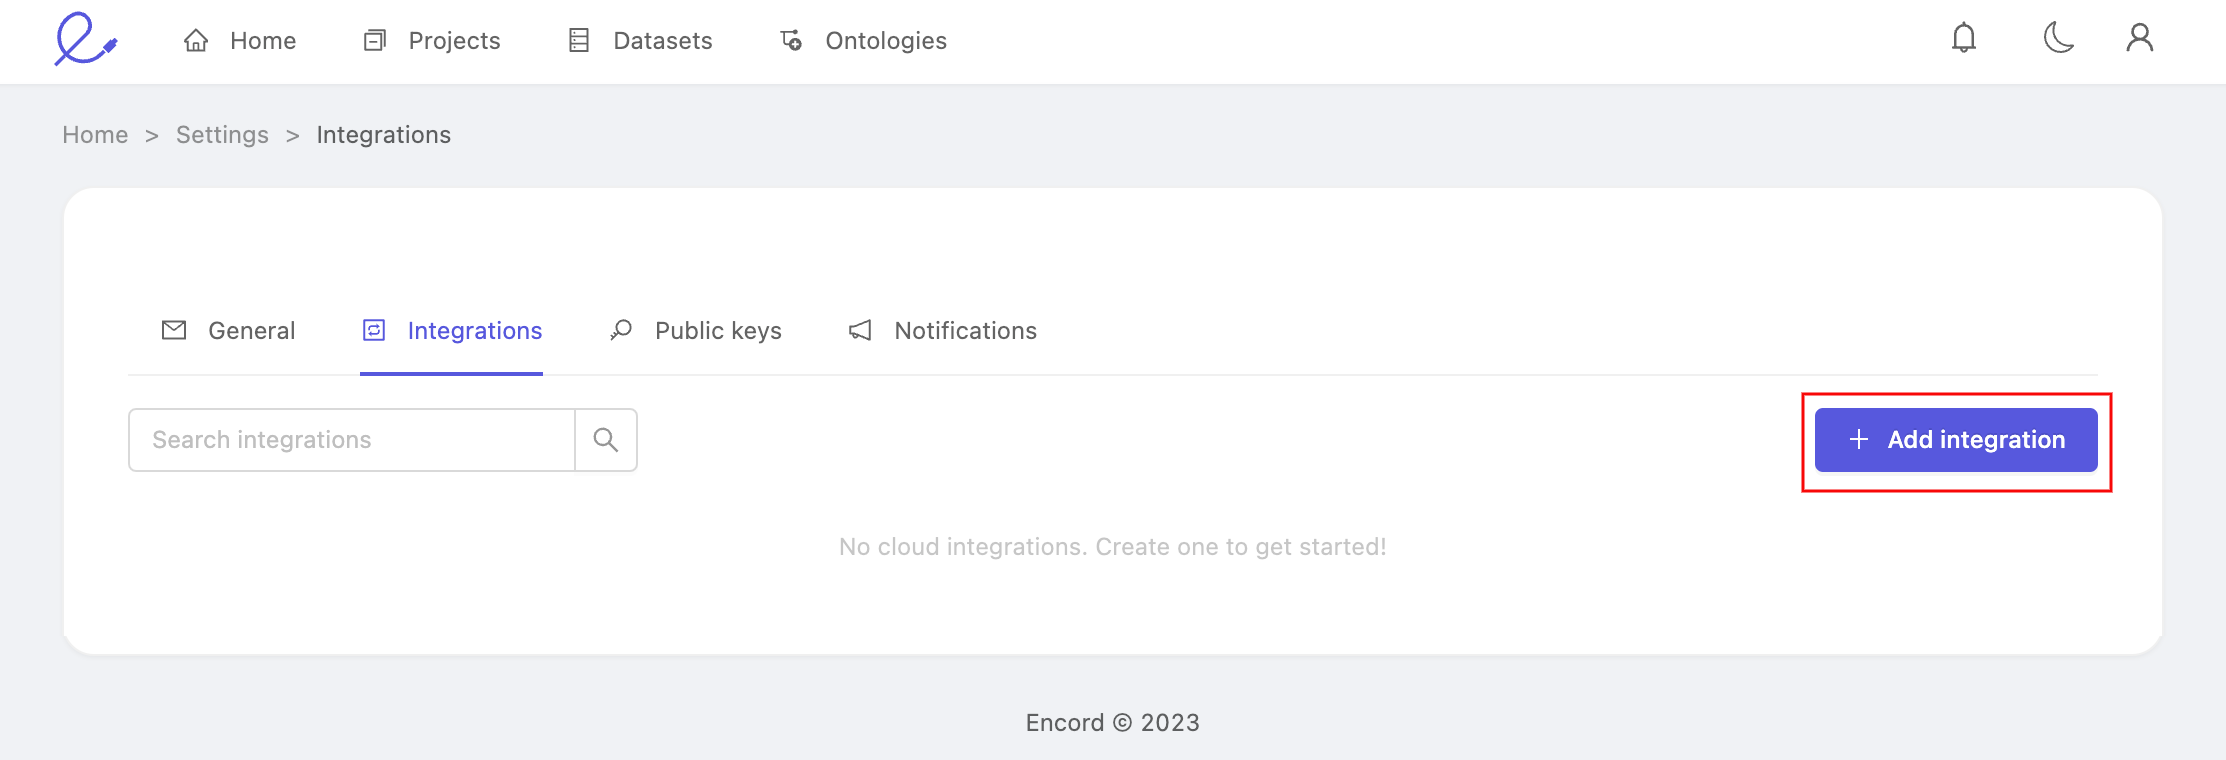
- Select 'AWS S3' at the top of the chooser.
It's essential you don't close this window until you have finished the whole integration process.
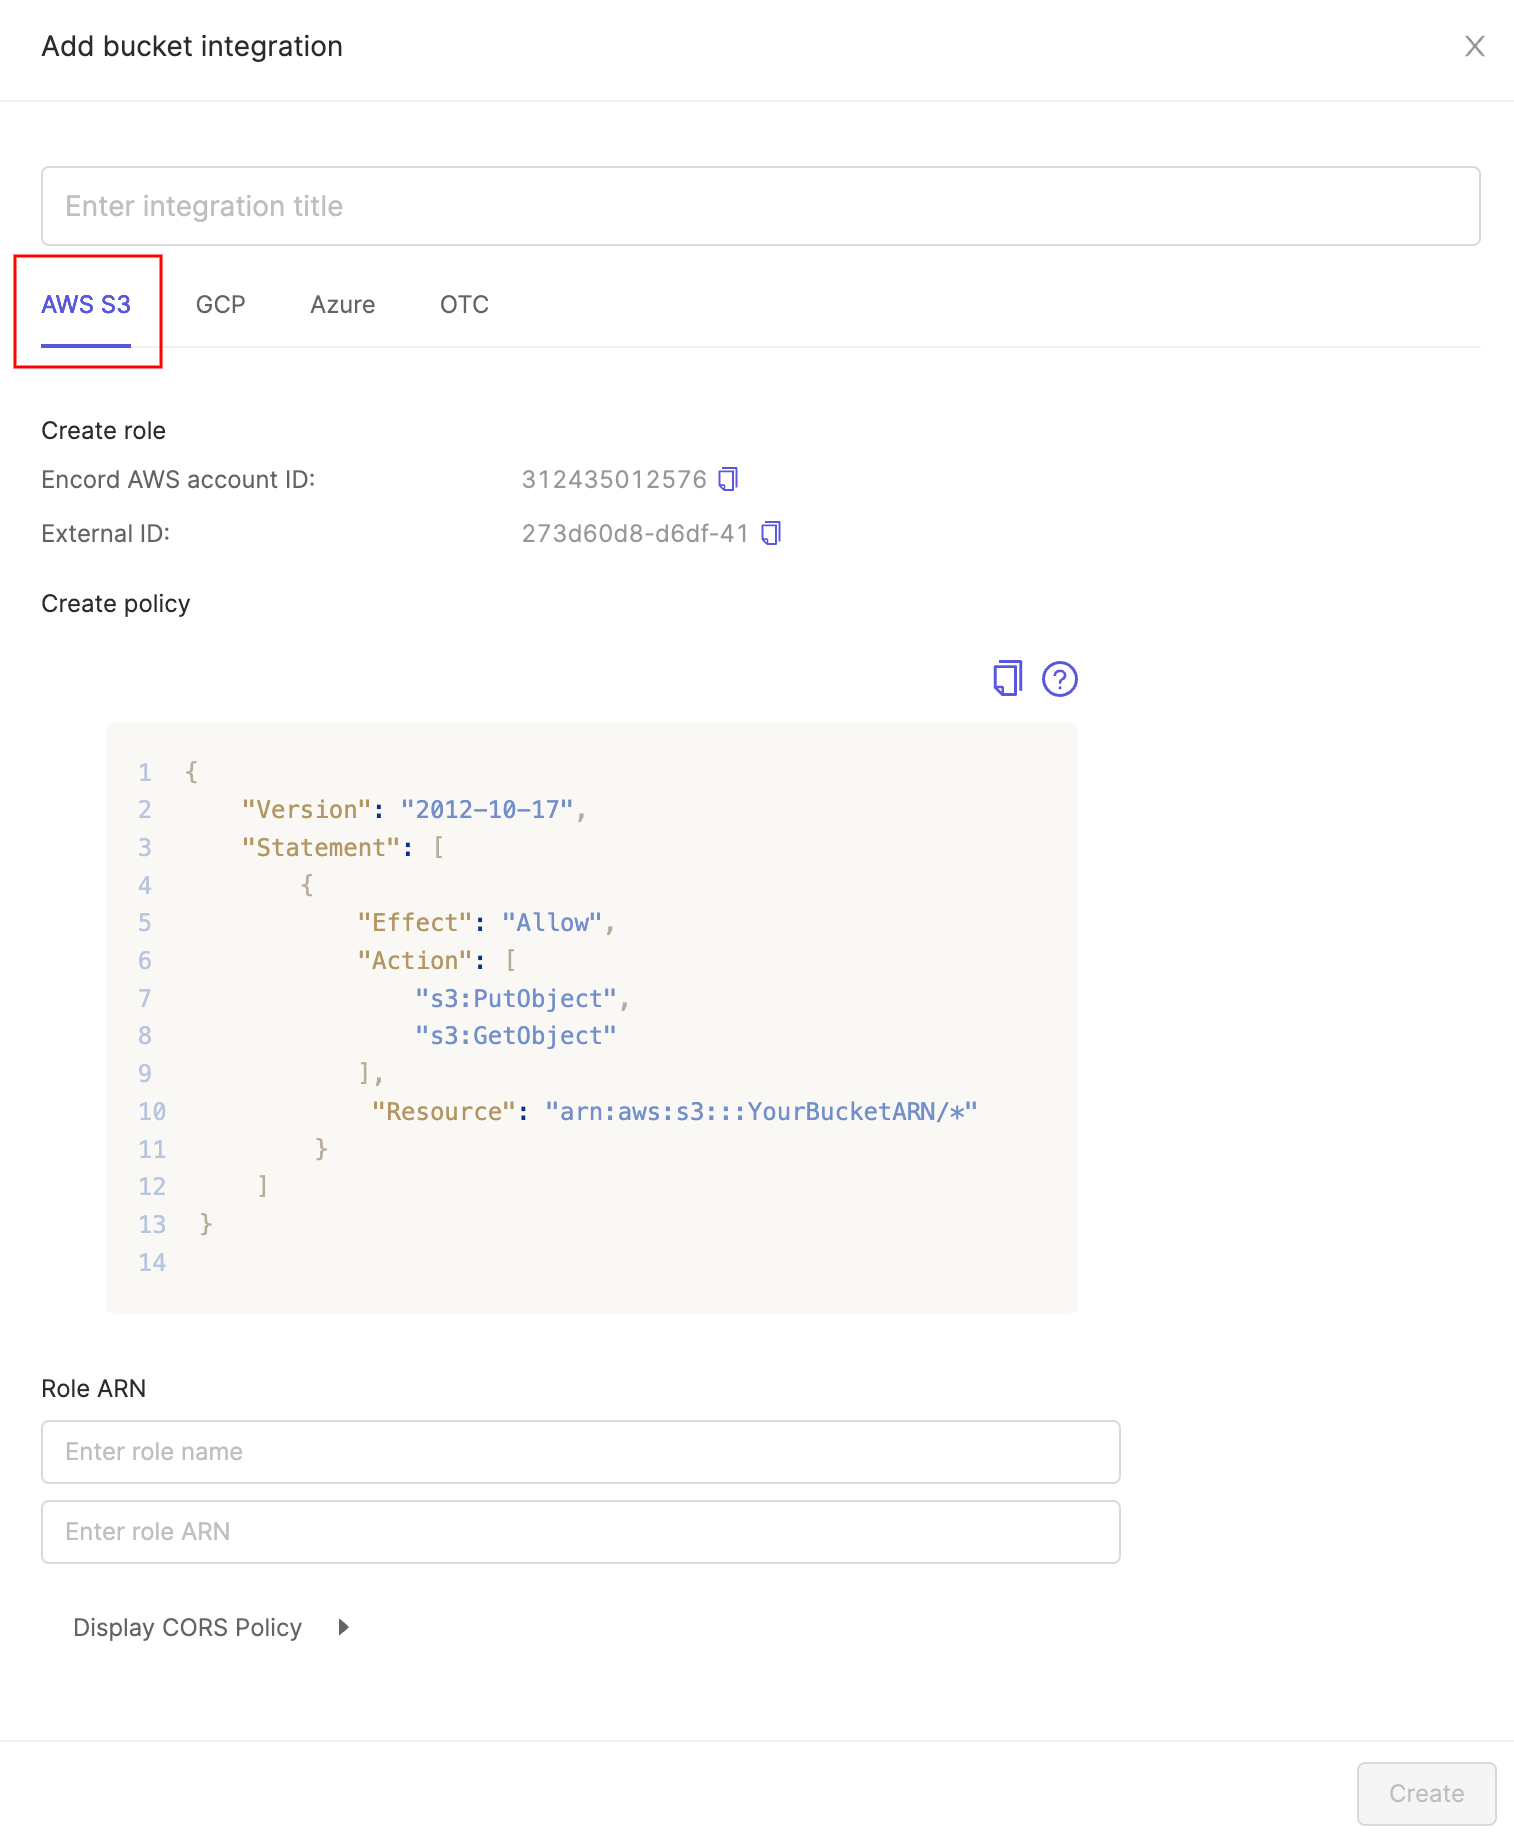
In order to integrate with AWS S3, you will need to:
- Create a permission policy for your resources that will allow appropriate access to Encord.
- Create a role for Encord and attach the policy so that Encord can access those resources.
- Activate Cross-origin resource sharing which allows Encord to access those resources from a web browser.
- Create and test the integration.
Your S3 bucket permissions should be set to be blocking all public access.
1. Create a permission policy
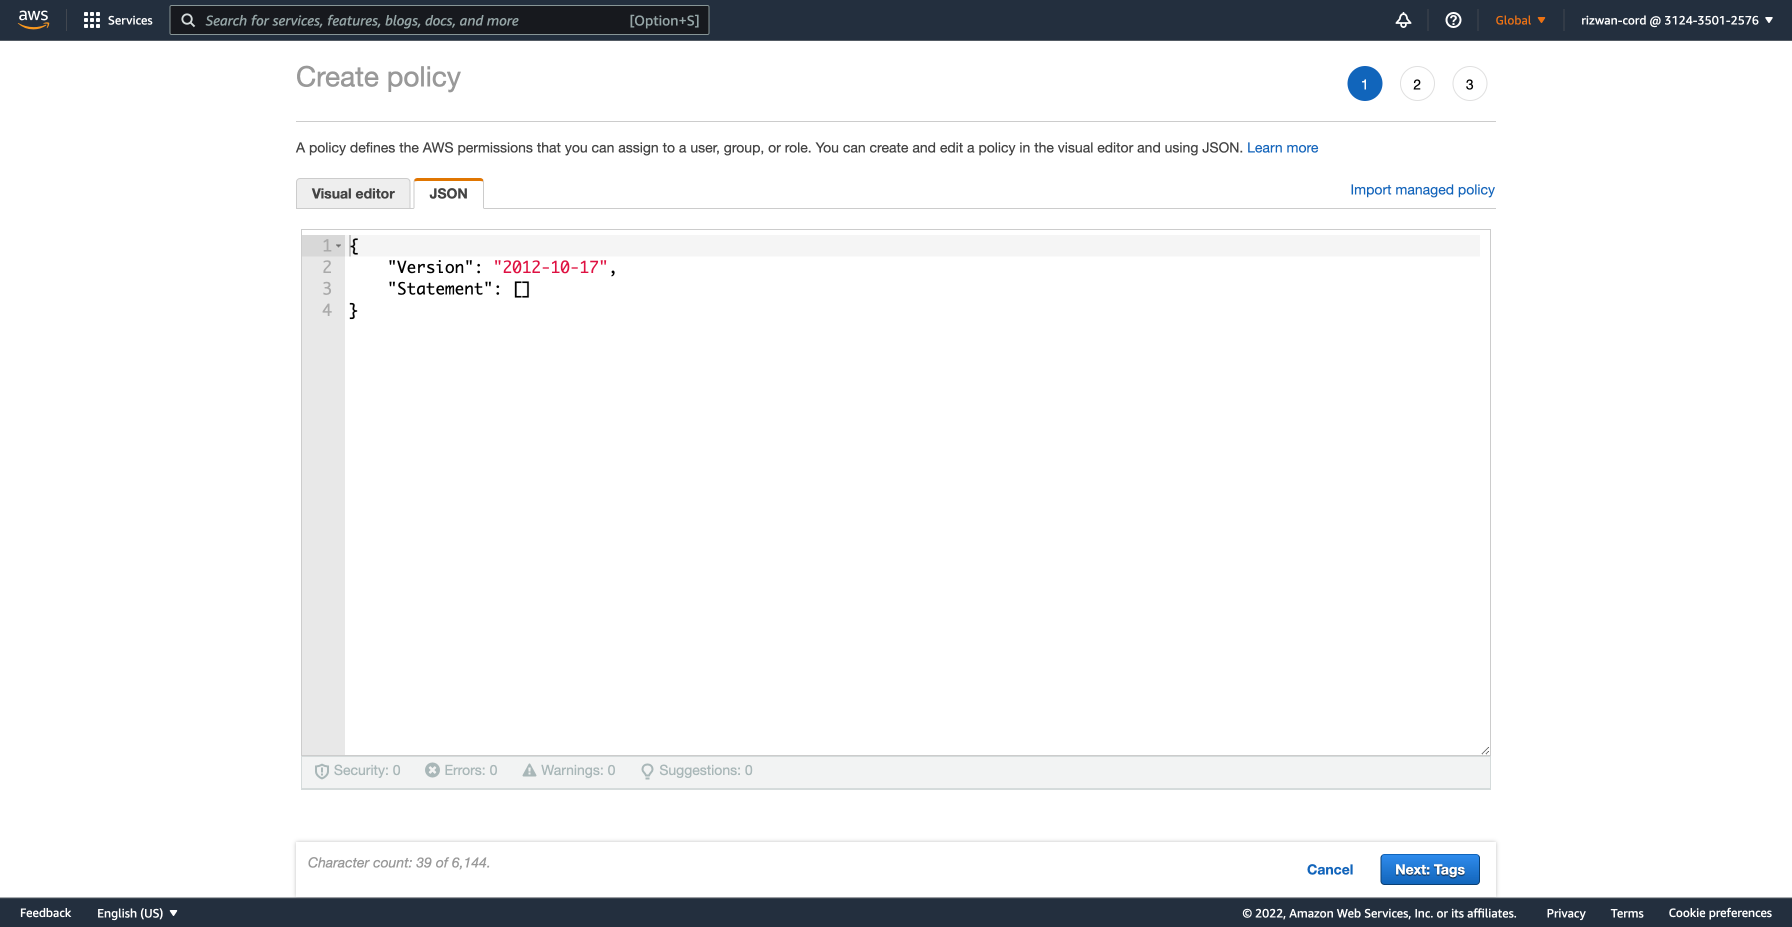
- Log in to your AWS account. Navigate to your Identity and Access Management (IAM) dashboard and go to 'Policies' on the left-hand side.
Policies can also be created using this AWS tool.

Click on 'Create policy' and then click on 'JSON'.
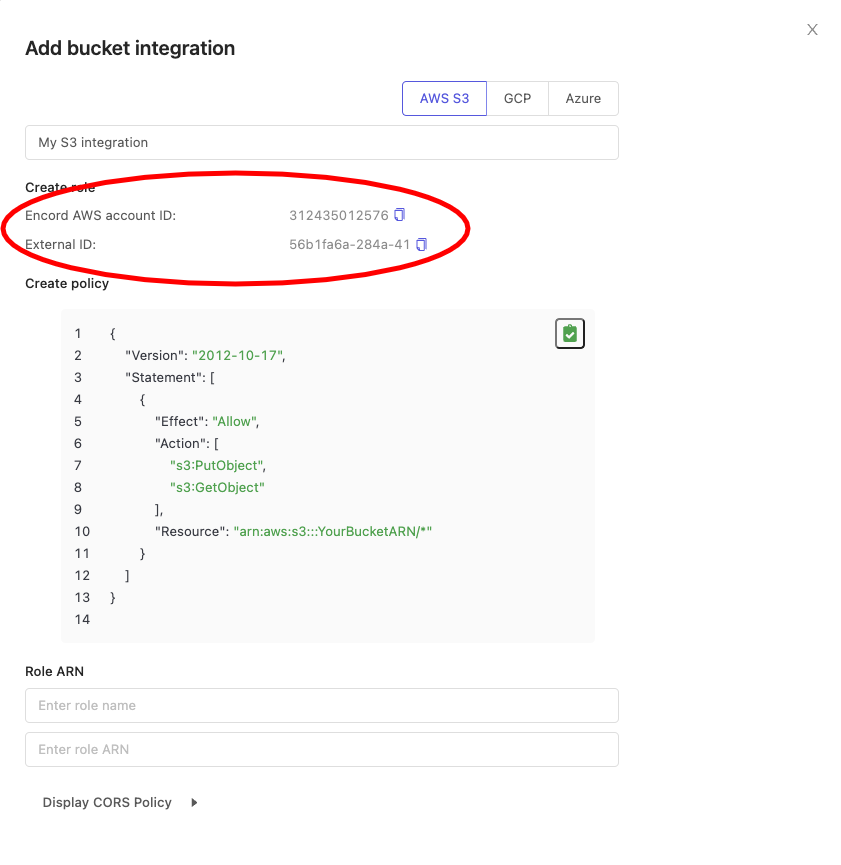
Inside the 'Create policy' section in Encord shown in the screenshot below, copy the JSON and paste into the AWS policy JSON editor opened in the previous step.
Replace the
arn:aws:s3:::YourBucketARNvalue for "Resource" with your bucket's Amazon Resource Name (ARN). The ARN can be found in the 'Properties' tab of your S3 bucket - in the example below the value at "Resource" has been set toarn:aws:s3:::com.encord.docs-demo/*.
If you don't expect to be creating image groups, the s3:PutObject action can be removed. However, this will prevent the re-encoding of videos hence we advise against removing this action.
Click the Next:tags button to add any tags according to your organization's resource tagging policy. Encord does not require any tags to function. Click the Next:Review button to proceed to the final step.
Give your policy a descriptive name (we will use it in the next step) and click the Create policy button. You now have a policy to apply to Encord once it has a defined role.
2. Create a role for Encord
Go to 'Roles' on the left-hand side and click the Create role button.
Select AWS Account as the 'Trusted entity type' and under the 'An AWS Account section', select Another AWS account.
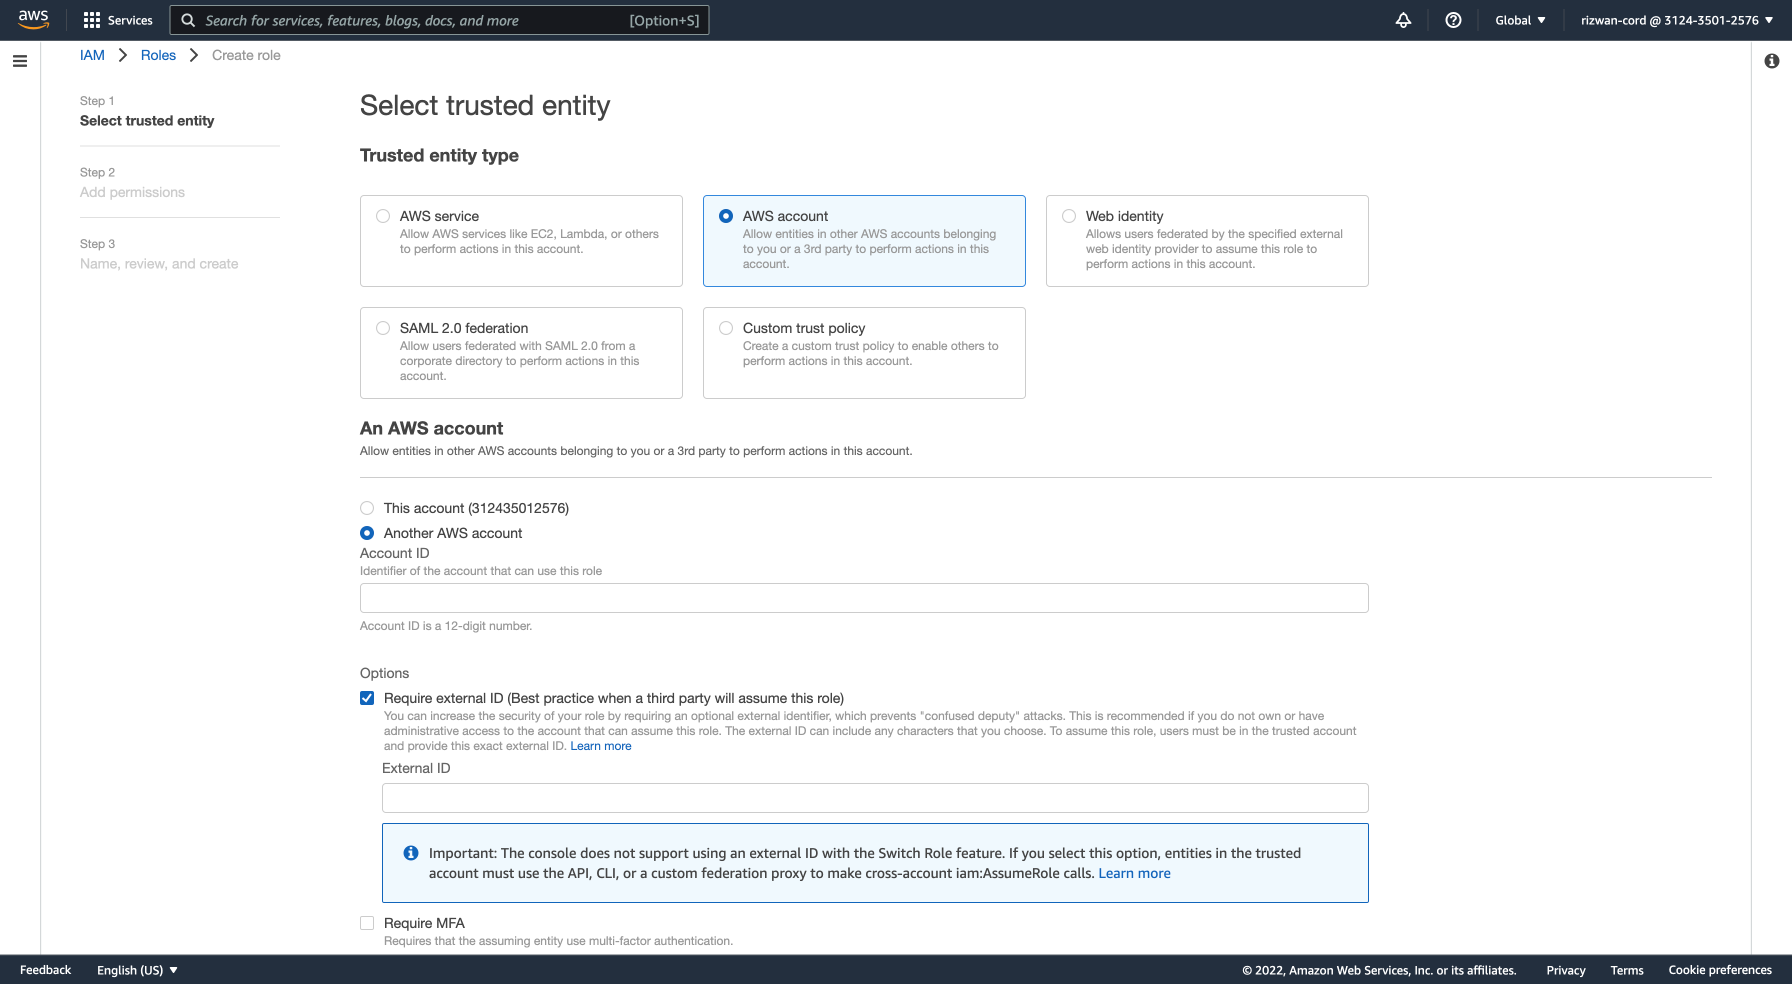
From the 'Integrations' window in the Encord app, copy the Encord AWS account ID as well as the External ID, and paste them into the relevant areas of the AWS trusted entity creation form. You have to check Require external ID under 'Options' in the form to reveal the External ID entry form. Click Next.
Attach the policy we created in step 1 and click the Next button. Give your role a descriptive name and click the Create role button. This is the role Encord will use to access this S3 bucket.
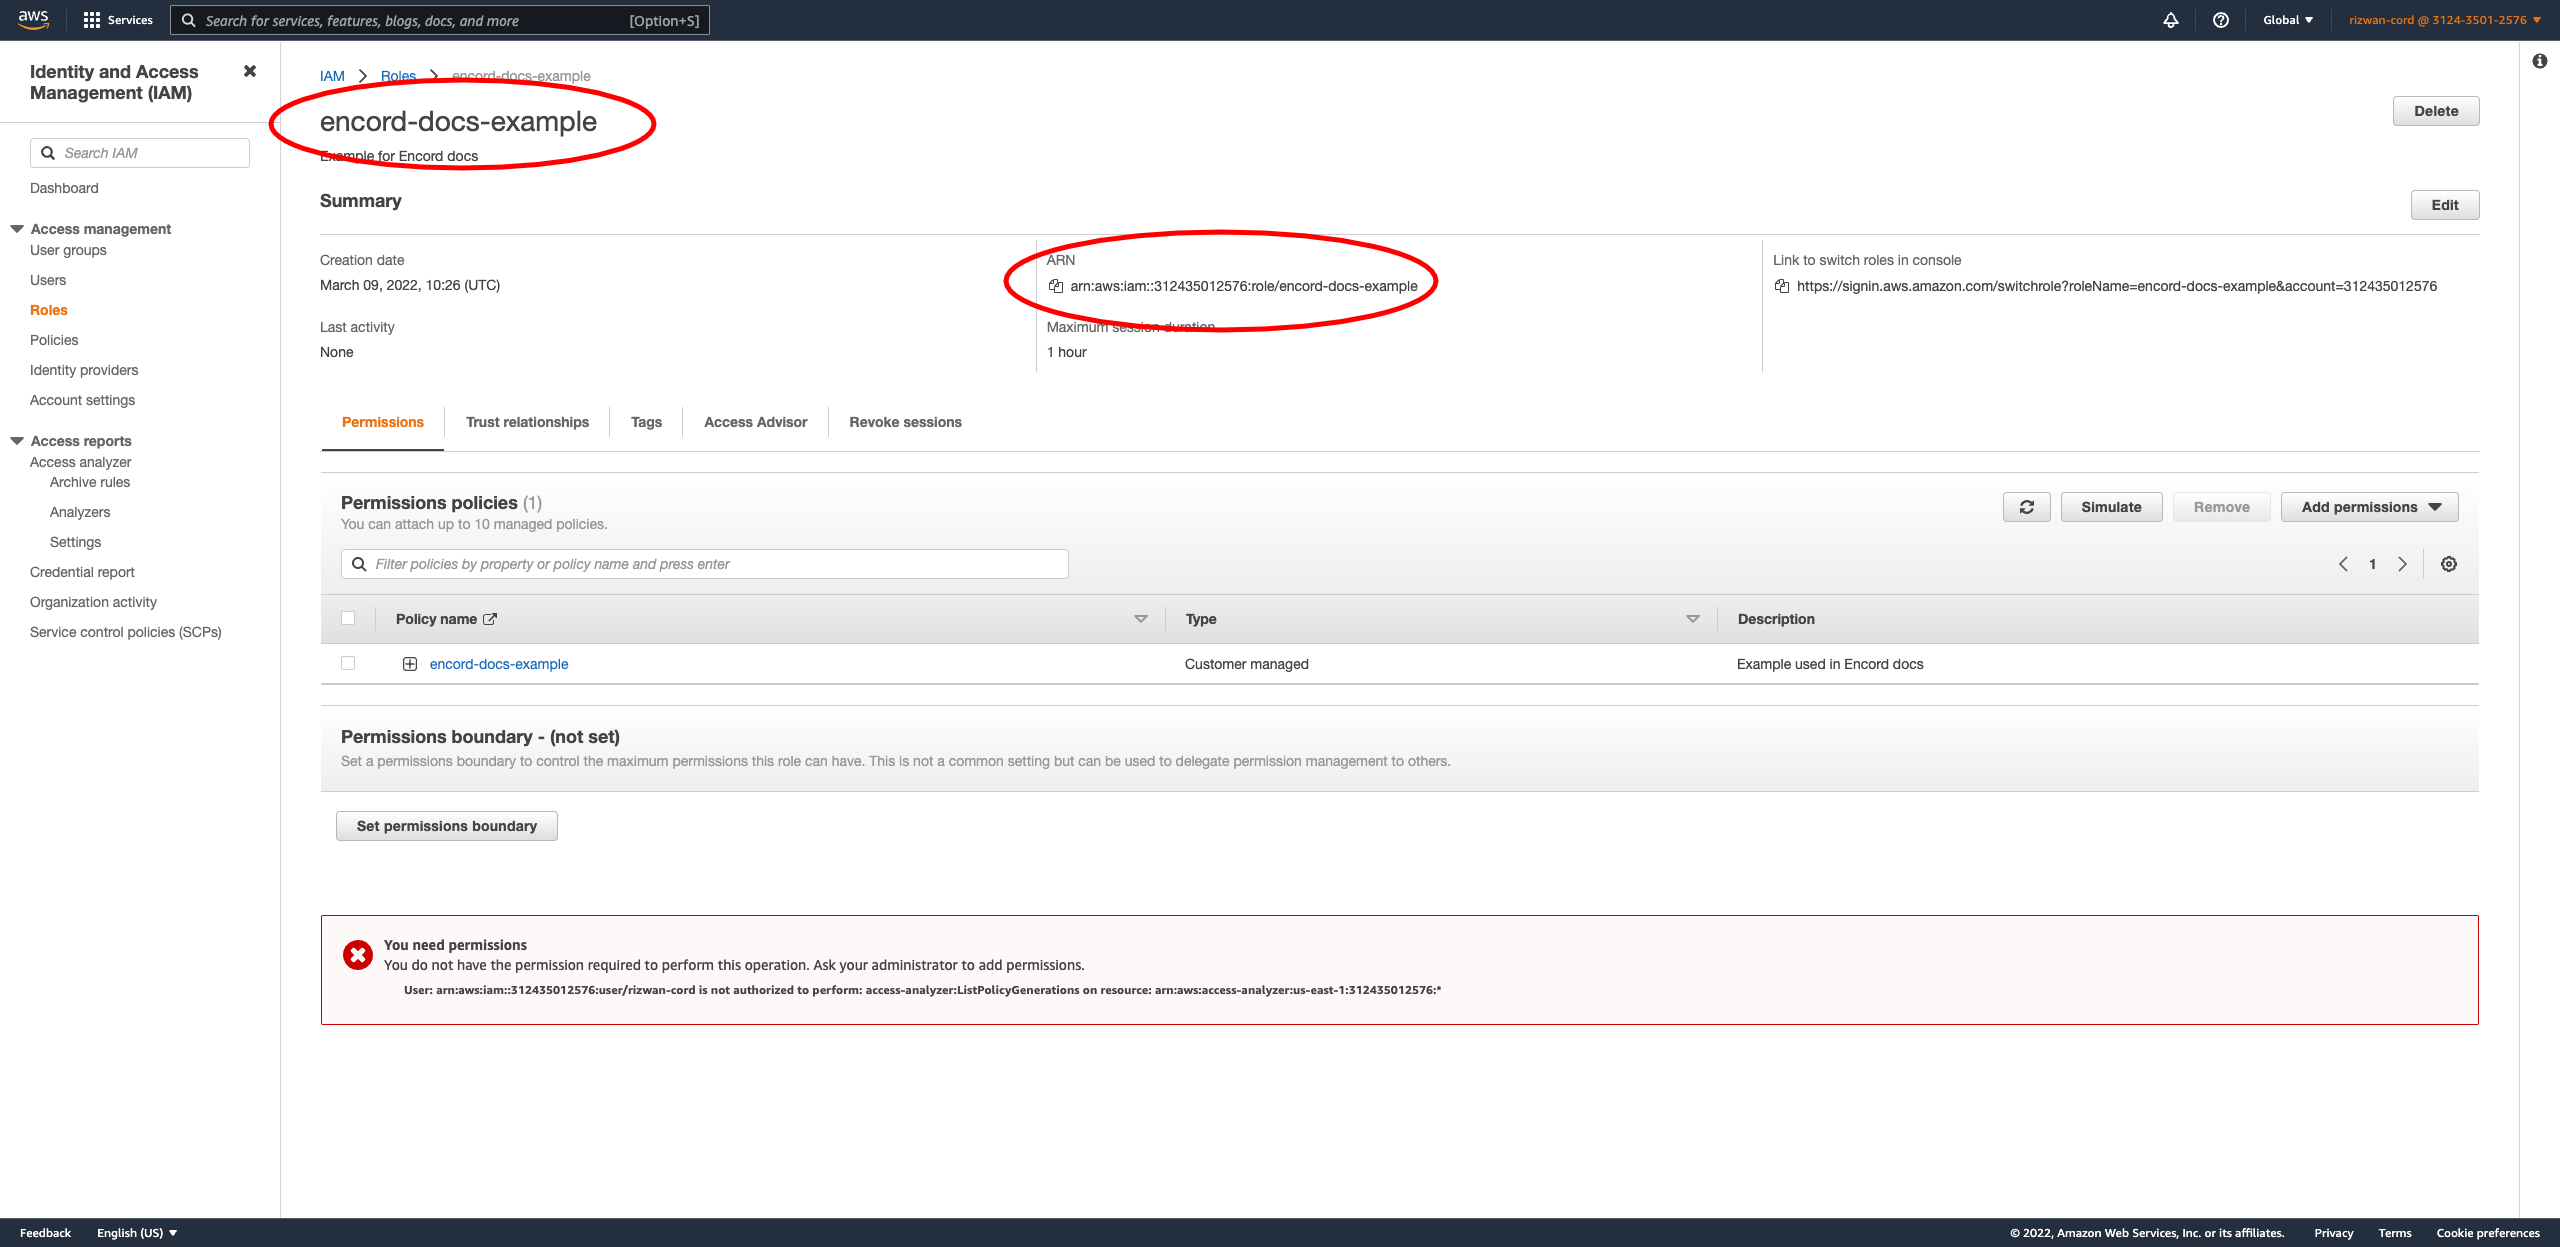
Now we need to let the Encord platform know the details of this role. In the AWS Console, click on the role you just created and copy the Role ARN as shown below.
Paste the ARN into the second entry form under Role ARN in the Encord integration window. Text after the final
/is your role name - paste it into the first entry area above the ARN.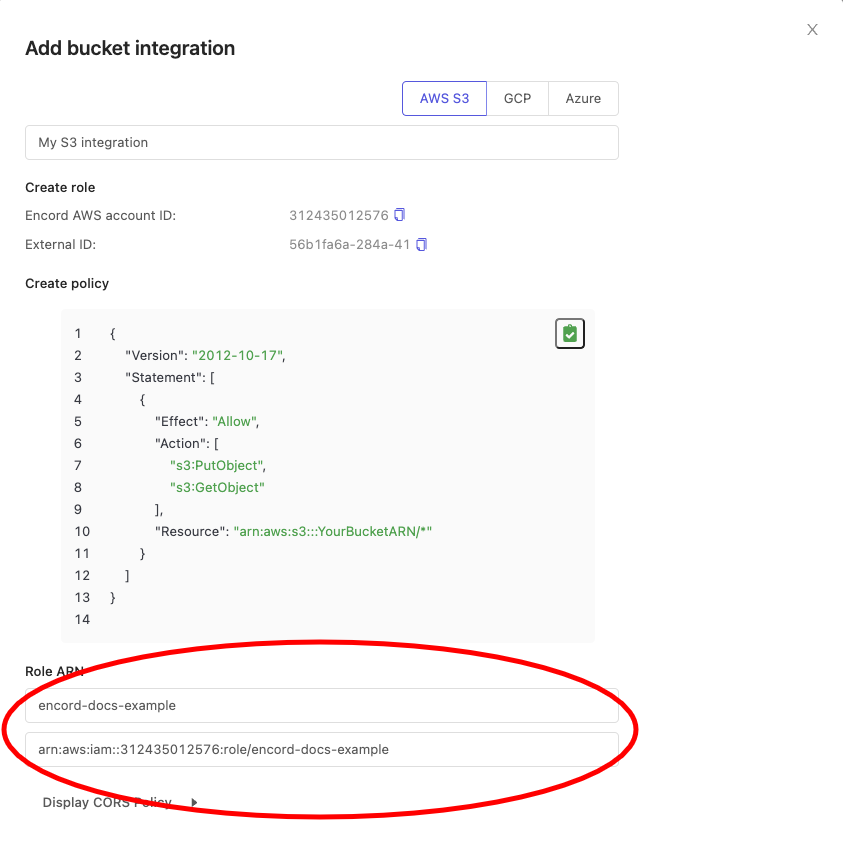
- Now that the role is set up, the next step is to enable Cross-origin resource sharing (CORS) on your S3 bucket to ensure that data can successfully be loaded in your browser while using the Encord app.
Correctly setting up the CORS permission is a critical step in completing your S3 integration, read below for detailed instruction.
3. Allow Cross-origin resource sharing (CORS)
Expand the 'Display CORS Policy' heading in the integrations window. It will look something like this:
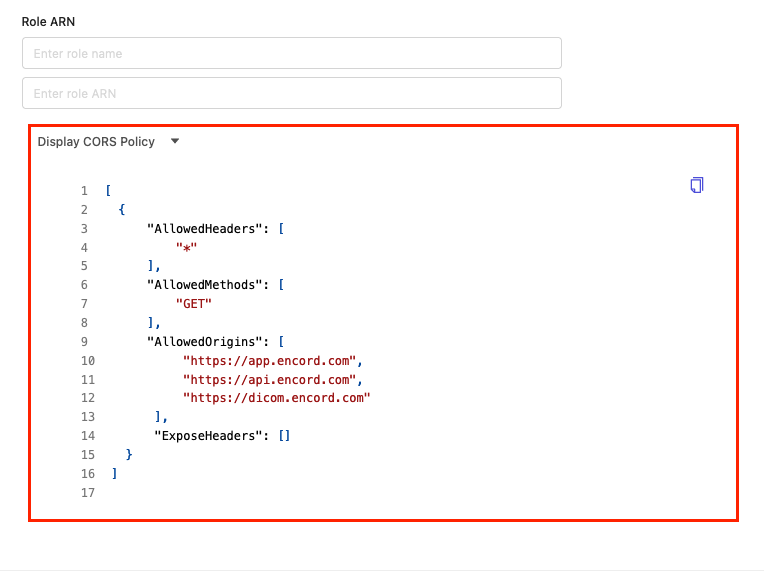
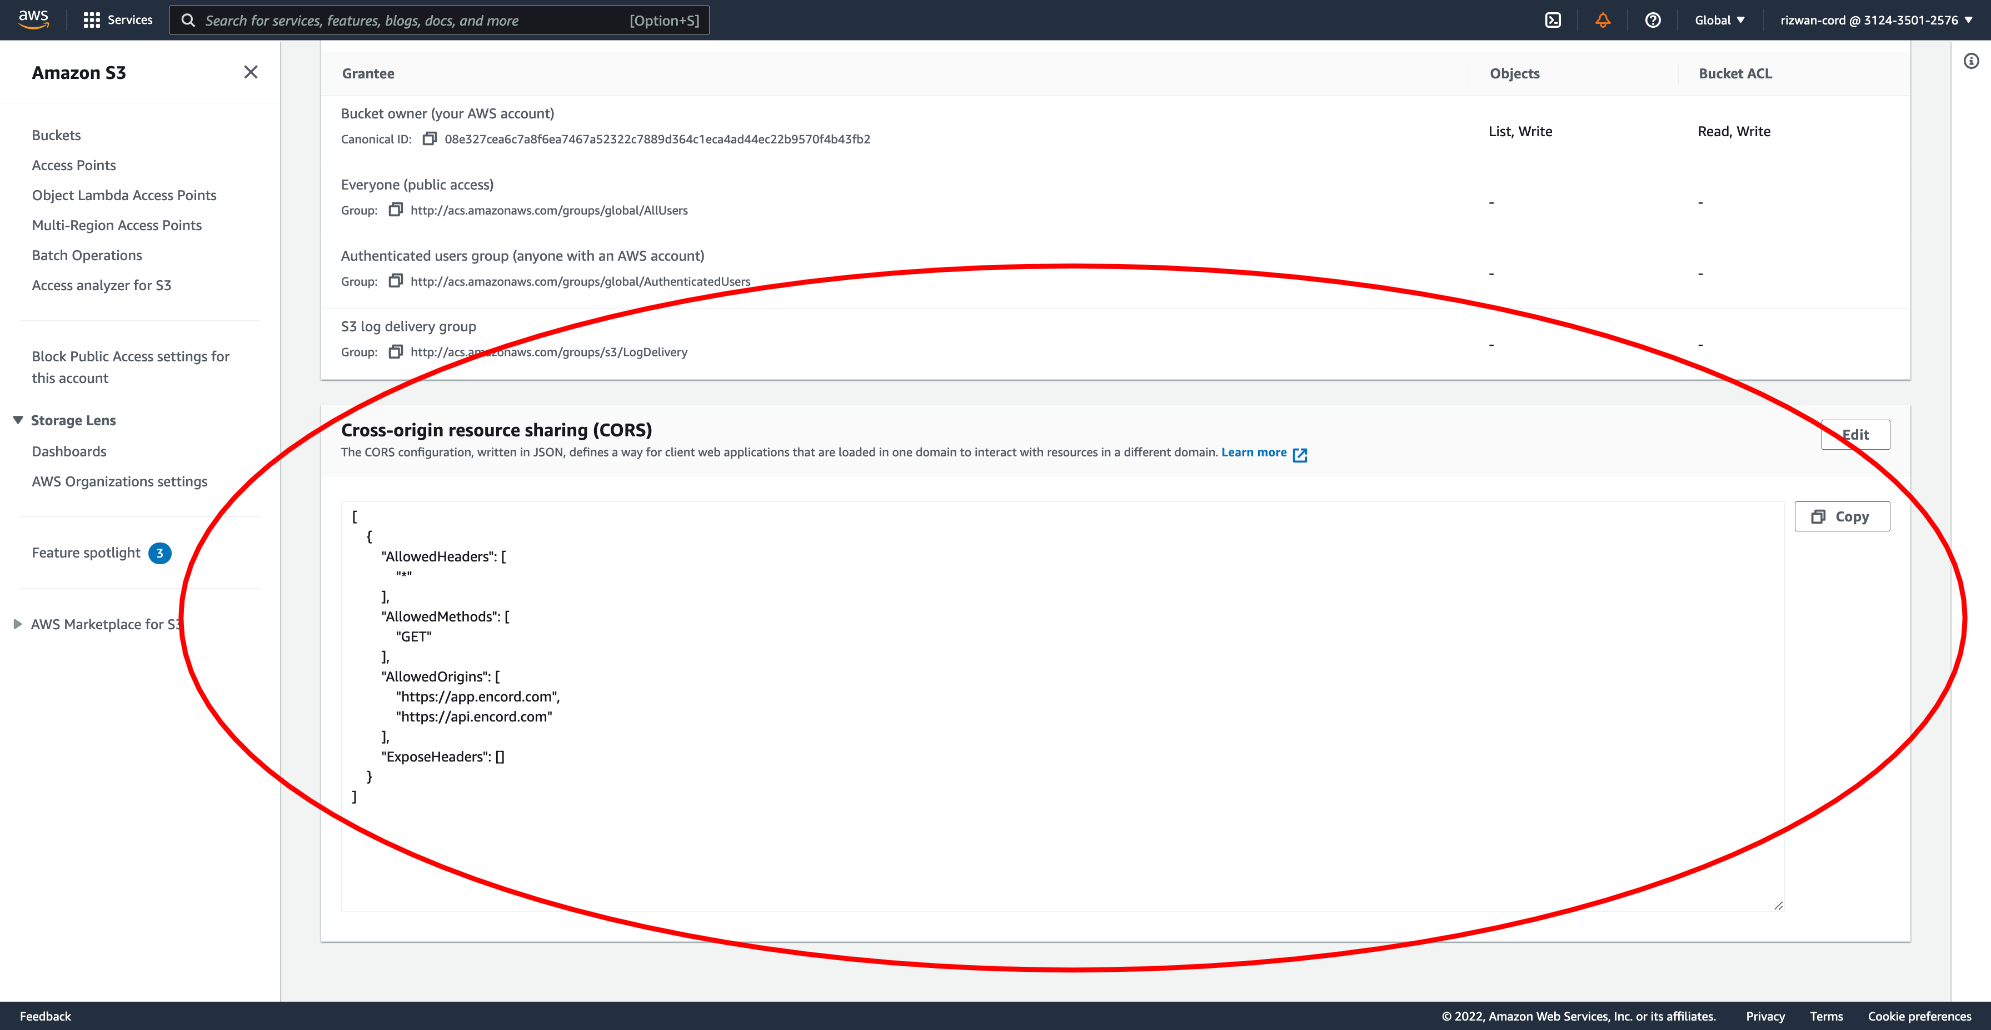
Copy the CORS JSON policy. Navigate to your S3 bucket and go to the 'Permissions' tab. Click Edit under the 'CORS Policy' heading and paste the JSON into the CORS editor. Click Save when you're done.
4. Create and test the integration
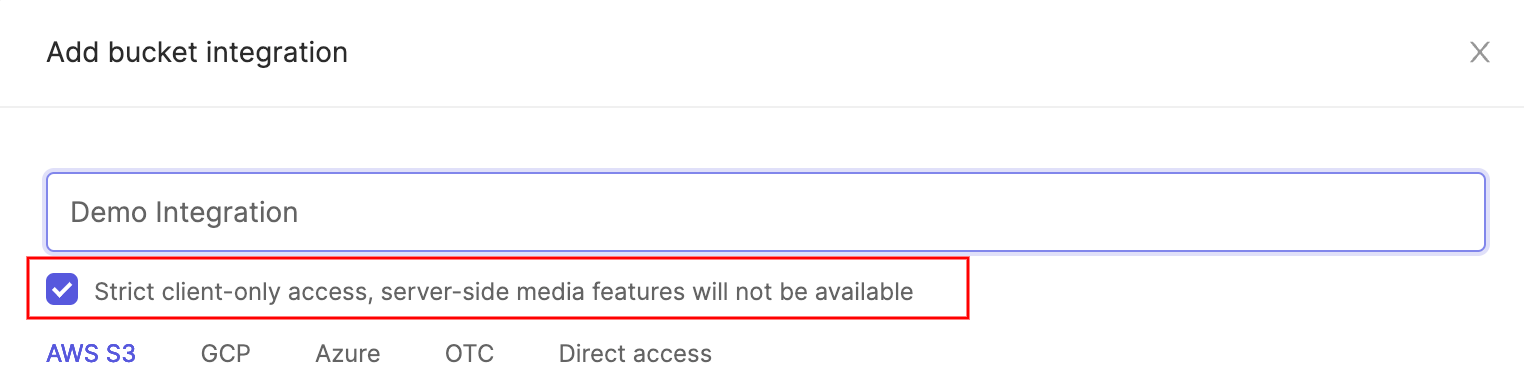
- Optionally check the box to enable Strict client-only access, server-side media features will not be available if you would like Encord to sign URLs, but refrain from downloading any media files onto Encord servers. Read more about this feature here.
Give your integration a name (if you haven't already) and click the Create button at the bottom of the pop-up.
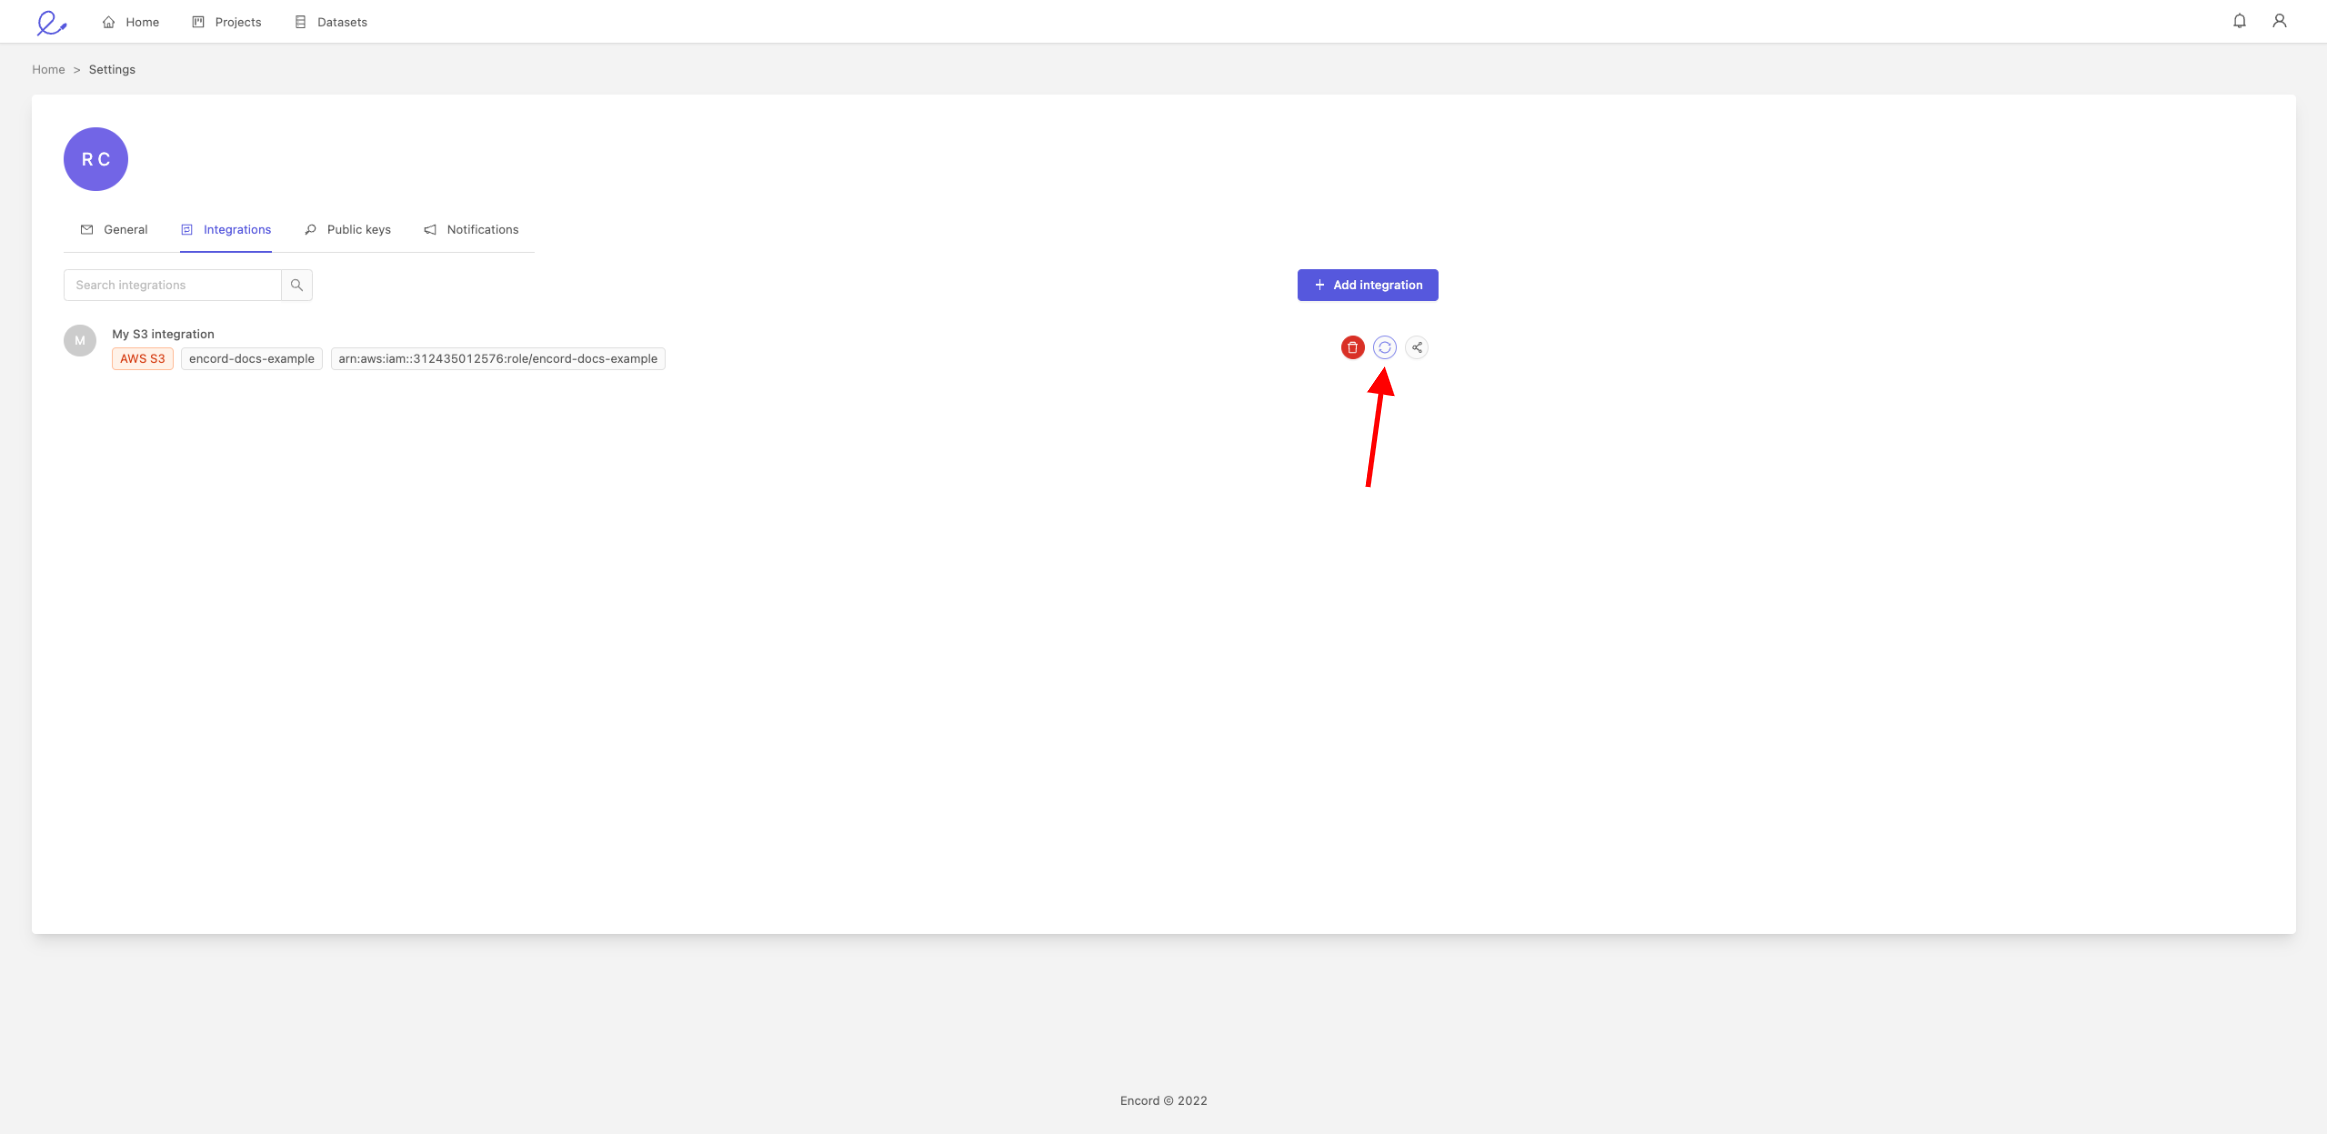
The integration will now appear in the list of integrations in the 'Integrations' tab.
To test that Encord can sync with your S3 bucket, click on the sync icon next to the bin icon.
If the sync is successful, you will see a message saying that the integration is functional. We have a few helpful scripts and examples to get you started creating datasets from your Amazon S3 bucket.
This test checks that Encord can assume the role that that has defined for it. It does not check that we can necessarily access your buckets. If this test passes but data on-boarding still fails, please check Encord has bucket permissions and that the object URLs are correct.
Create a Multi-Region Access Point integration
If you are using Multi-Region Access Points, create an integration in Encord by clicking New integration in the 'Integrations' screen. When following the step-by-step guide above make sure to the following:
- Creating a permission policy for your multi-region access point in AWS - when setting up your policy, make sure to list the ARN of the Multi-Region Access Point, as well as the ARNs of all constituent buckets in the JSON.
Example JSON
{
    "Version": "2012-10-17",
    "Statement": [
        {
            "Effect": "Allow",
            "Action": [
                "s3:PutObject",
                "s3:GetObject"
            ],
            "Resource": [
                "Your-Multi-Access-Point-ARN/*",
                "Bucket-1-ARN/*",
                "Bucket-2-ARN/*",
                "Bucket-3-ARN/*"
            ]
        }
    ]
}
Make sure you create a CORS policy for every bucket that is included in your Multi-Region Access Point.
When uploading data to a dataset using the Multi-Region Access Point integration, make sure your JSON file is formatted correctly for use with a Multi-Region Access point - as documented here.