Creating and configuring workflows
Workflows are a powerful tool to design and build your projects - letting you control how an annotation task moves through different stages of the project, and determining how different stages are structured and interact with one another.
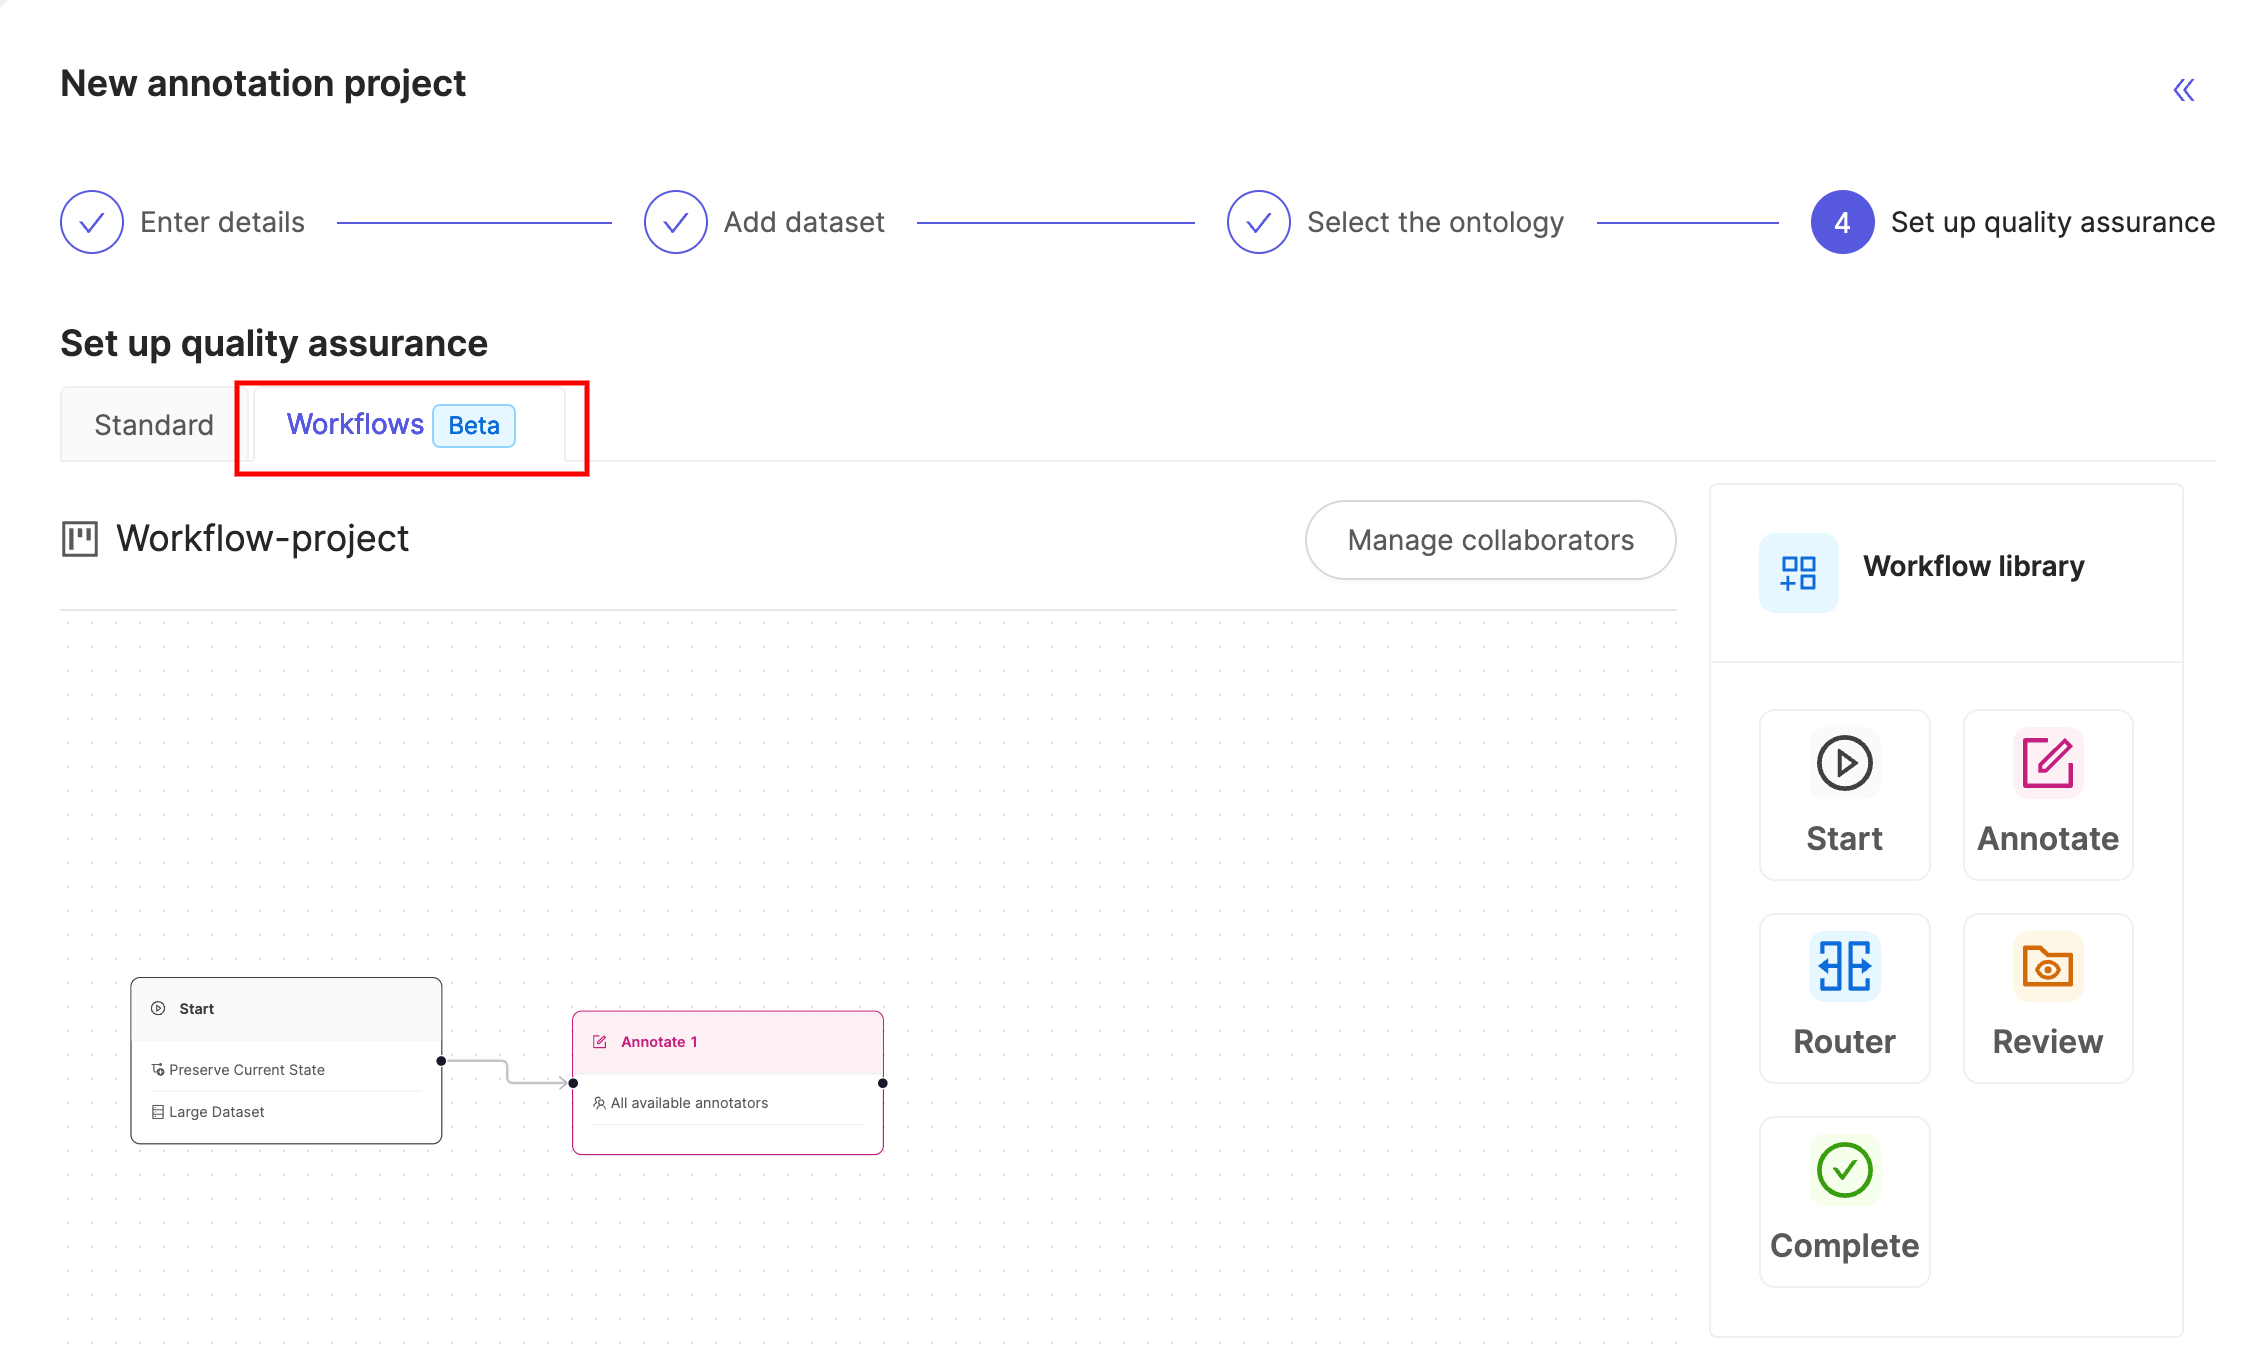
Select the Workflows (Beta) tab when setting up quality assurance during project creation to create a workflow project.
On this page you can find:
- A step-by-step tutorial on setting up and configuring your workflow project.
- A detailed explanation of all the components of the workflow composer.
Workflows are replacing the previous Task Manager which will be gradually phased out.
We are rolling this feature out in Beta mode. Please understand there might be some blips in stability as we continuously add new features and improve performance.
Workflows - tutorial
This section will outline a video tutorial on creating a basic Workflow project, as well as a step-by-step guide to create a project using Workflows.
Video Tutorial
Video tutorial - Workflows
Step-by-step guide
To get started, create a new annotation project - select the datasets you'd like to add, as well an ontology for the project. In the final Set up quality assurance stage, select the Workflows (Beta) tab to create a workflow project.

1. Add users to the project
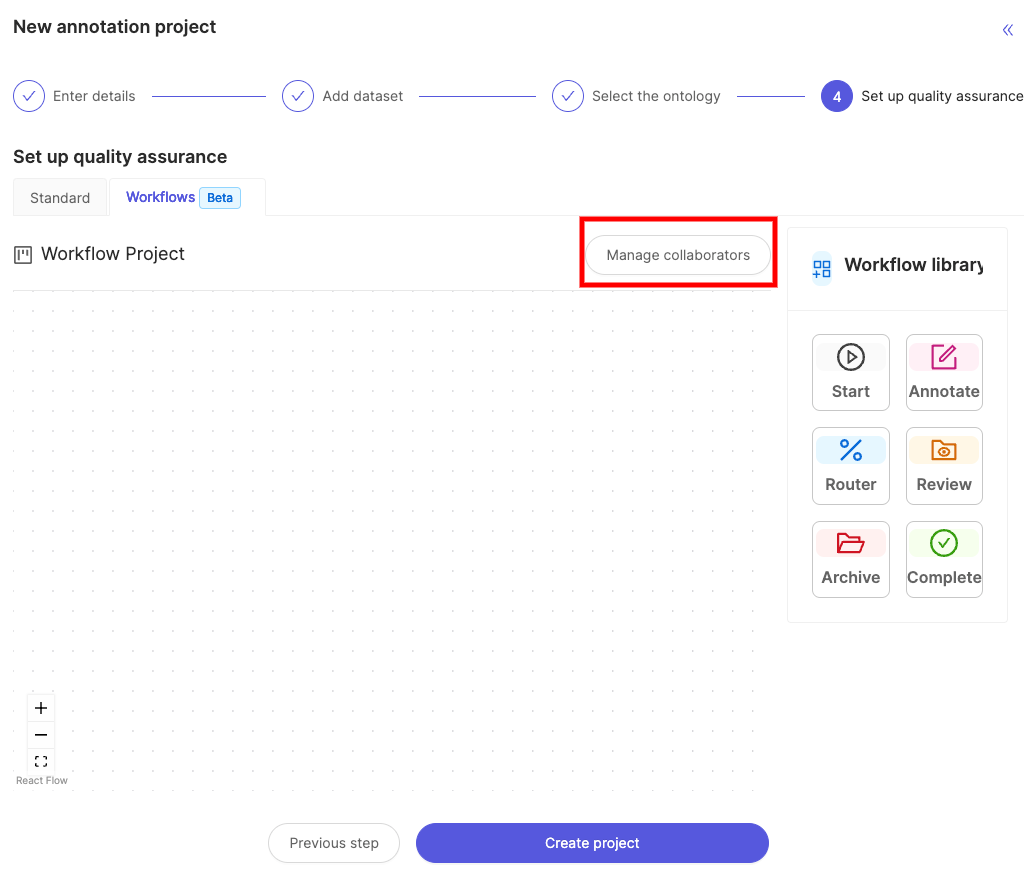
Add users from within your organization to the project by clicking the Add collaborators button, highlighted in the image below.
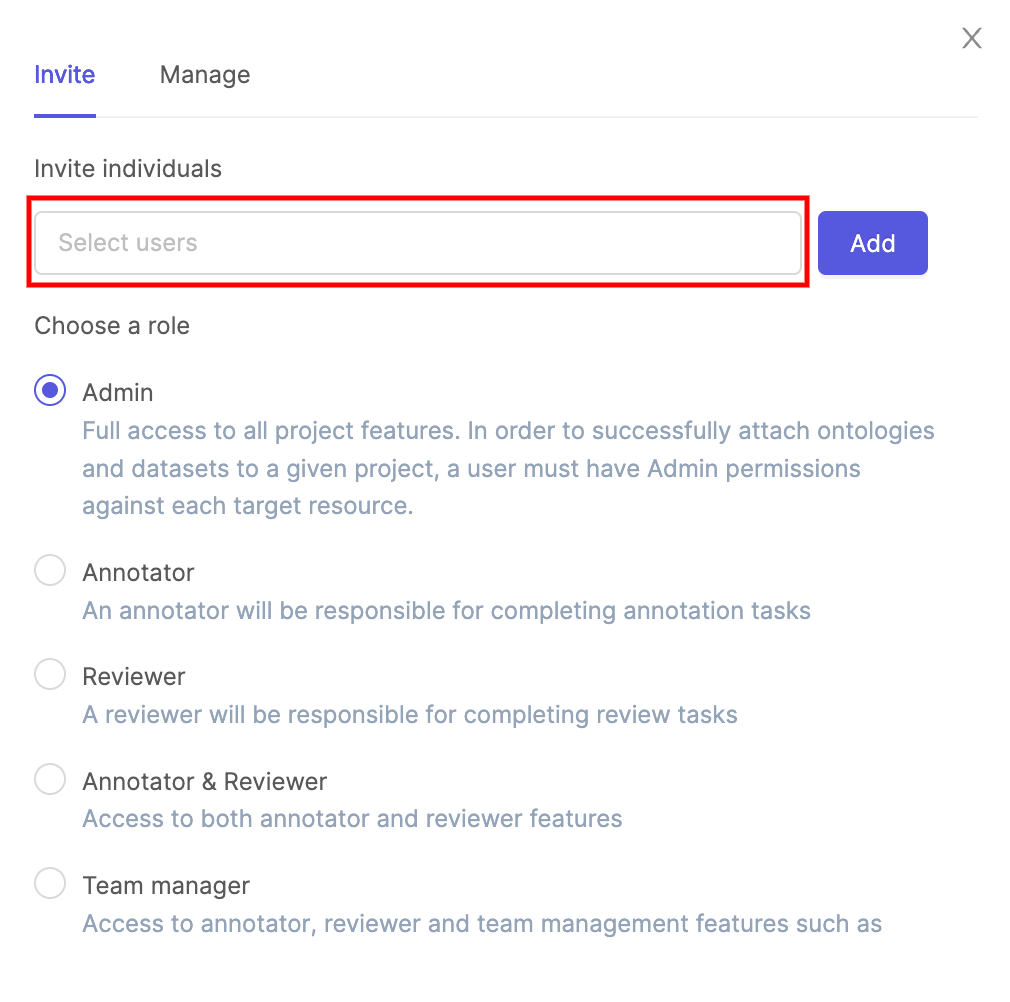
- Collaborators are added based on their role within the project - select the role you would like the collabotor(s) to have.
- Start typing the email of a user you would like to add into the area highlighted on the image below, and select the user from the list that appears. Repeat this for every user that will have the same role.
- When you are done selecting users for this role, click Add.
Learn more about managing collaborators in the Managing collaborators section.
2. Configure your workflow
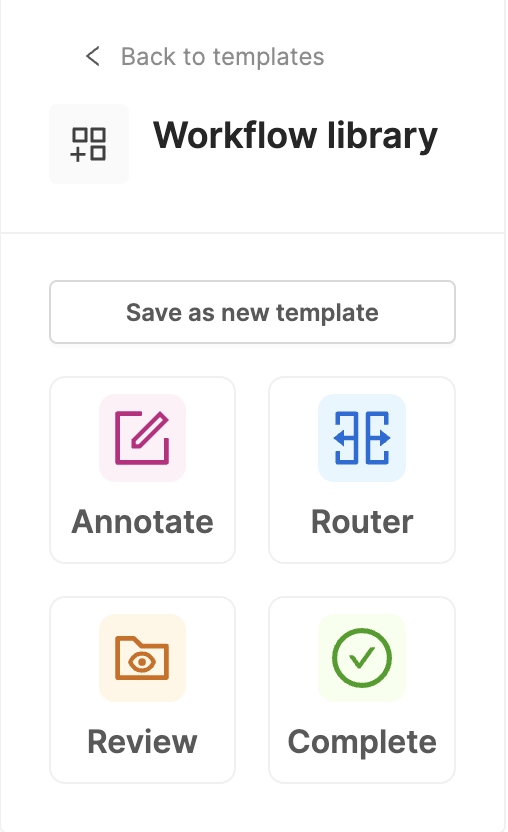
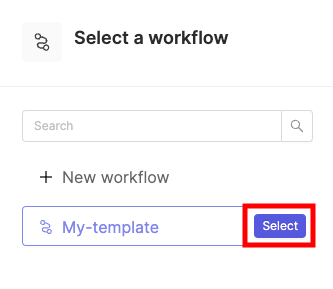
Click the + New workflow button to create a workflow. Any workflow created can be saved as a template by clicking the Save as a new template button.
Alternatively, you can use a template that was previously created. Click here to learn more.
Configure your workflow by pulling components from the Workflow library onto the canvas - the video below shows how to do this. The canvas will be populated with a Start stage, connected to an Annotate stage by default.
Add the stages and other components you require for your workflow onto the canvas:
- All workflows must begin with the Start stage.
- All workflows must contain an Annotate stage.
- Add routers to your project to determine different pathways through your workflow a task can take. Click on the Router card to determine the type of router.
- Add as many Review stages as necessary.
- All workflows must end at a Complete stage.
Link all components on the canvas by clicking and dragging from one connection point to another, as seen below.
The cursor changes from ![]() to
to ![]() when hovering over a connection point.
when hovering over a connection point.
3. Configure the stages of your workflow
Once you’ve arranged the stages in the composer, it’s time to configure the details of each stage.
- Click an Annotate card on the canvas to start editing the annotation stage.
- Give the stage a descriptive name.
- Add annotators. If you'd like to specify annotators for this stage, add them as collabortors. For full details on how collaborators can work on tasks at each stage, see our section on managing collaborators.
- Optionally, add a Webhook to recieve notifications when labels are submitted at this stage.
More details about configuring annotation stages can be found in the Annotate section below
- Click a Review card on the canvas to start editing the review stage.
- Give the stage a descriptive name.
- Add reviewers. If you'd like to specify reviewers for this stage, add them as collabortors. For full details on how collaborators can work on tasks at each stage, see our section on managing collaborators.
More details about configuring review stages can be found in the Review section below.
Click a Router card on your canvas. Please see our percentage router section for more details.
Optionally, add a Webhook to the Complete stage to recieve a notification when a task has been completed.
More details about configuring percentage routers found in the router section below.
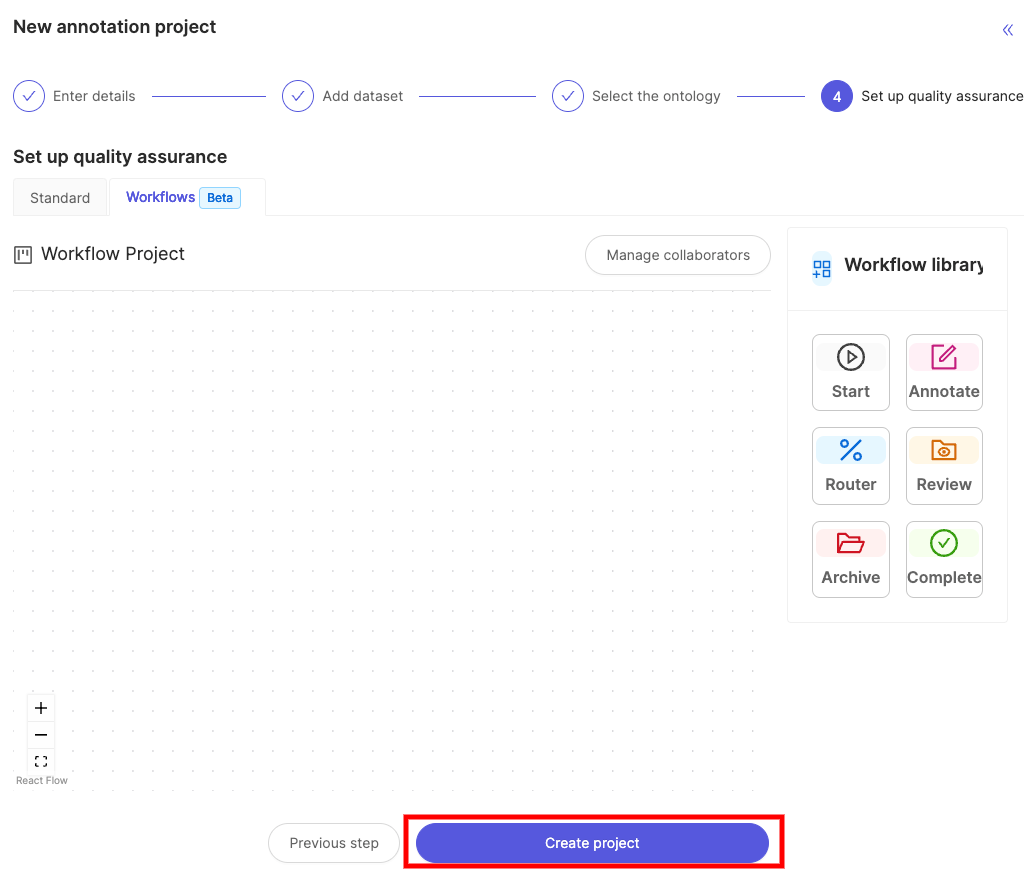
5. Create your project
Once all previous stages in this tutorial have been completed, and your graph has been validated you are ready to create your project. Simply click the Create Project button highlighted in the image below.
Workflow composer components
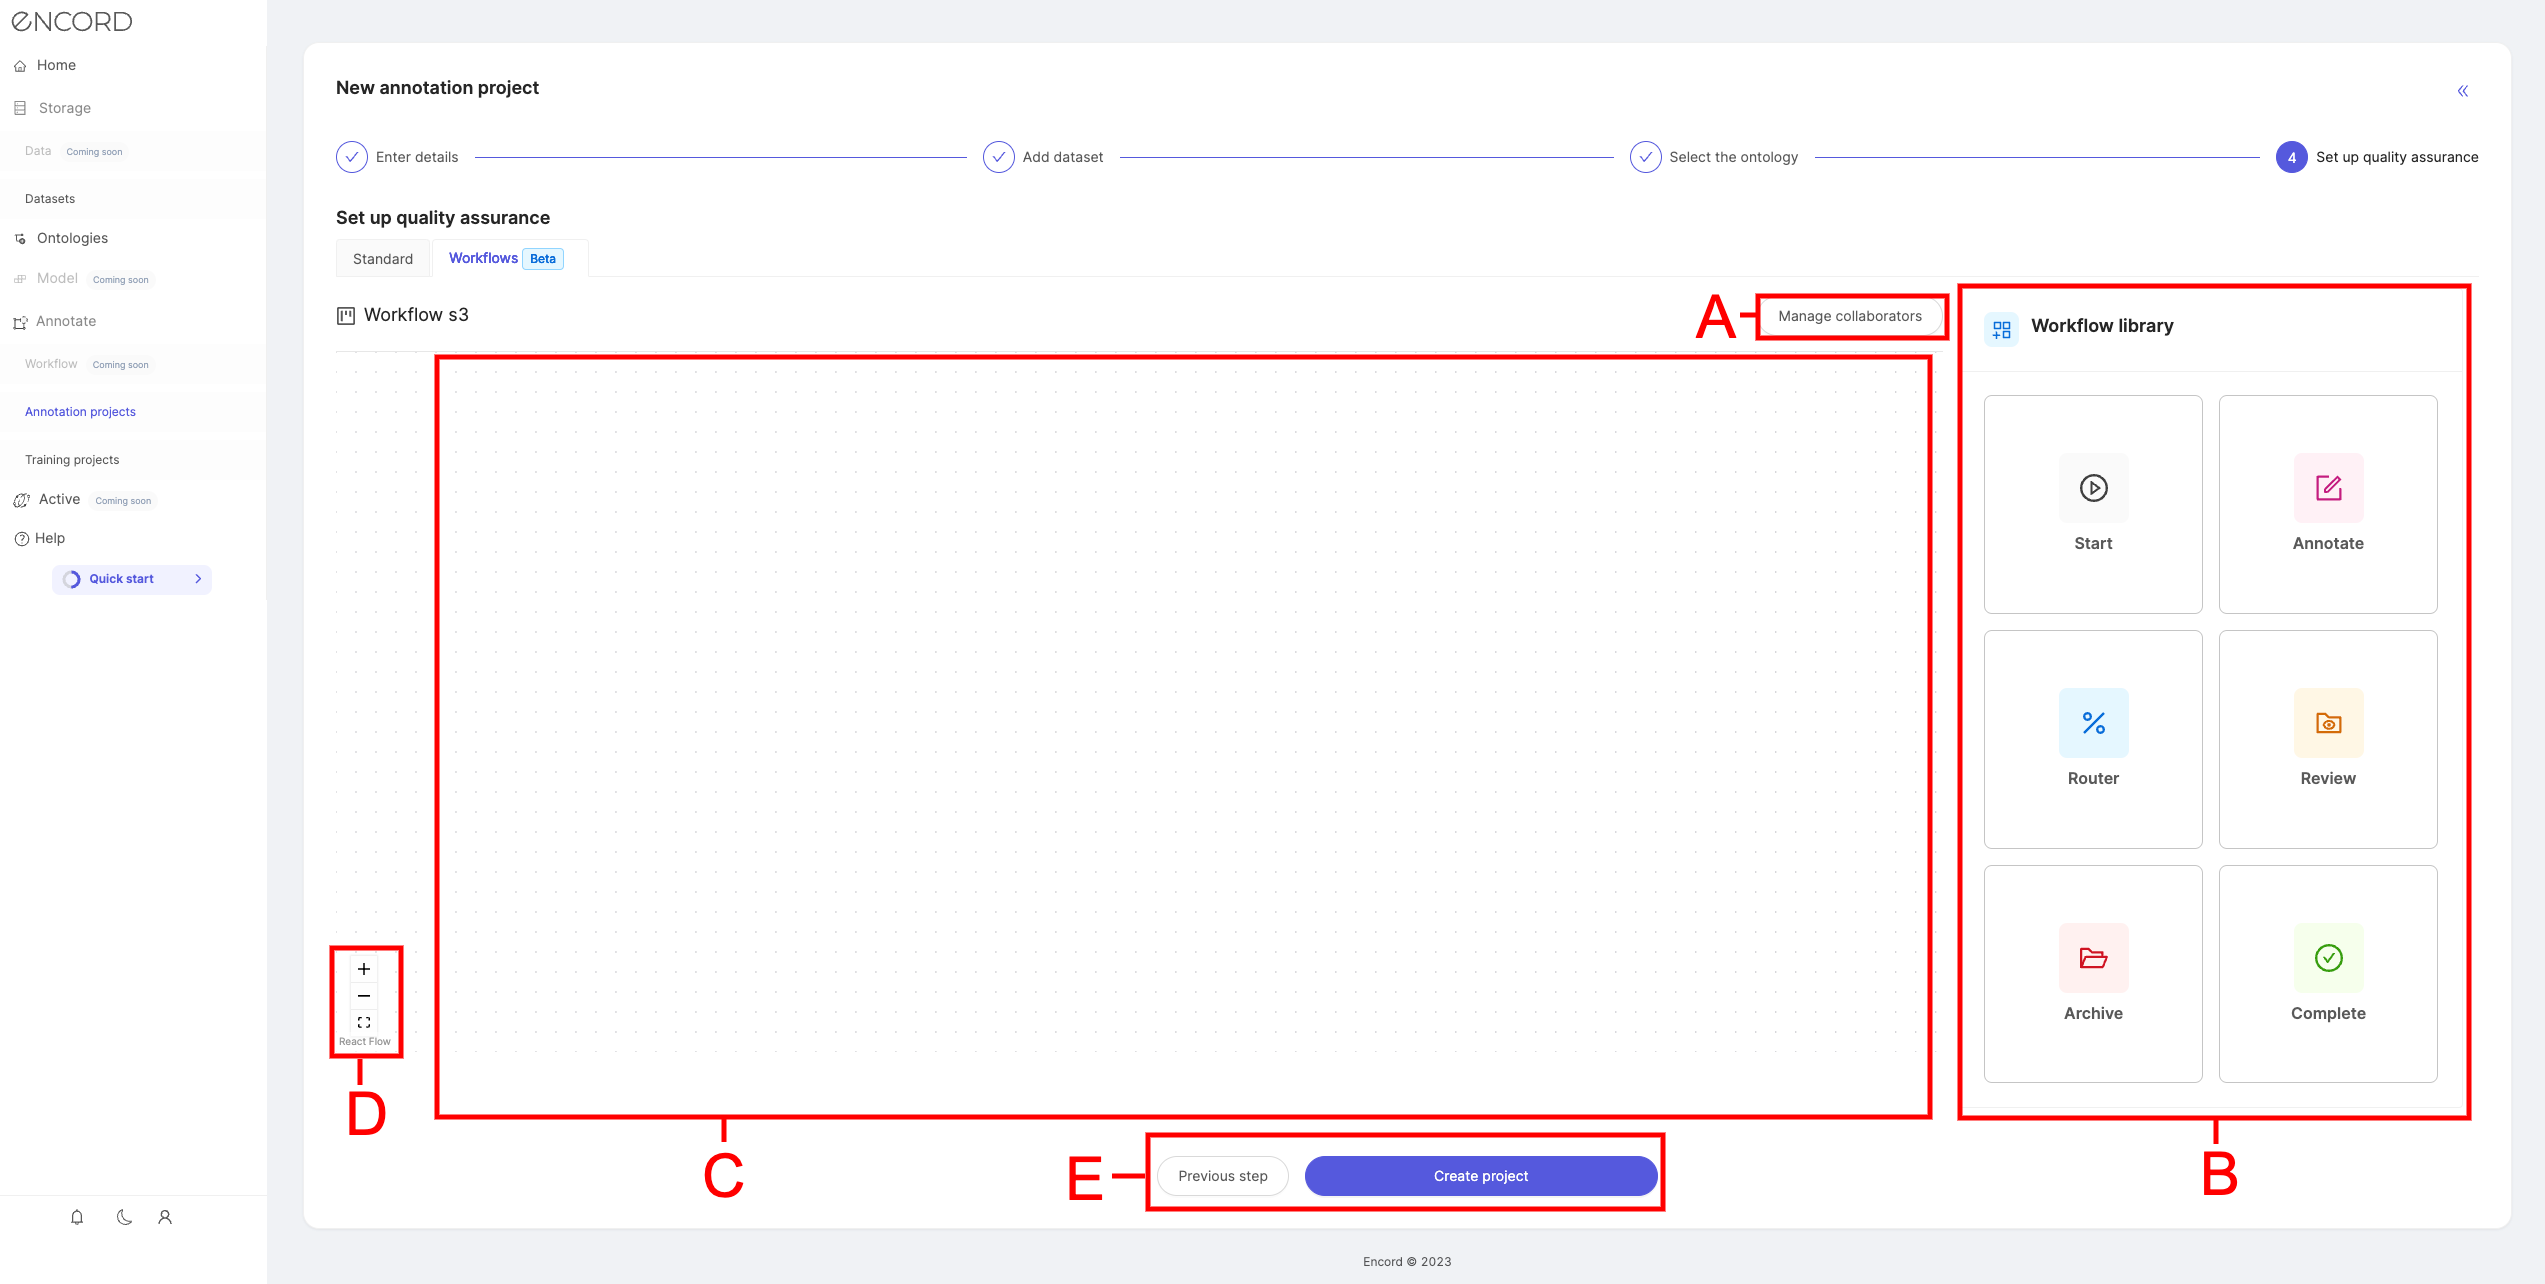
A. Manage Collaborators allows you to seamlessly add users to your project as collaborators, which can be added to different stages of the workflow.
B. The Workflow library contains all the components that make up a project. Drag the cards from the workflow library onto the workflow canvas (C) to build the stages a workflow should pass through. Some cards can be used more than once to create complex workflows. The configuration details for each component can be found in the Workflow library components section below.
C. The Workflow canvas is the canvas on which you design your workflow, by connecting cards from the workflow library. Set up the stages you'd like your workflow to pass through from left to right, and connect them to suit your needs. Click and drag the canvas to move it.
D. Zoom in and out of the Workflow canvas for convenience. Large workflow designs will require you to zoom out to see the whole picture. The
 icon focuses in on your workflow.
 E. Create the project, or return to the previous step of the project creation process. Click Create Project to complete the creation process.
Currently connections between nodes on the canvas can't be edited within a project after its creation. However, workflow templates can be edited and configured even when attached to ongoing projects. Click here.
Workflow library components
This section contains an overview of how to work with all Workflow library components.
Start

Start represents the beginning an annotation task through your workflow, and can therefore only be used once in a project. It must have a connector linking it to the next stage.
It displays the datasets connected to the project, as well as the ontology.
Annotate
Annotate represents an annotation stage, during which a group of annotators add labels to tasks assigned to them.
Click an Annotate card on the canvas to edit. Click x next to the name to exit edit mode.
Click the
 icon to edit the name of the annotation stage. This is particularly useful when your project has multiple annotation stages.
Annotation instructions can be added in the project's 'Settings' after the project has been created.
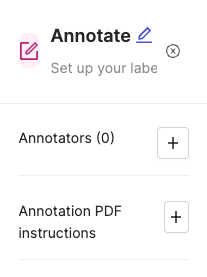
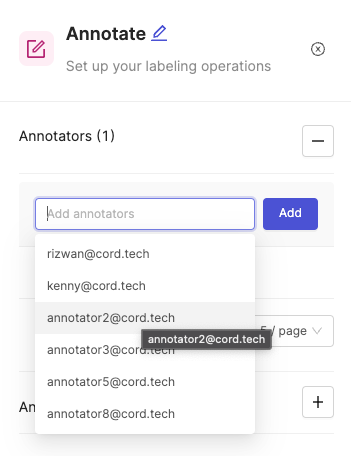
- Add annotators by expanding the section with the + sign next to Annotators, and selecting from a list of collaborators that have been added using Manage collaborators on the project level. Click Add once you have selected the collaborators you would like to add.
Only collabortors with the 'Annotator' role can be added to an annotation stage. All Admins and Team Managers will be part of all annotation stages and therefore can't be added, or removed.
- The number of annotators in this stage will be shown in brackets; 1 in the image above. The section is hidden using the - sign.
A Webhook can optionally be added to an annotation stage to send out notifications whenever a task is sumbitted. Press the + icon next to 'Webhook' and add the URL of the server you would like to recieve notifications on.
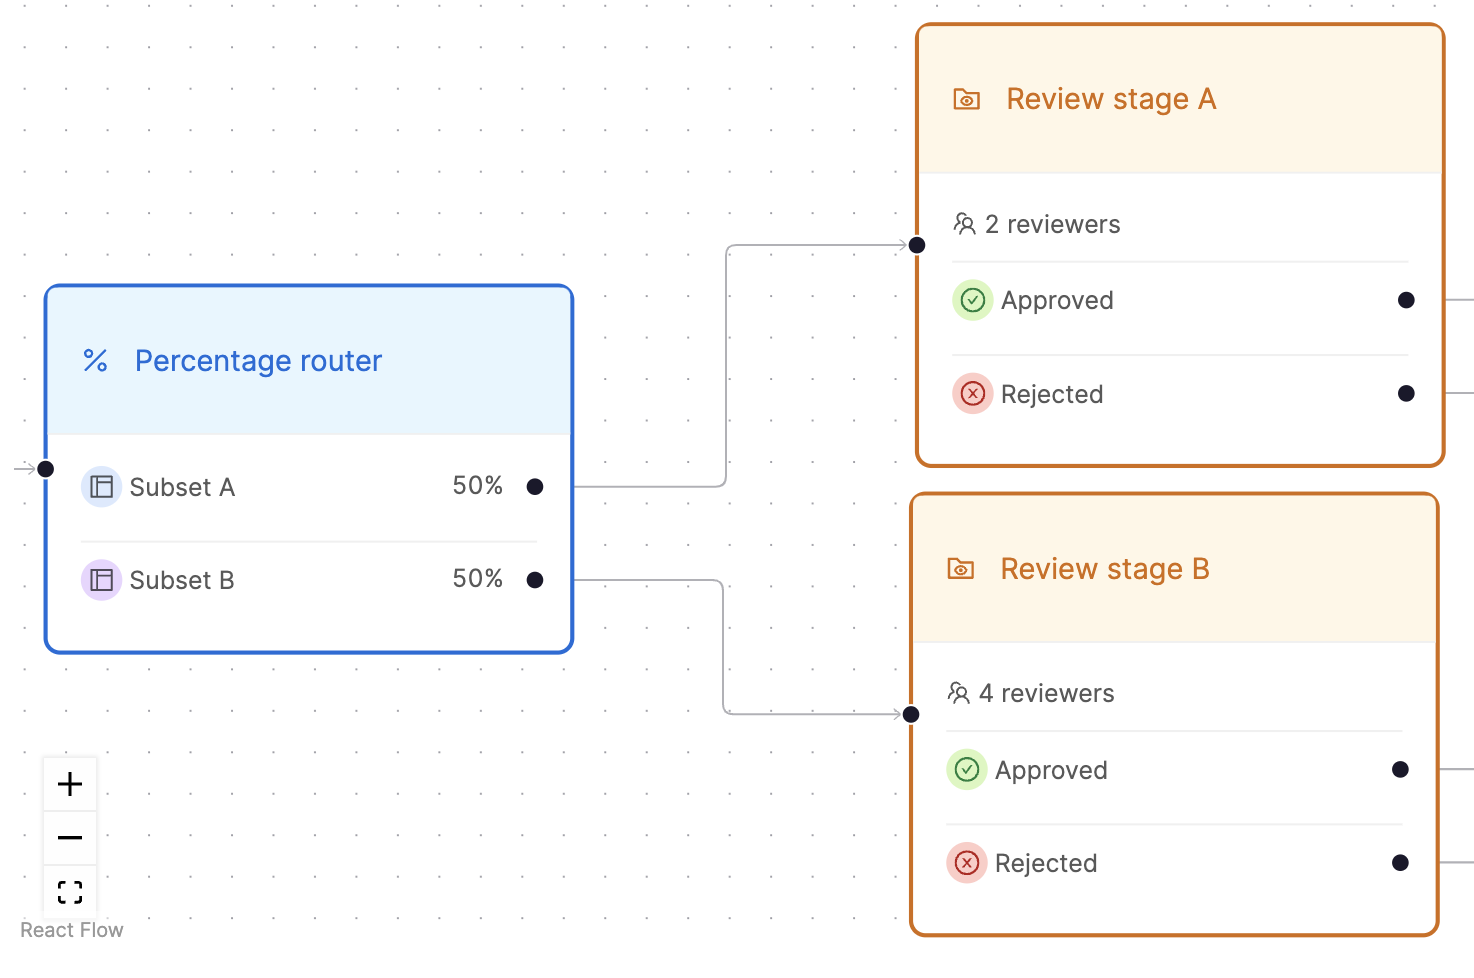
Router
A Router is added to split the path that annotation tasks take through the workflow, based on various conditions you determine. Collaborators can be added
Routing can be set up according to the following:
Percentages
Pathways can be split according to a certain percentage of annotation tasks. For example, 50% of tasks get sent to review stage A, while the other 50% of tasks get sent to review stage B, splitting the workload between two different groups of reviewers.
A task will be consistently routed the same way, once a route through the workflow has been specified. This means that a task routed to review stage A on its first pass will do so every consecutive time it reaches the percentage router.
Collaborators
Collaborator routers are being developed and will become available soon.
Determine the path different users take through your workflow. For example, if subset A completes a task it gets sent to be reviewed by review stage A, while a task completed by subset B gets reviewed in review stage B.
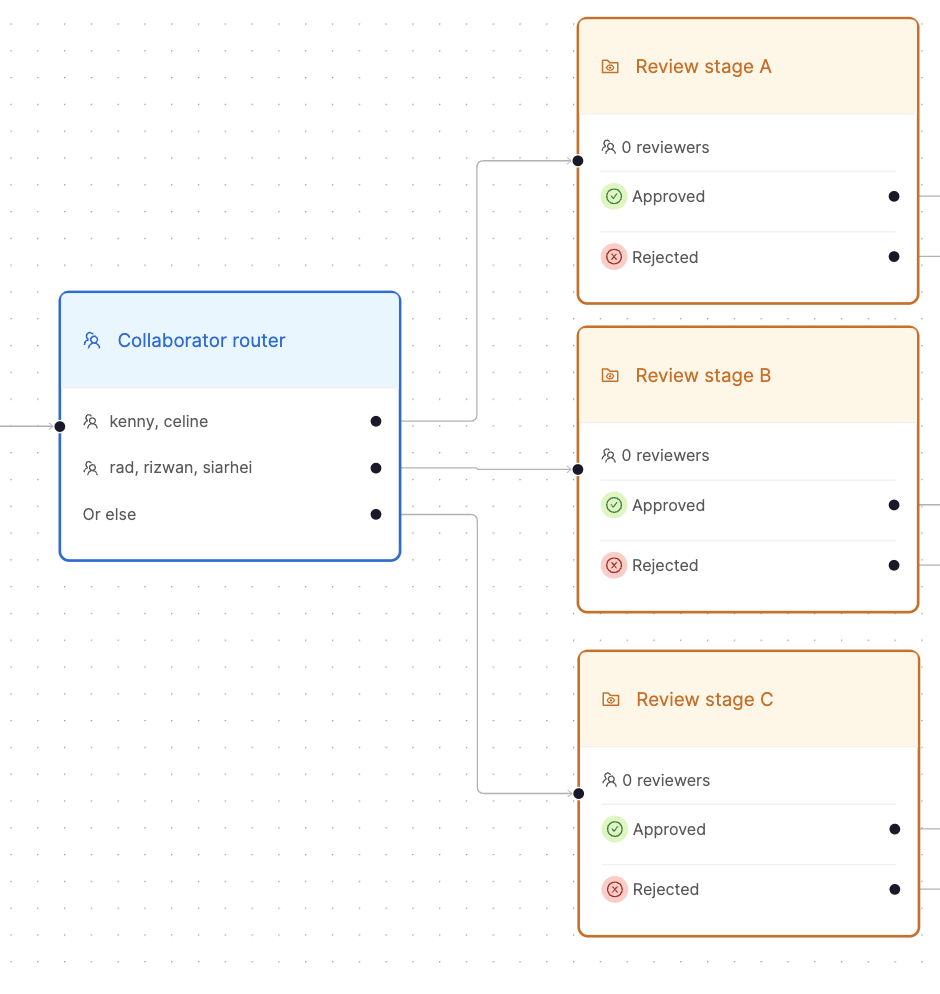
The 'Or else' option accounts for all collaborators not explicitally added to the router. In the image above they will will be directed to review stage C
Click Add pathway to select a subset of collaborators that will make up a pathway - only collborators present in the previous stage can be selected from. There is no limit on the amount of pathways you can create.
Click Add to finish a pathway.
Collaborators can only be added to the Router once an input has been connected.
Review

Review represents a review stage where tasks created in an annotation stage are reviewed. A project can have multiple review stages, all of which have different reviewers, and are routed according to different conditions.
Once a task has been rejected a review stage, it can't be passed onto another review stage directly.
Click a Review card that has been added to the canvas to edit. Click x next to the name to exit edit mode.
Click the
icon to edit the name of the review stage. This is particularly useful when your project has multiple review stages.
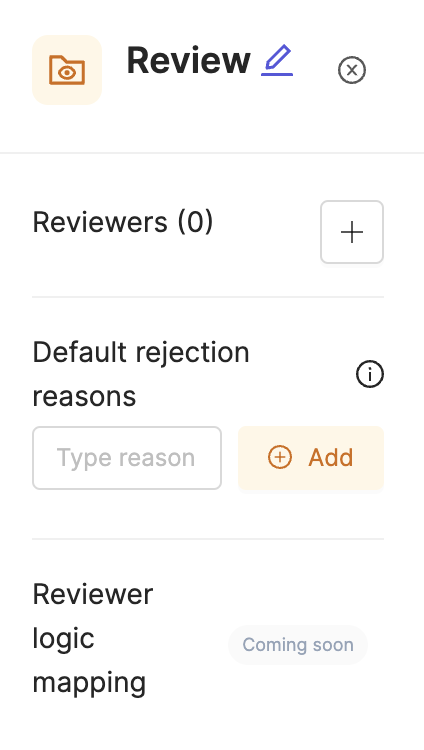
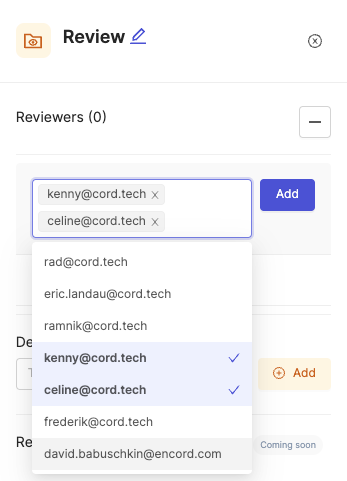
- Reviewers can be added by clicking + next to Reviewers, and selecting from a list of collaborators that have been added using Manage collaborators on the project level. Click Add once you have selected the collaborators you would like to add.
Only collabortors with the 'Reviewer' role can be added to a review stage. All Admins and Team Managers will be part of all review stages and therefore can't be added, or removed.
- The number of reviewers in this stage will be shown in brackets; 0 in the images above and below. The section is hidden using the - sign.
Complete
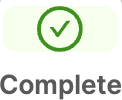
Complete represents the stage of a project at which a task is marked as complete, and can therefore only be used once per project.
Having passed though your workflow, it was deemed to be acceptable data for the training of machine learning algorithms. Complete tasks can still be accessed by admins.
Optionally, add a Webhook to this stage to recieve notifications whenever a task arrivies at the Complete stage.Press the + icon next to 'Webhook' and add the URL of the server you would like to recieve notifications on.
Managing collaborators
User permissions
| Permission | Admin | Team Manager | Reviewer | Annotator | Annotator & Reviewer |
|---|---|---|---|---|---|
| Attach / Detach datasets | X | ||||
| Attach / Switch ontology | X | ||||
| Delete | X | ||||
| Invite team members | X | X | |||
| Manage team permissions | X | X | |||
| Manage admins | X | ||||
| Annotate & review tasks | X | X | Review only | Annotate only | X |
| Confirm annotations | X | X | |||
| Control assignments and status | X | X |
Project level collaborators
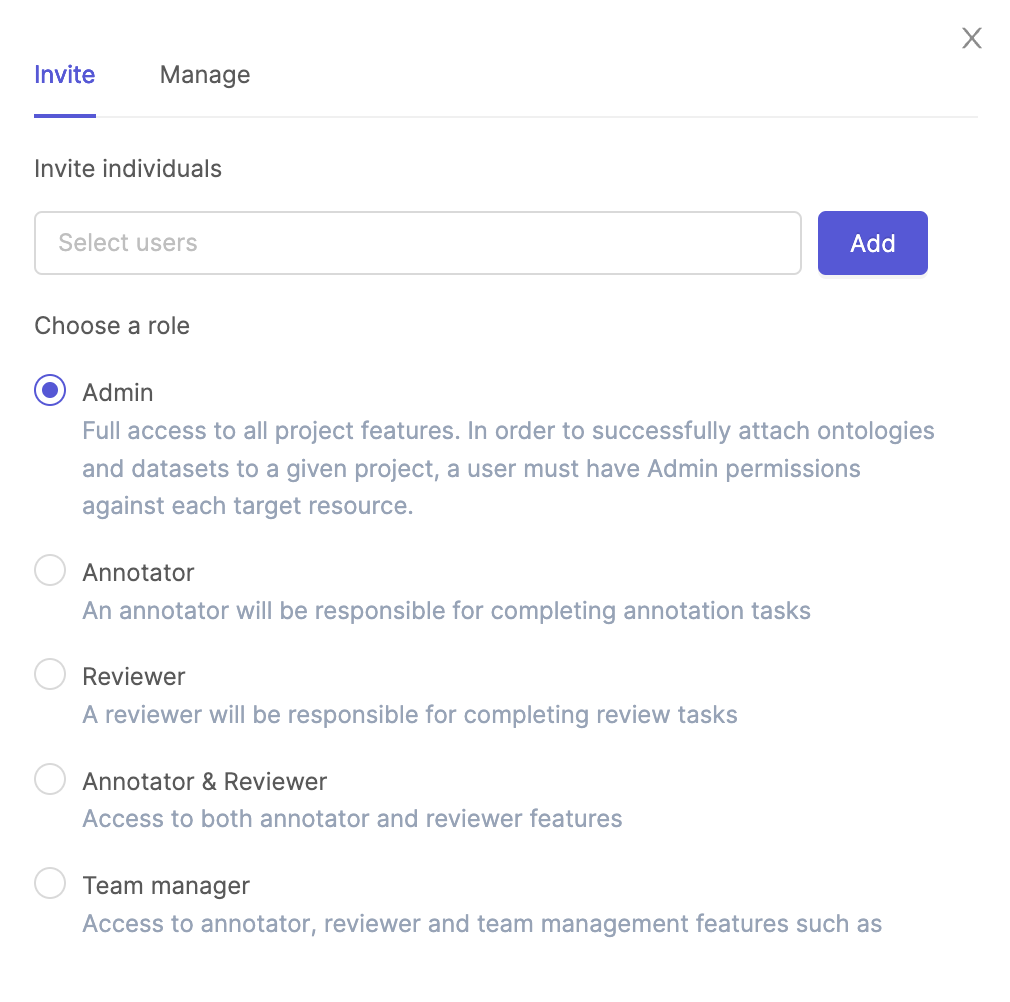
Click the Manage Collaborators button, as shown in the Creating workflows section.
- Add collaborators and select their roles in the 'Add tab', shown below.
- Remove and manage collaborators in the 'Manage' tab.
Workflow stage level collaborators
Collaborators can be added to a workflow stage by clicking + on a card that has been added to the workflow canvas.

Learn how to add collaborators to different stages of a project by visiting the relevant sections in this document:
If no collaborators are specified at a given stage, all users with permissions will be added by default.
For example, if no collaborators are specified at an Annotatate stage then all collaborators with the following roles wil be added by default:
- Annotator
- Annotator & Reviewer
- Team Manager
- Admin