Ontologies on Encord
Befitting their importance in machine learning applications, ontologies are a first-class entity in the Encord platform, with direct connections to users, organisations, and projects. The details of each relationship are explained below.
DICOM customers might be more familiar with the term 'labeling protocol', which is equivalent to an ontology.
Ontologies users, and organizations
The user who created the ontology is granted admin privileges, which gives full control over the ontology including adding other team members as viewers and admins. Users can be connected to as many ontologies as necessary, and there is no requirement to be part of an ontology's organization to be invited as a collaborator on the ontology. Collaborators are controlled from the 'Ontology > Settings > Team' pane.
The various actions each role can perform against an ontology are summarized below:
| Role | Edit Structure | Attach/detach from projects | View Tree Structure | View JSON Structure | Manage Collaborators | Copy | Delete |
|---|---|---|---|---|---|---|---|
| Viewer | ❌ | ✅ (if project admin) | ✅ | ✅ | ❌ | ❌ | ❌ |
| Admin | ✅ | ✅ (if project admin) | ✅ | ✅ | ✅ | ✅ | ✅ |
Ontologies are automatically assigned to the organization of the user who created them, and cannot be transferred between organizations at this time. Admin members of an organization may add themselves as ontology admins from the organizations' Ontologies interface.
Ontologies and projects
Before they can be used for annotation, ontologies must be attached to at least one project. In order to ensure the exact same representation of annotations stays synchronized between projects, ontologies can be attached to multiple projects simultaneously. This removes manual work and the related errors from keeping ontologies synchronized across projects, and also makes it easy to enforce rigorous standardization across your related projects. However, this also implies any change to an ontology will affect all attached projects.
Modifying ontologies associated with projects that already have labels associated with them can create orphaned labels -- that is labels whose class no longer belongs to the connected ontology. While additive actions (making new objects or classifications) are relatively safe actions, destructive edits to ontologies can have unintended side effects unless accompanied by due caution.
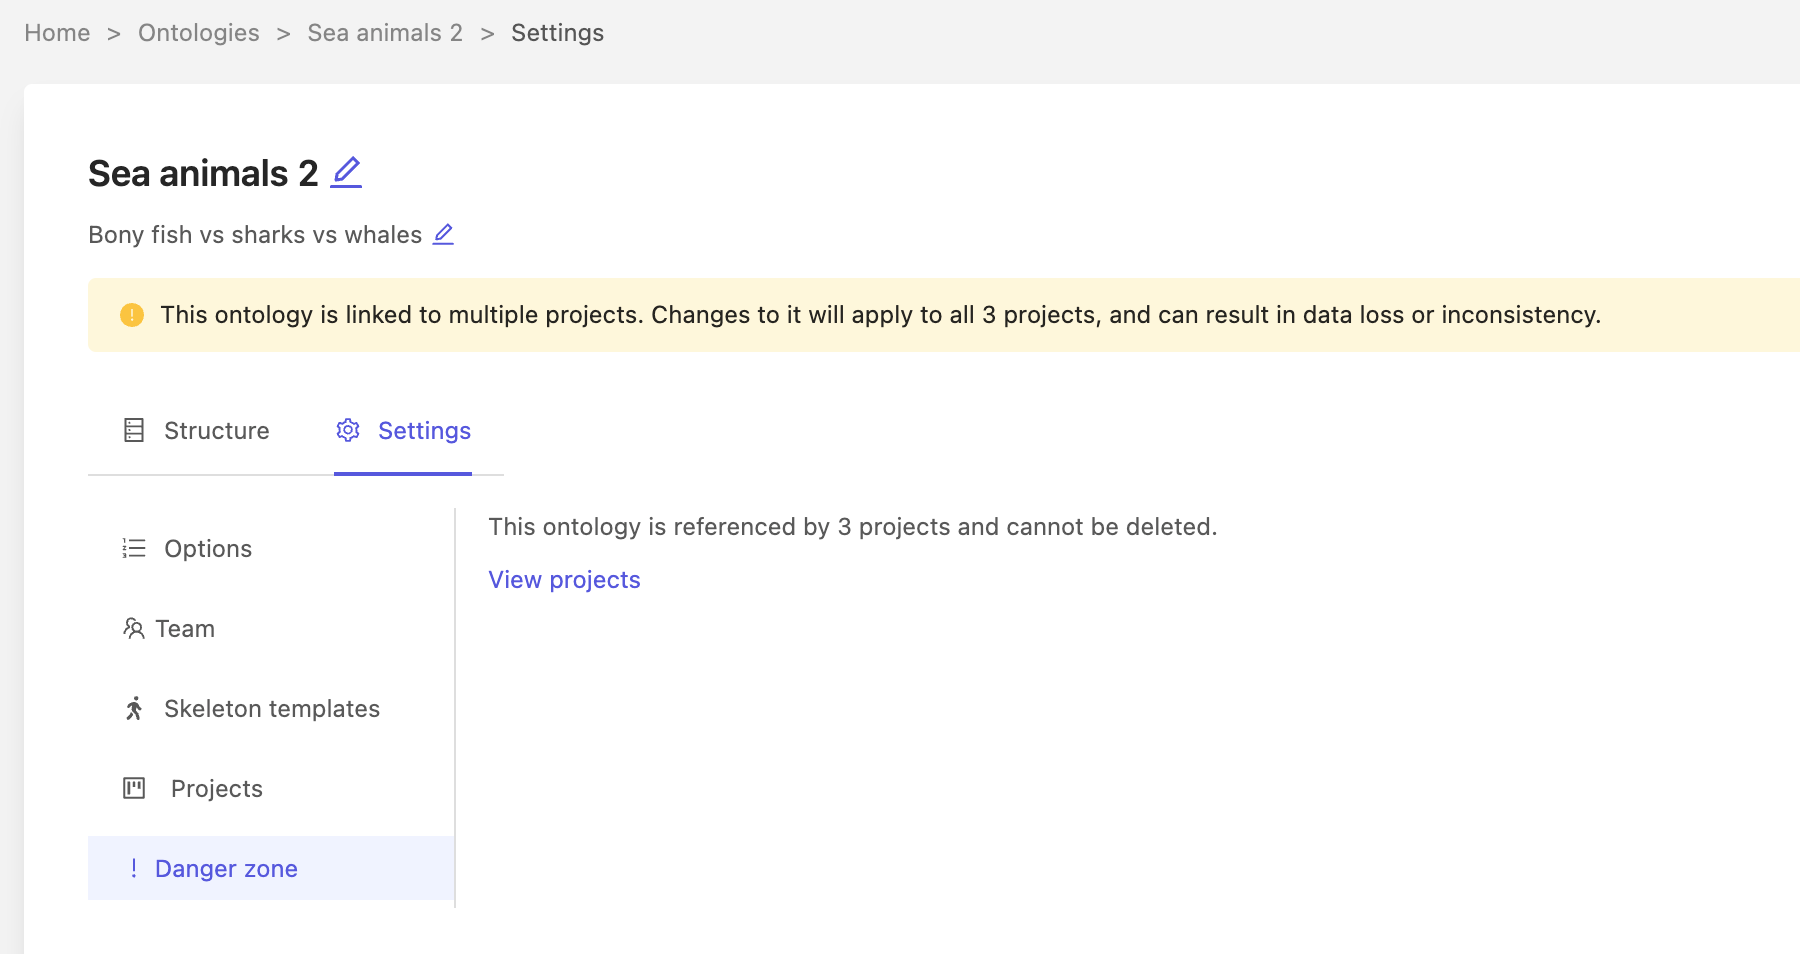
You will see a warning badge if the ontology is used by more than a single project. You can find the list of the projects using this ontology in the ontology settings.
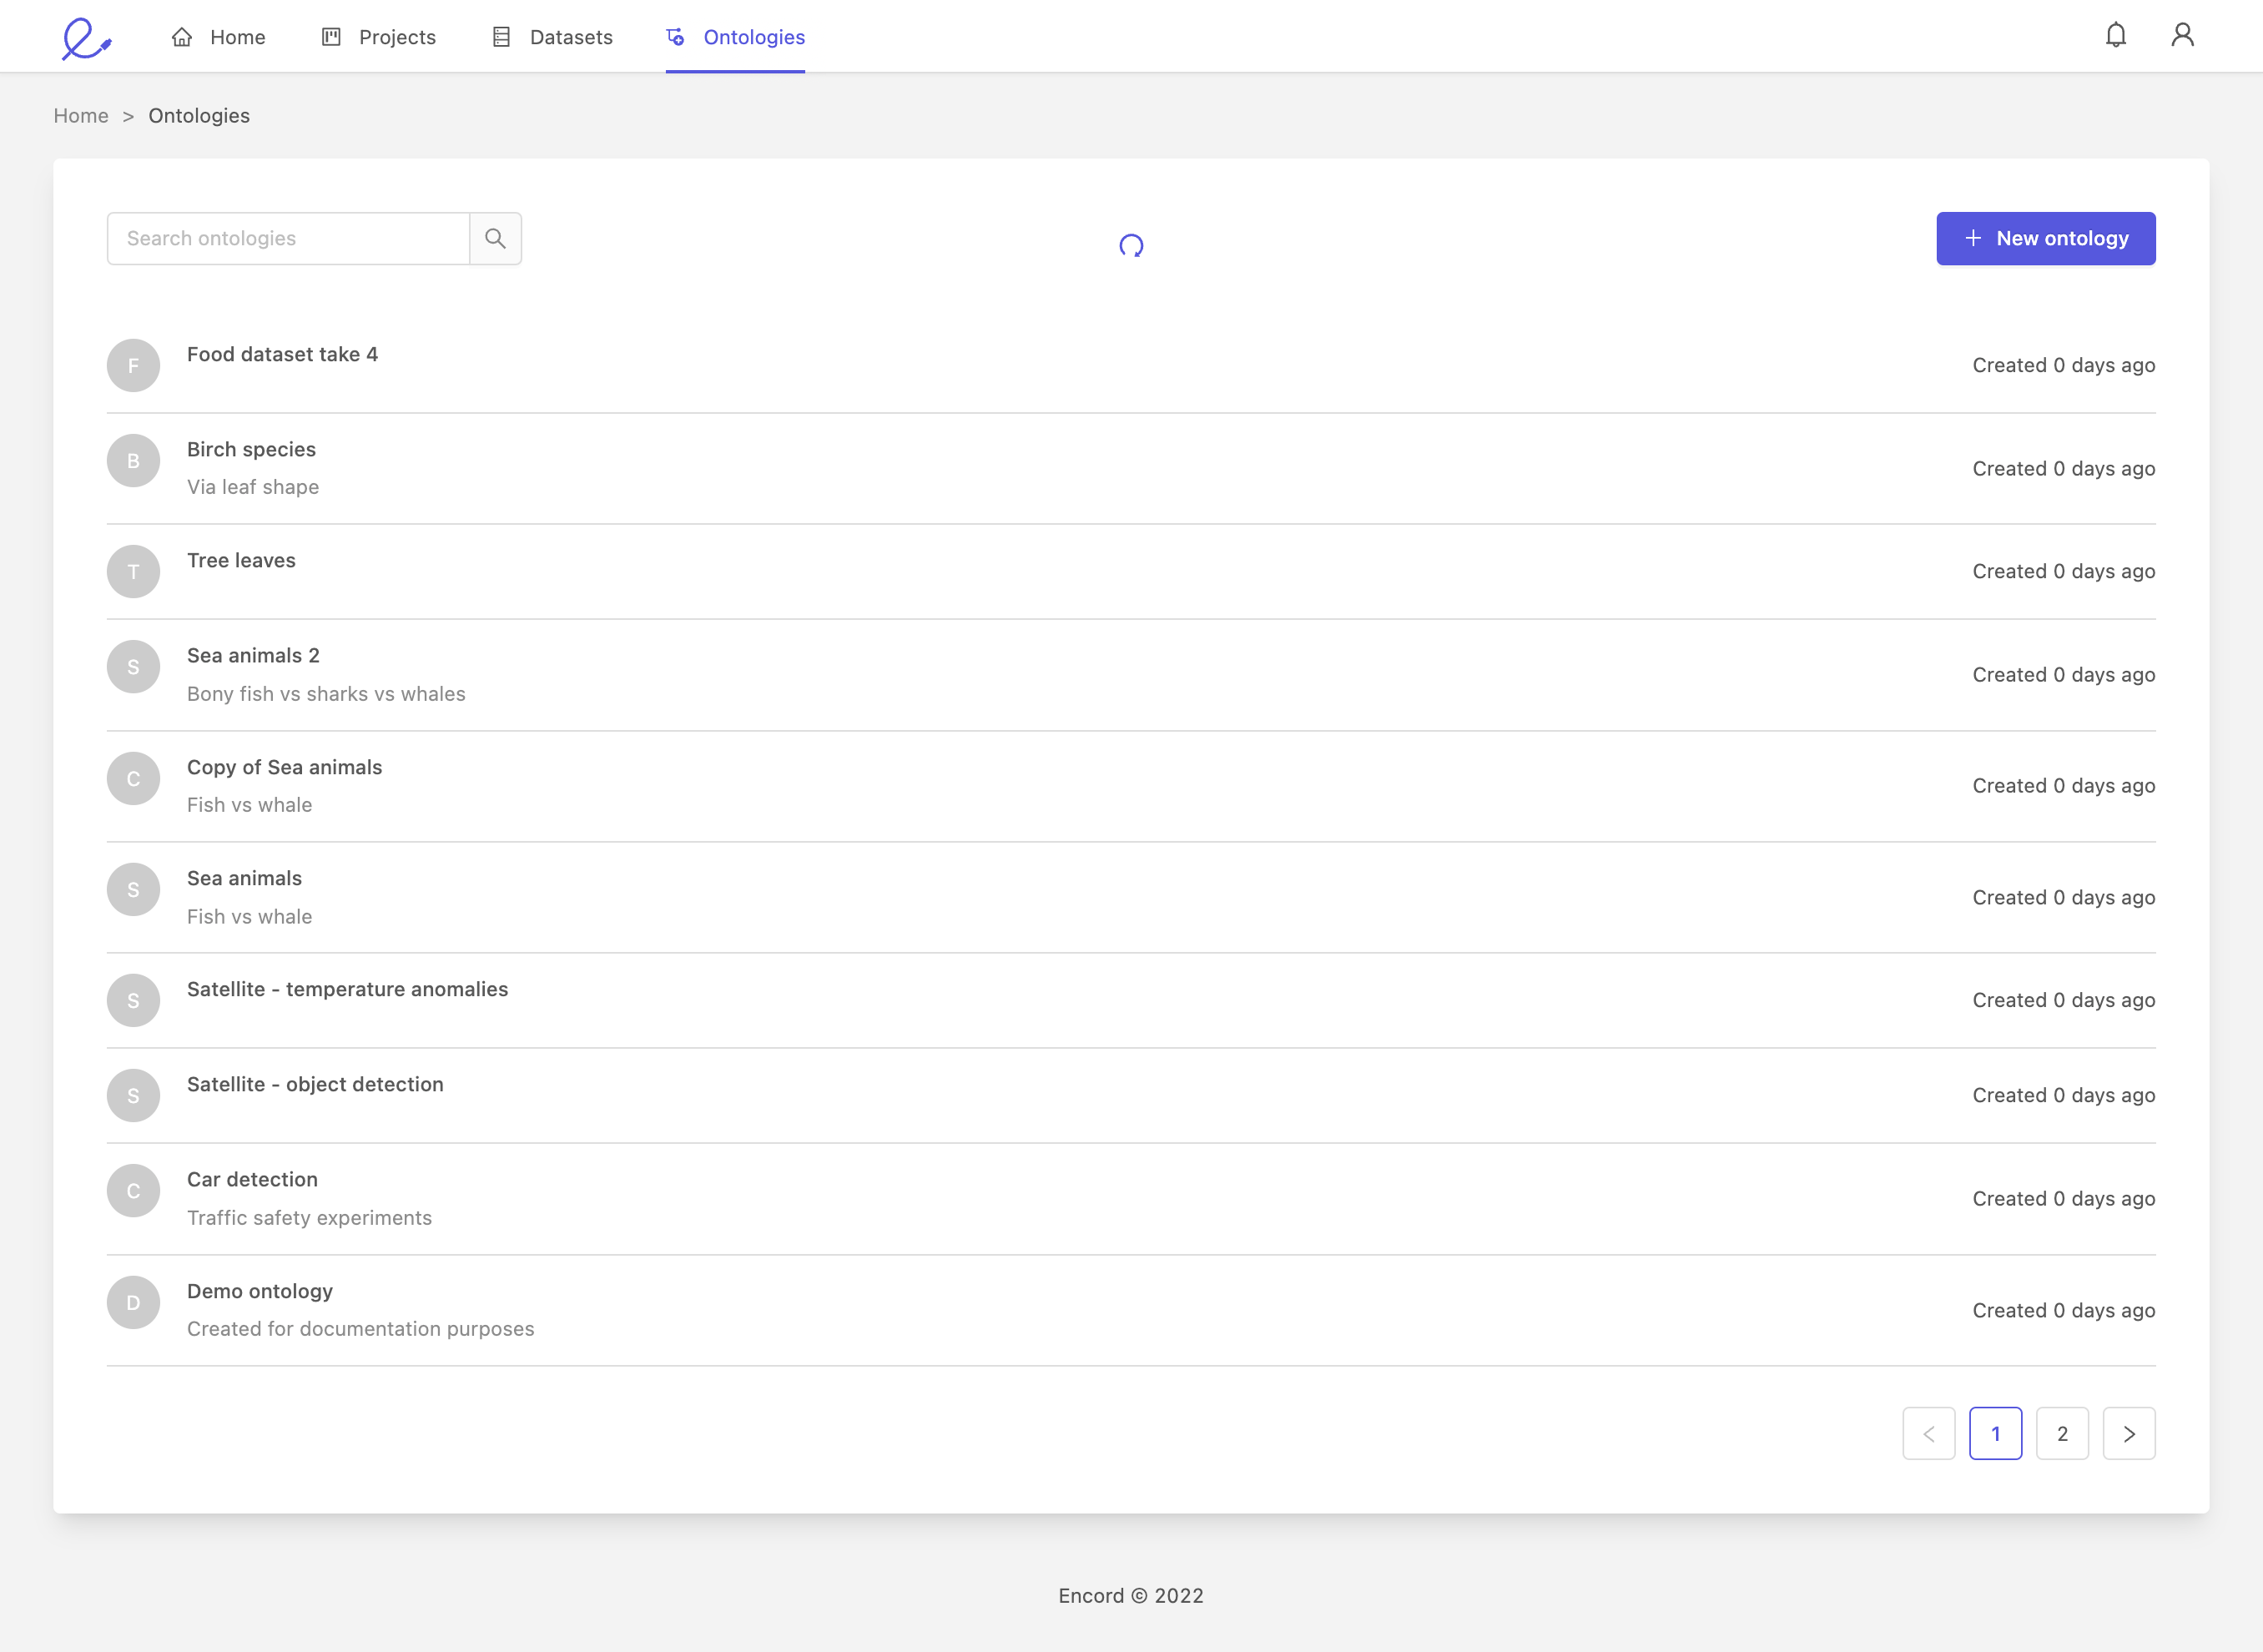
List and Search
The 'Ontologies' tab in the Navigation bar is the entry point to working with ontologies on Encord. You'll be presented with a list of ontologies of which you have at least Viewer permissions. Use the search bar to filter by name.
If you're not connected to any ontologies, or are ready to make a new one, press the '+ New ontology' button to start the ontology creation process.
Create
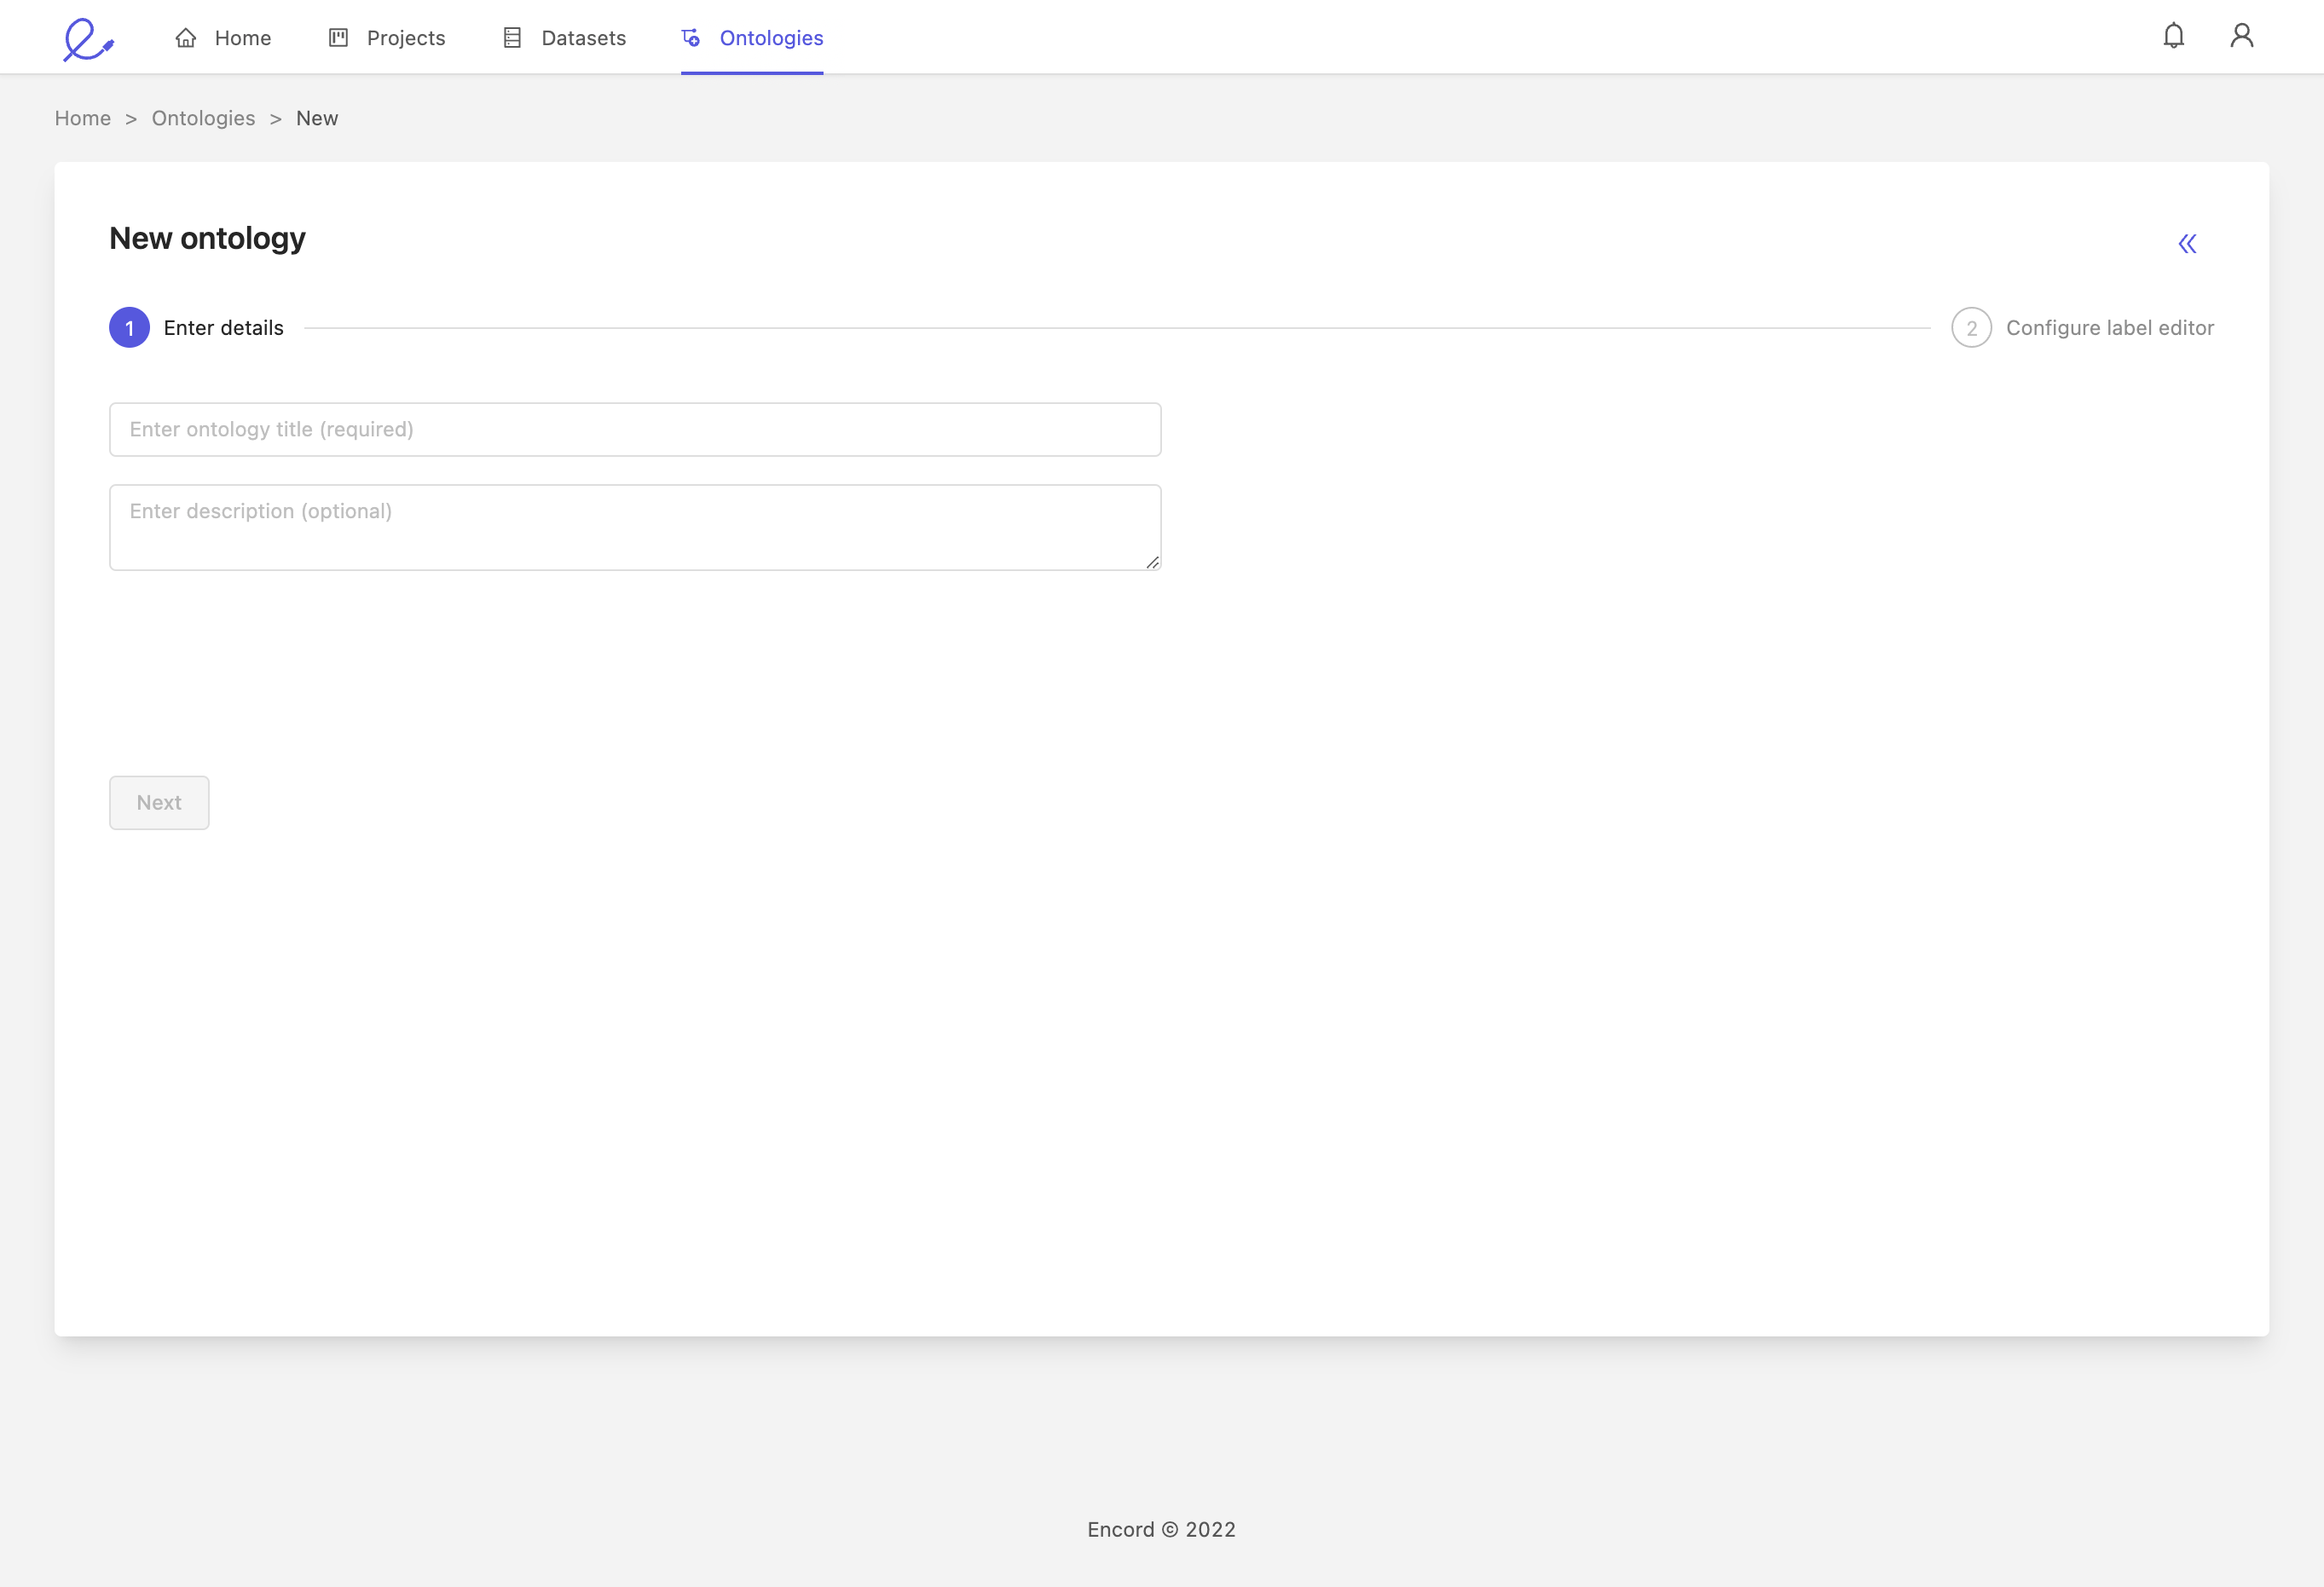
The ontology creation flow starts with the 'Enter details' screen, where you enter the title and description. Descriptions are optional, but clear descriptions can help you and your team stay organized. There is no need to be perfect, you can always edit the title and description after creation as well. Press Next to move on once you're satisfied.
The 'Configure the editor' screen is where you initialize your ontology's structure. Use the '+' buttons under the Objects and Classifications section to add them to the structure. You can use nested classifications to create expressive, hierarchically descriptive structures and attach classification modifiers to aid in the annotation process or dynamically annotate data, as necessary. Reference the structure section of the documentation below for full details on the significance and configuration details of each component.
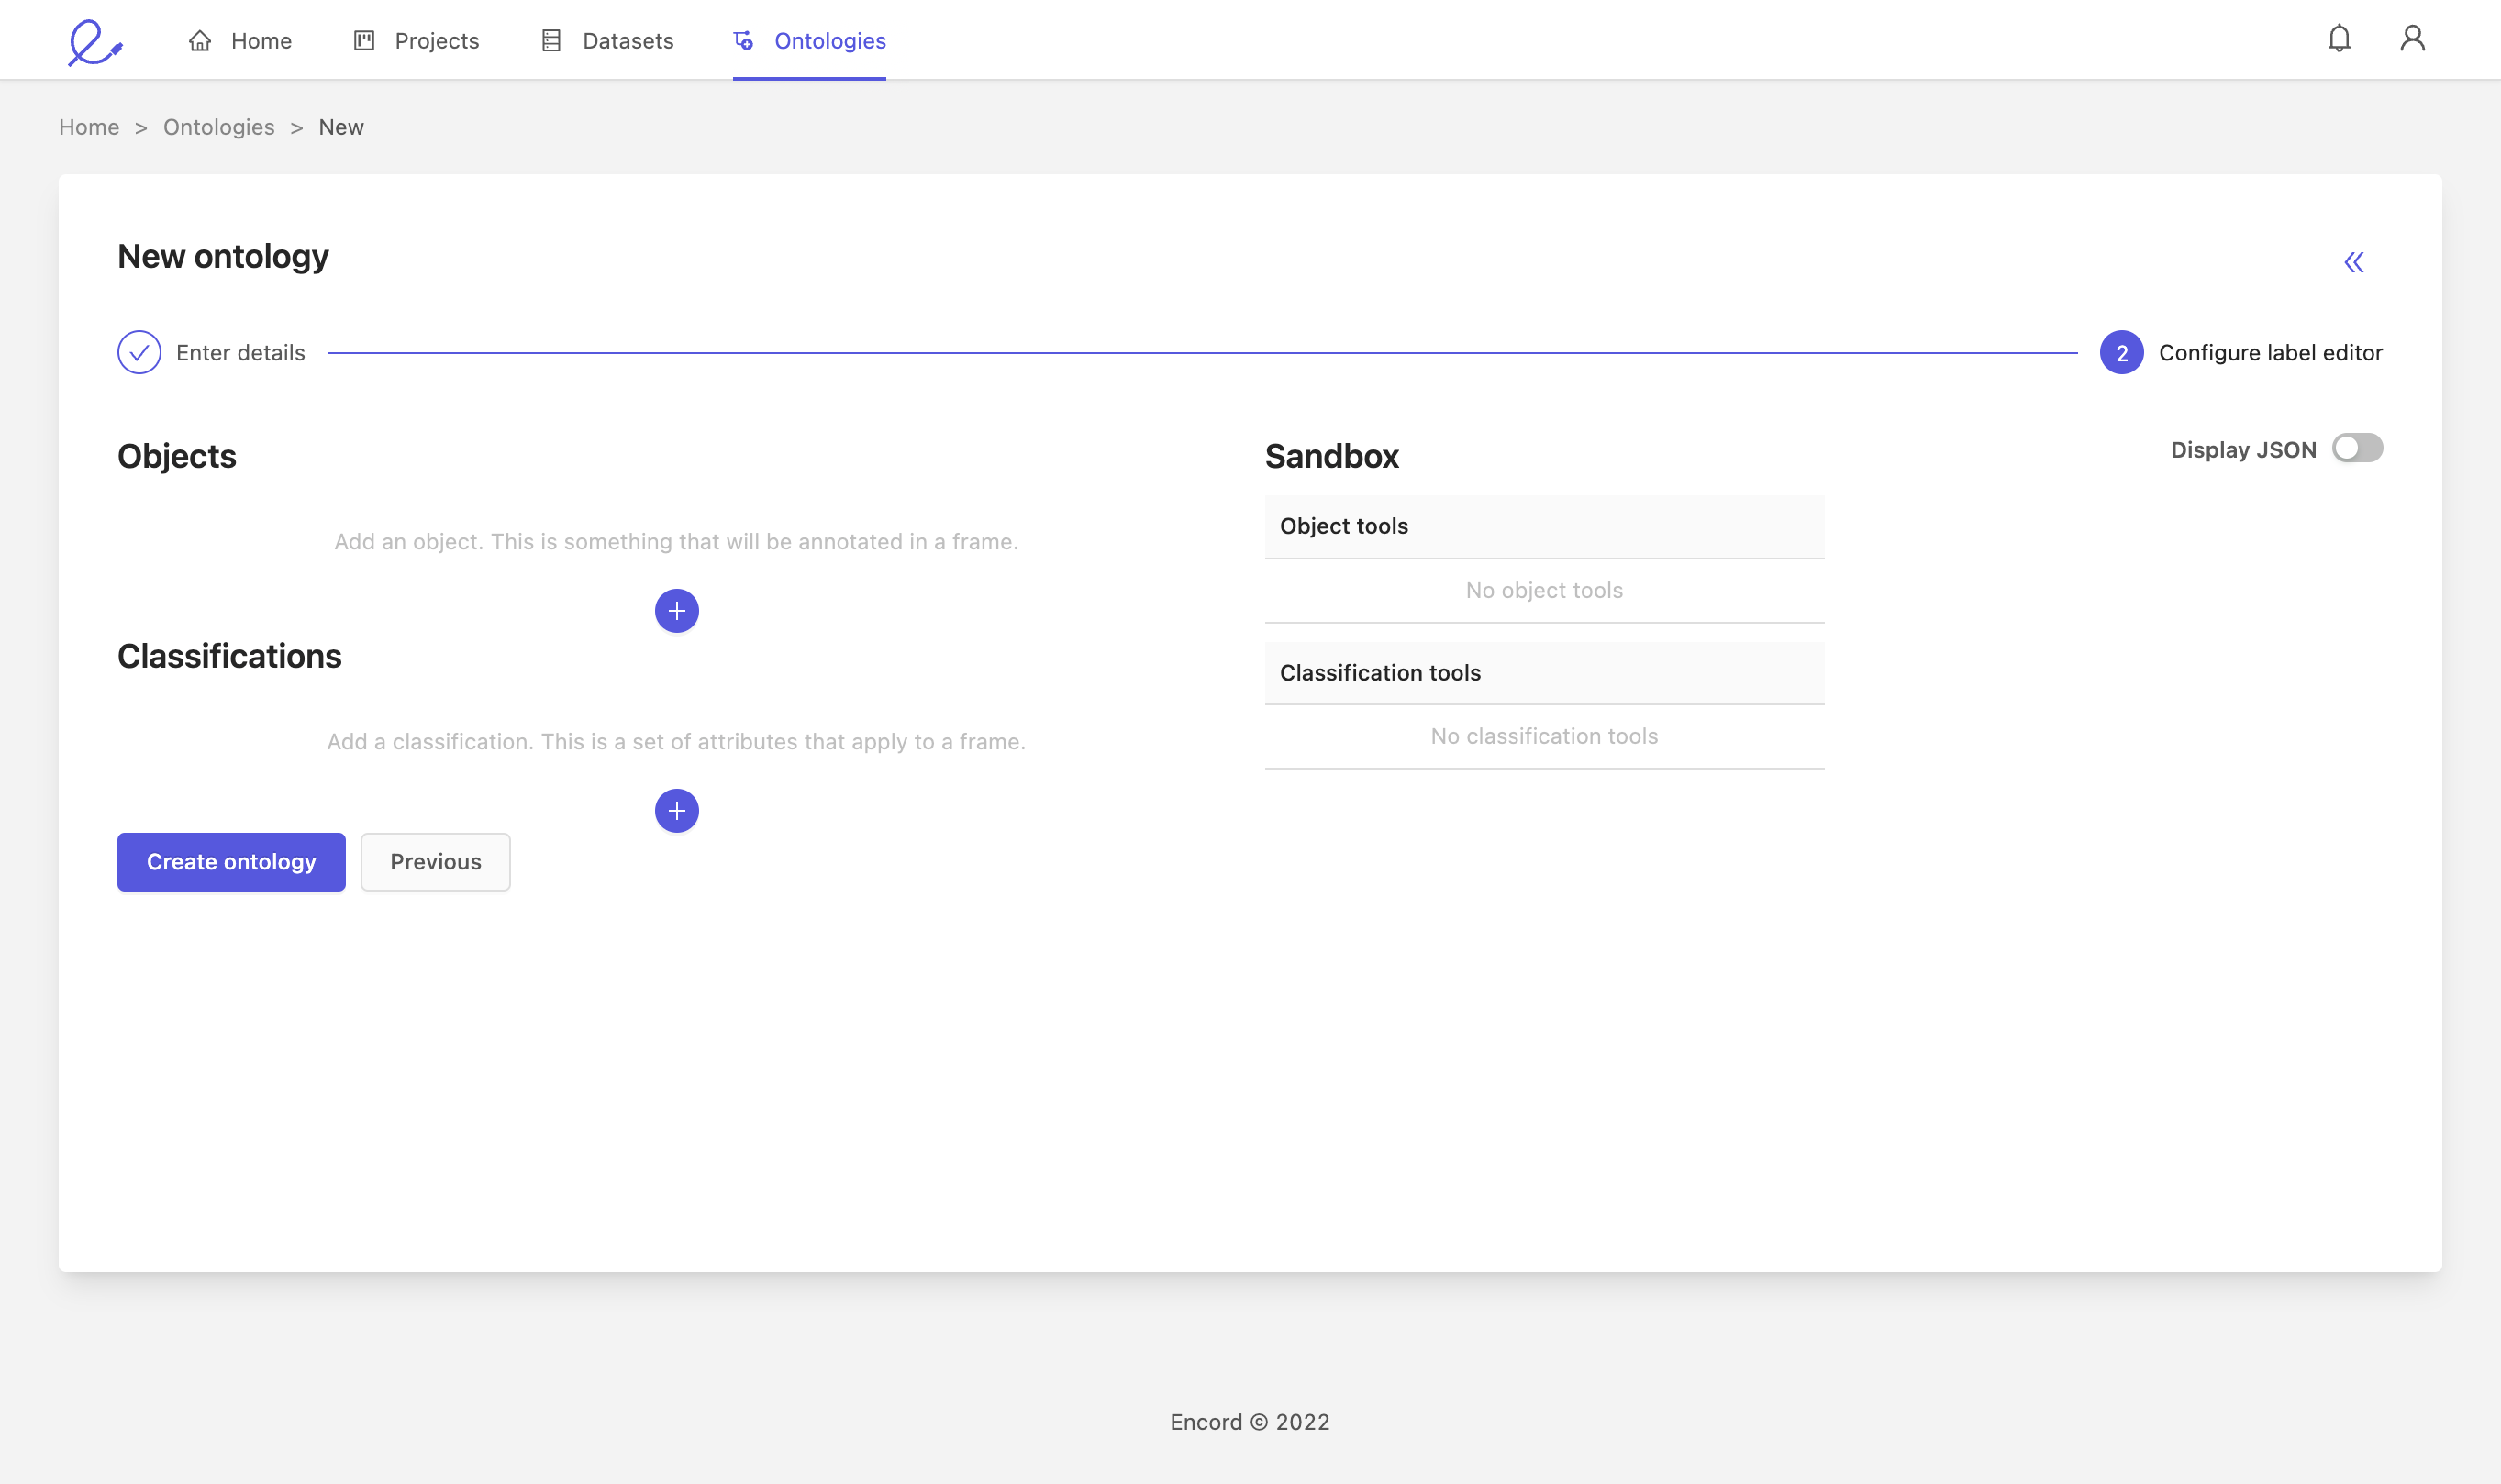
As you are editing the structure, the 'Sandbox' view will offer a preview of how the ontology will appear to your annotators in the label editor. You can expand and contract individual elements by clicking on them to confirm the tree structure of the ontology. You can also view the ontology's JSON representation by toggling the ‘Display json’ toggle on the upper right. This may be useful if you are using Encord's SDK or API.
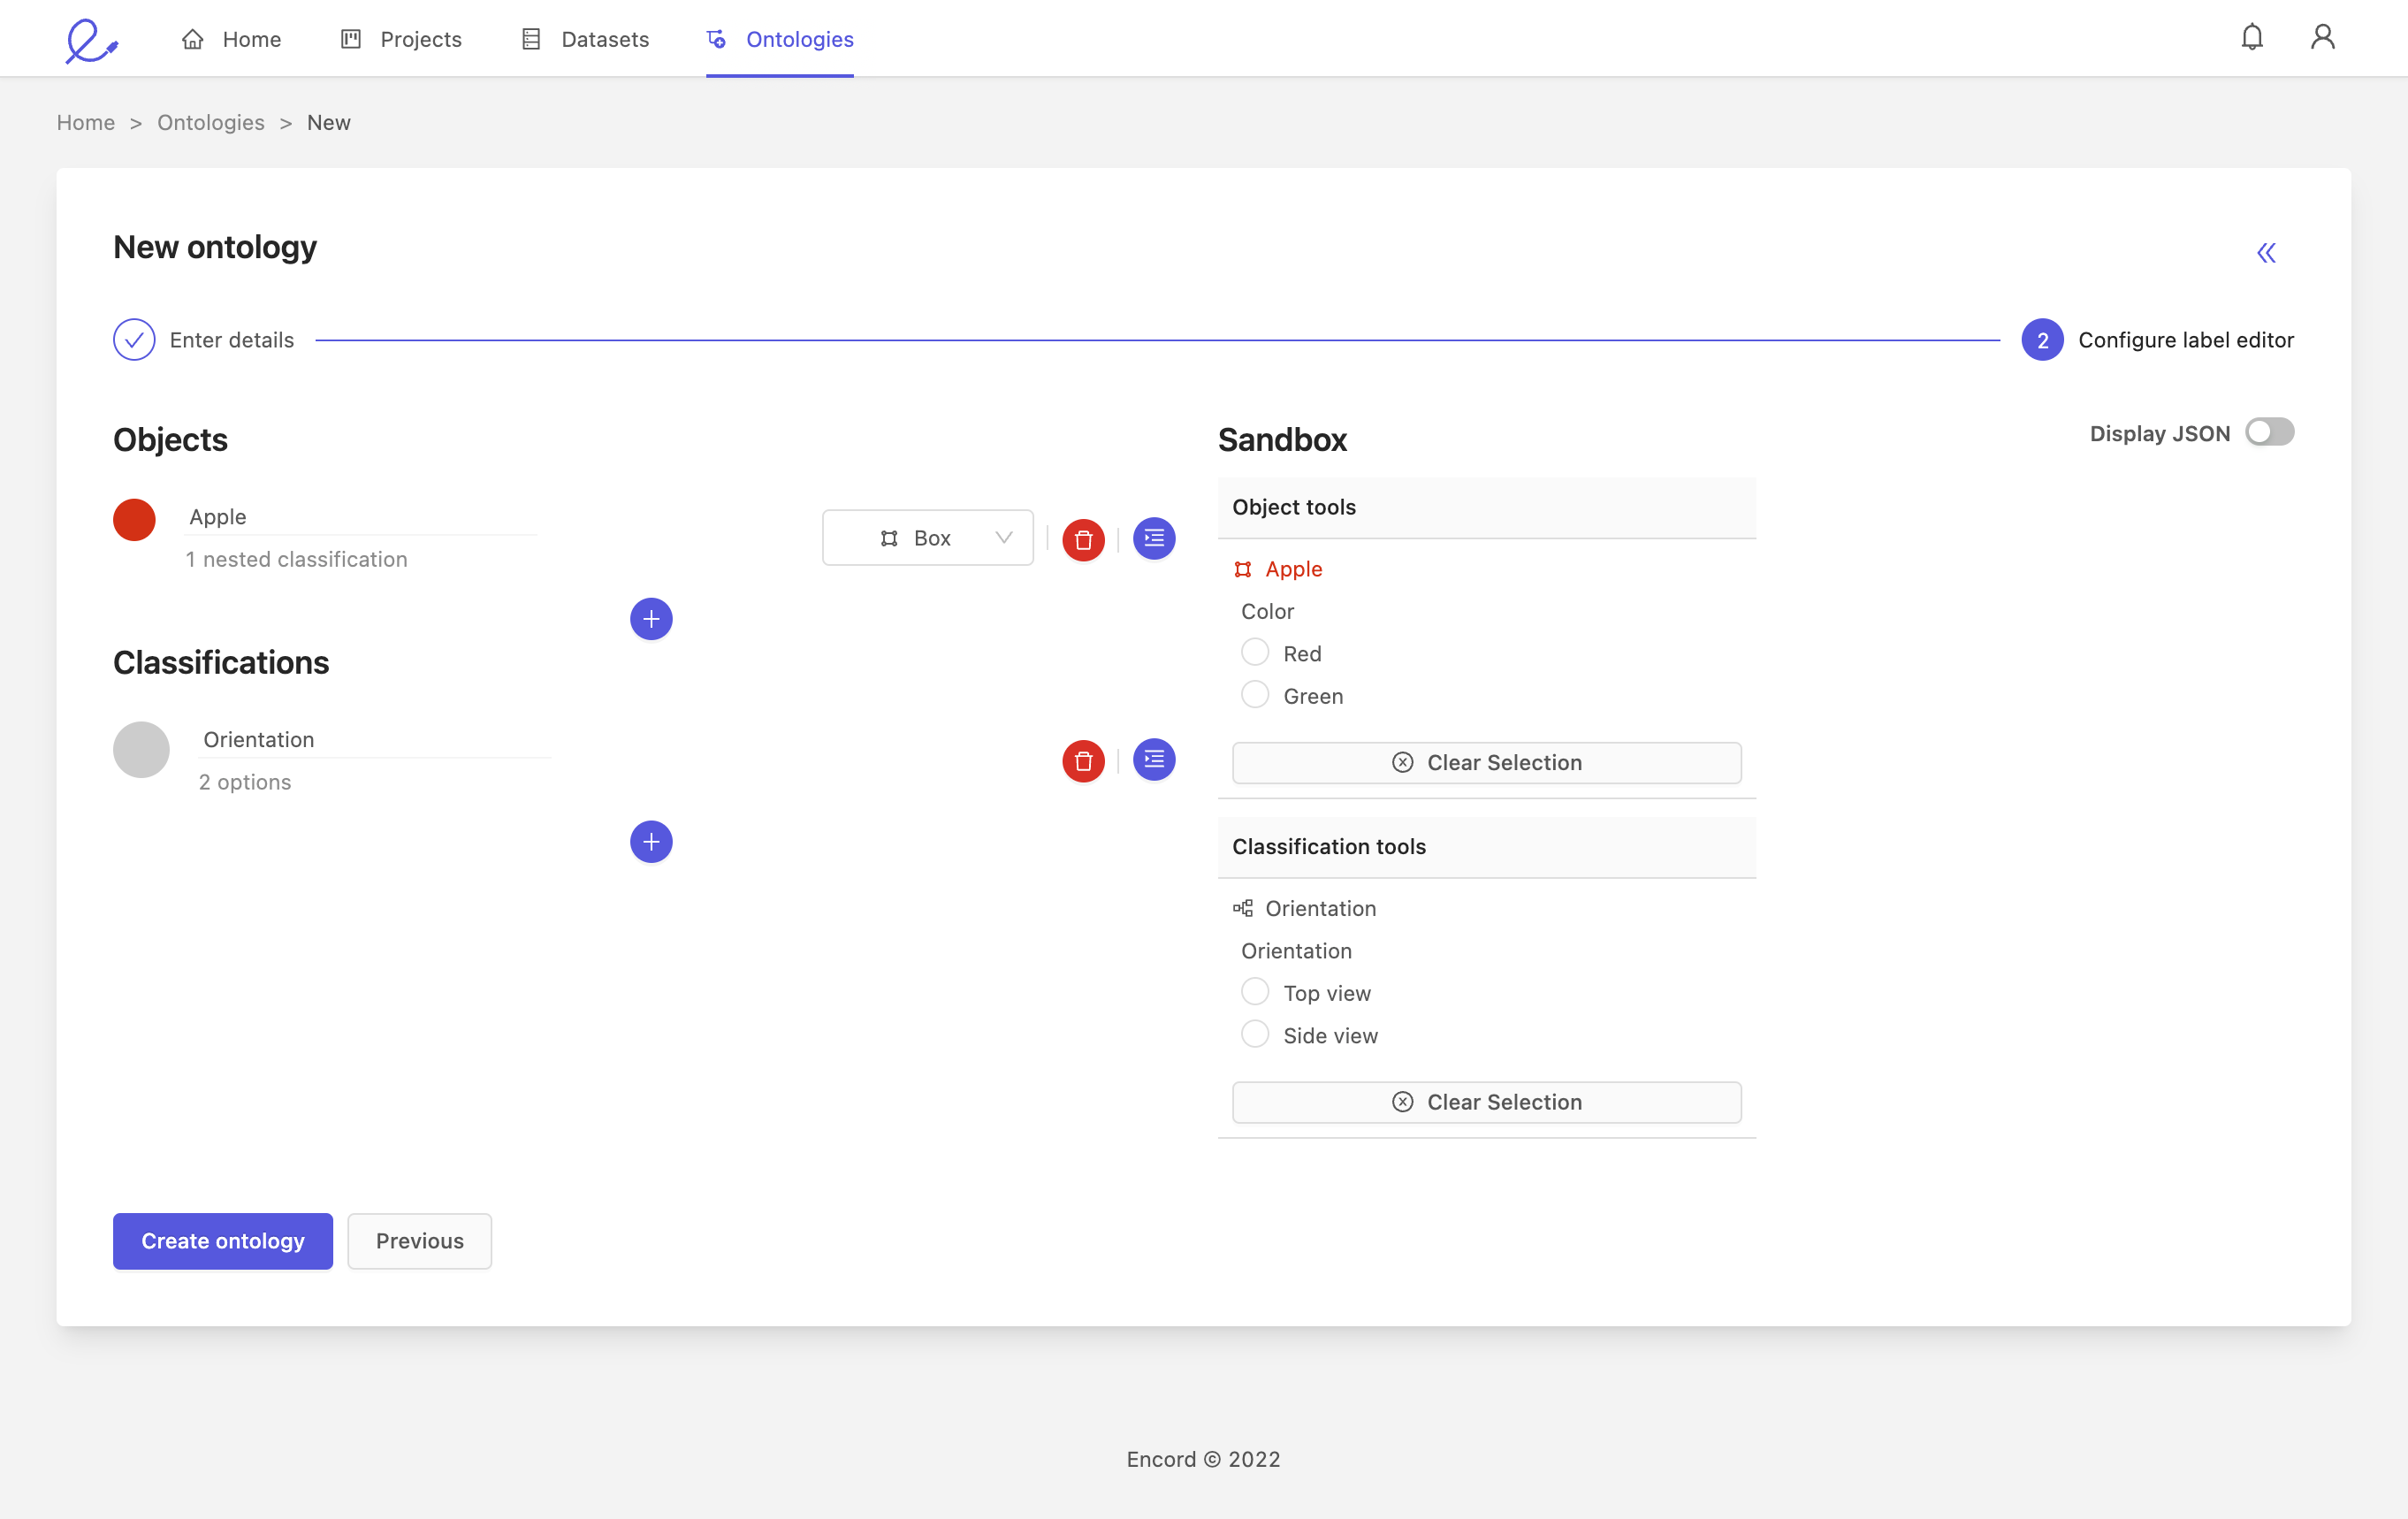
Ontology JSON Preview
{
  "objects": [
    {
      "id": "1",
      "name": "Apple",
      "color": "#D33115",
      "shape": "bounding_box",
      "featureNodeHash": "dfa43291",
      "attributes": [
        {
          "id": "1.1",
          "name": "Color",
          "type": "radio",
          "required": false,
          "featureNodeHash": "3a2d7e3e",
          "options": [
            {
              "id": "1.1.1",
              "label": "Red",
              "value": "red",
              "featureNodeHash": "d262efe3"
            },
            {
              "id": "1.1.2",
              "label": "Green",
              "value": "green",
              "featureNodeHash": "05e37fad"
            }
          ]
        }
      ]
    }
  ],
  "classifications": [
    {
      "id": "1",
      "featureNodeHash": "621710a2",
      "attributes": [
        {
          "id": "1.1",
          "name": "Orientation",
          "type": "radio",
          "required": false,
          "featureNodeHash": "2313aee5",
          "options": [
            {
              "id": "1.1.1",
              "label": "Top view",
              "value": "top_view",
              "featureNodeHash": "cc336600"
            },
            {
              "id": "1.1.2",
              "label": "Side view",
              "value": "side_view",
              "featureNodeHash": "02d60e6f"
            }
          ]
        }
      ]
    }
  ]
}
Edit
You can continue to edit and update the ontology after you've created it. You can edit and update the structure exactly as you did during the creation process from the Structure pane. Reference the explanation of ontology structure if you need a reminder about the various components.
Modifying ontologies associated with projects that already have labels associated with them can create orphaned labels -- that is labels whose class no longer belongs to the connected ontology. While additive actions (making new objects or classifications) are relatively safe actions, destructive edits to ontologies can have unintended side effects unless accompanied by due caution.
You will see a warning badge if the ontology is used by more than a single project. You can find the list of the projects using this ontology in the ontology settings.
In addition to editing the structure, the Settings pane exposes control over many of the operational settings and actions for ontologies. The details are described below.
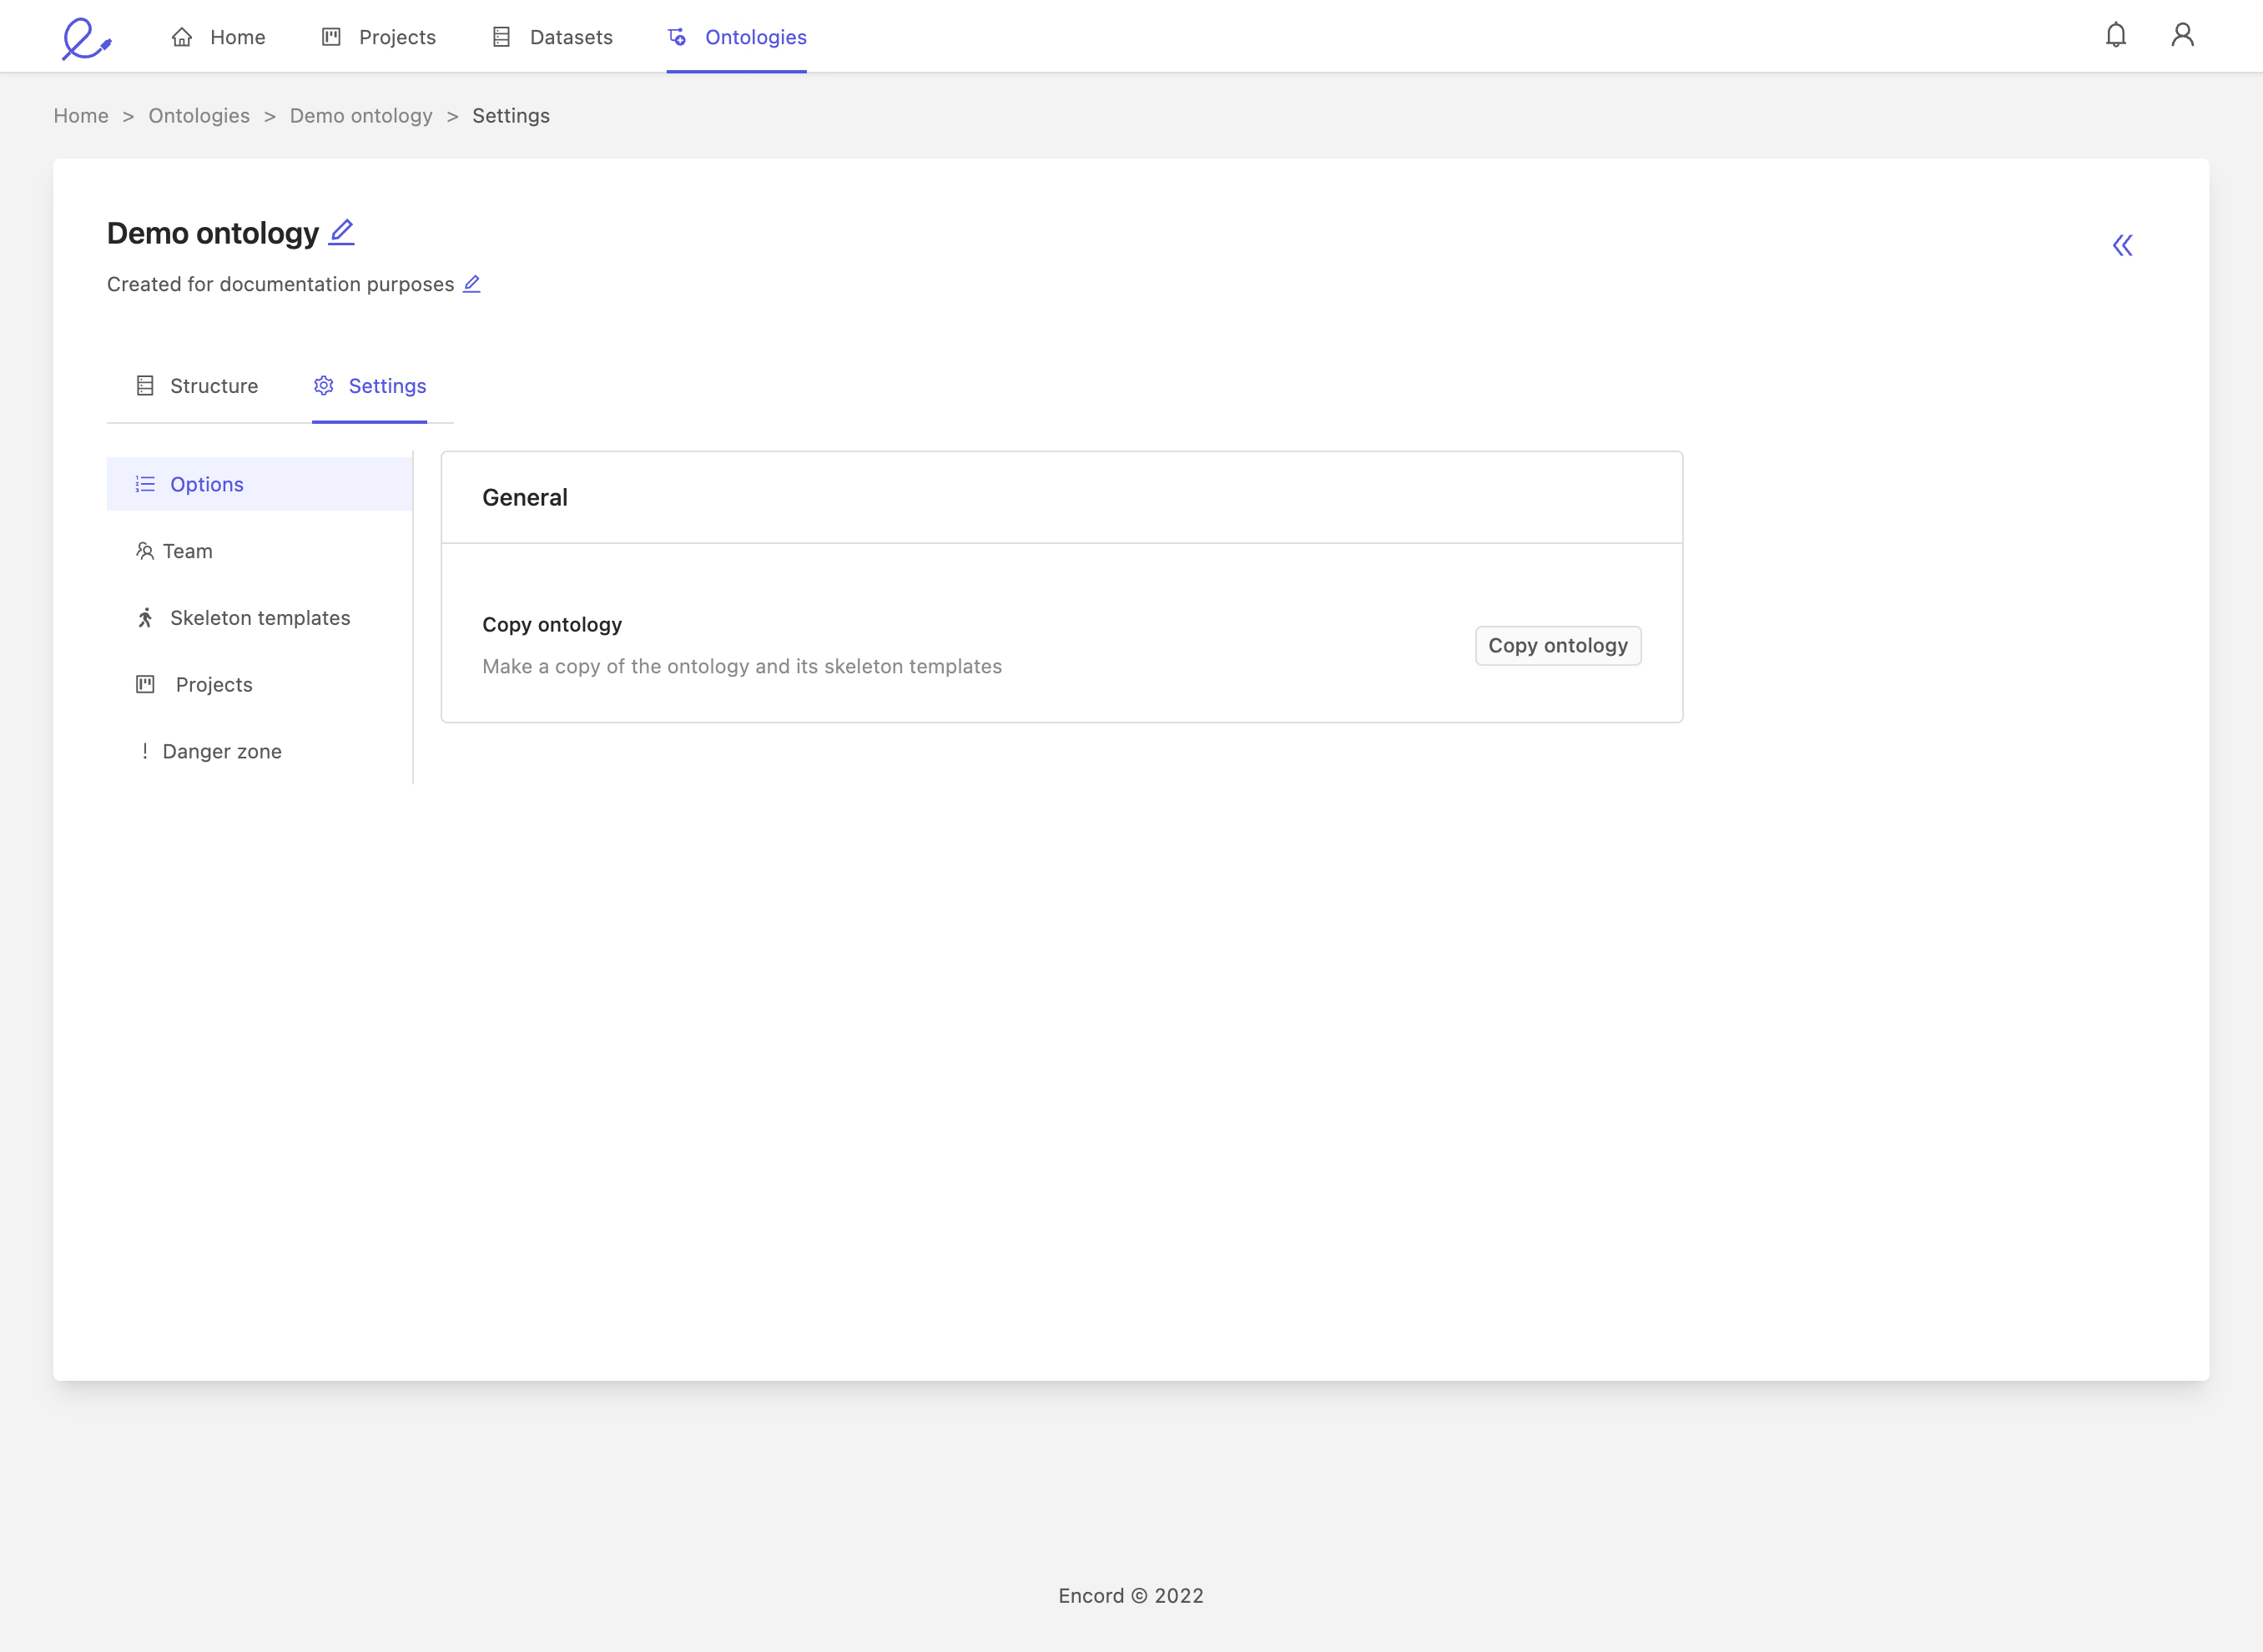
Options
From the 'Options' pane, you can create a copy of the ontology. Copying an ontology will also copy the object primitives and optionally the attached team members, but will not be attached to any projects.
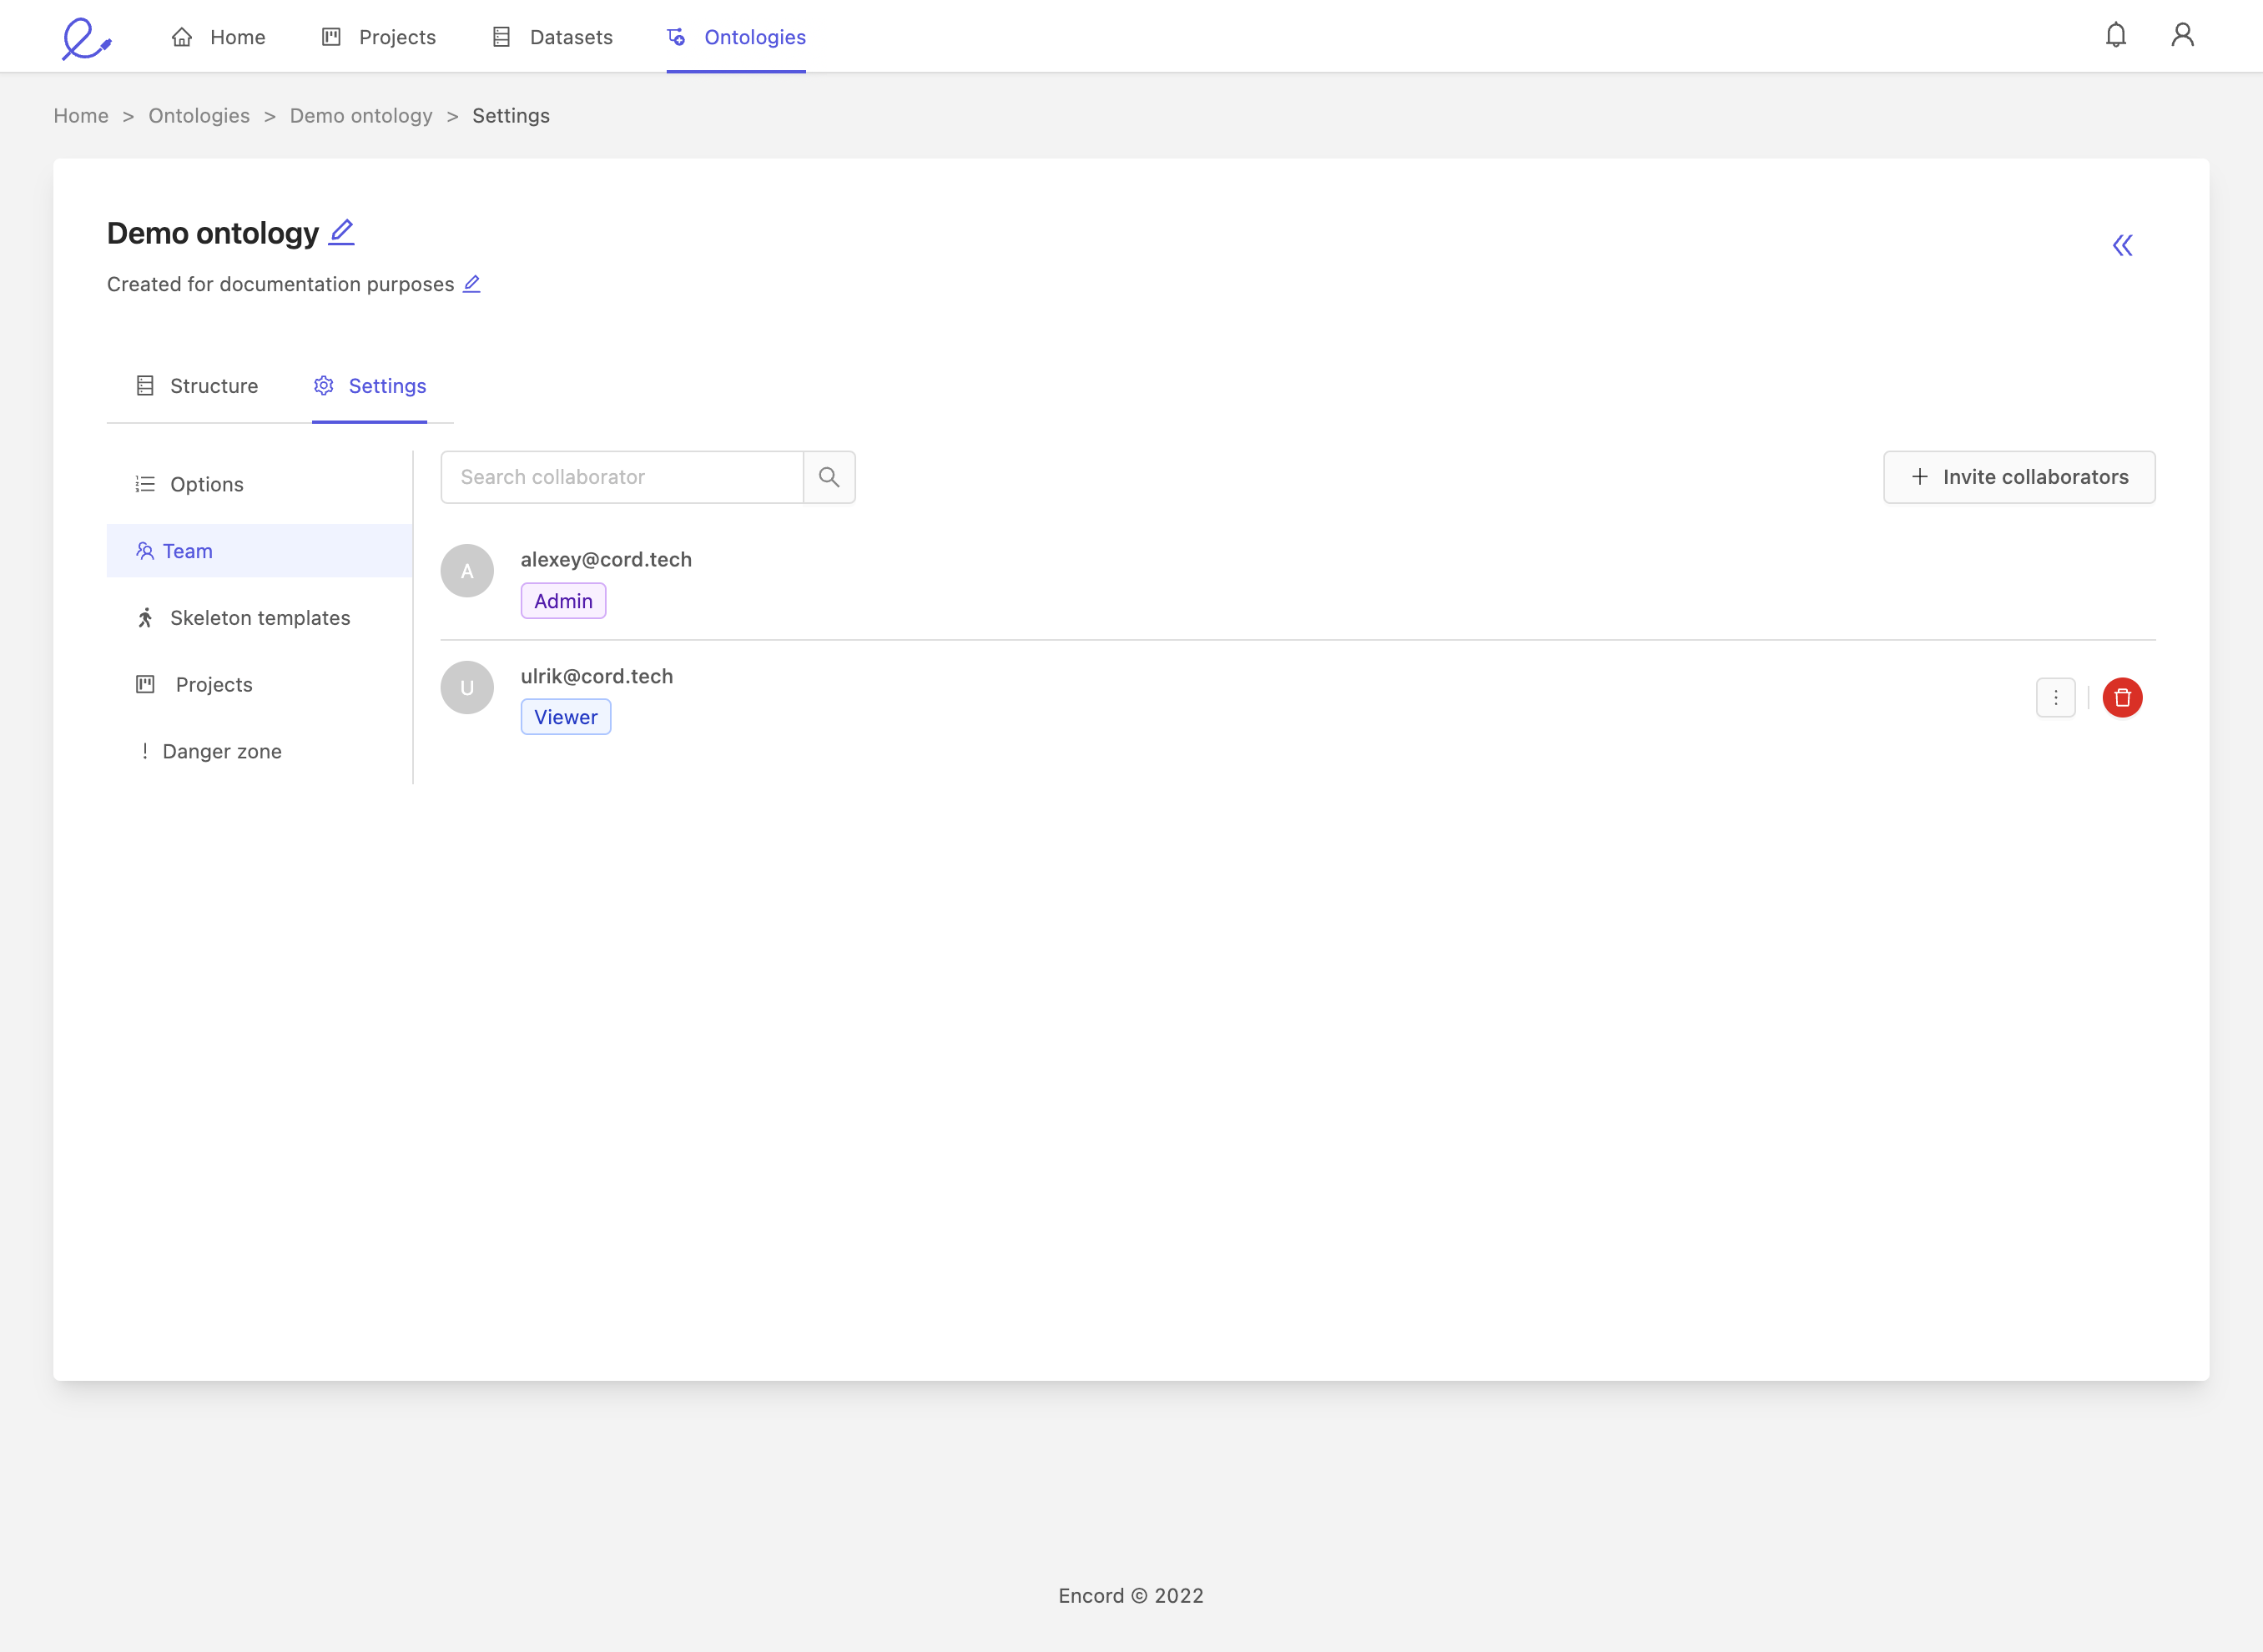
Team
The 'Team' pane shows a list of collaborators on the ontology, and allows you to invite new collaborators. You can edit existing Viewers by elevating them to Admins or removing them from the ontology, but once a collaborator is an Admin, they are permanently attached to the ontology.
Object primitives
Object primitives (formerly called Skeleton templates) are a unique object annotation type. Using object primitives is a two-step process:
- Use the template editor to create a configuration of key points, and define the vertices between them. Optionally, name the vertices for making identification easier. Give your template a name and press 'Save current state'.
- Return to the object annotation type selector in the structure editor, select the name of your newly saved template as the object annotation type. At this point, you can enter the label editor and create your custom objects.
Object primitive template editor
Object primitives are created in the 'Object primitives' section of the 'Settings' tab when editing an ontology.
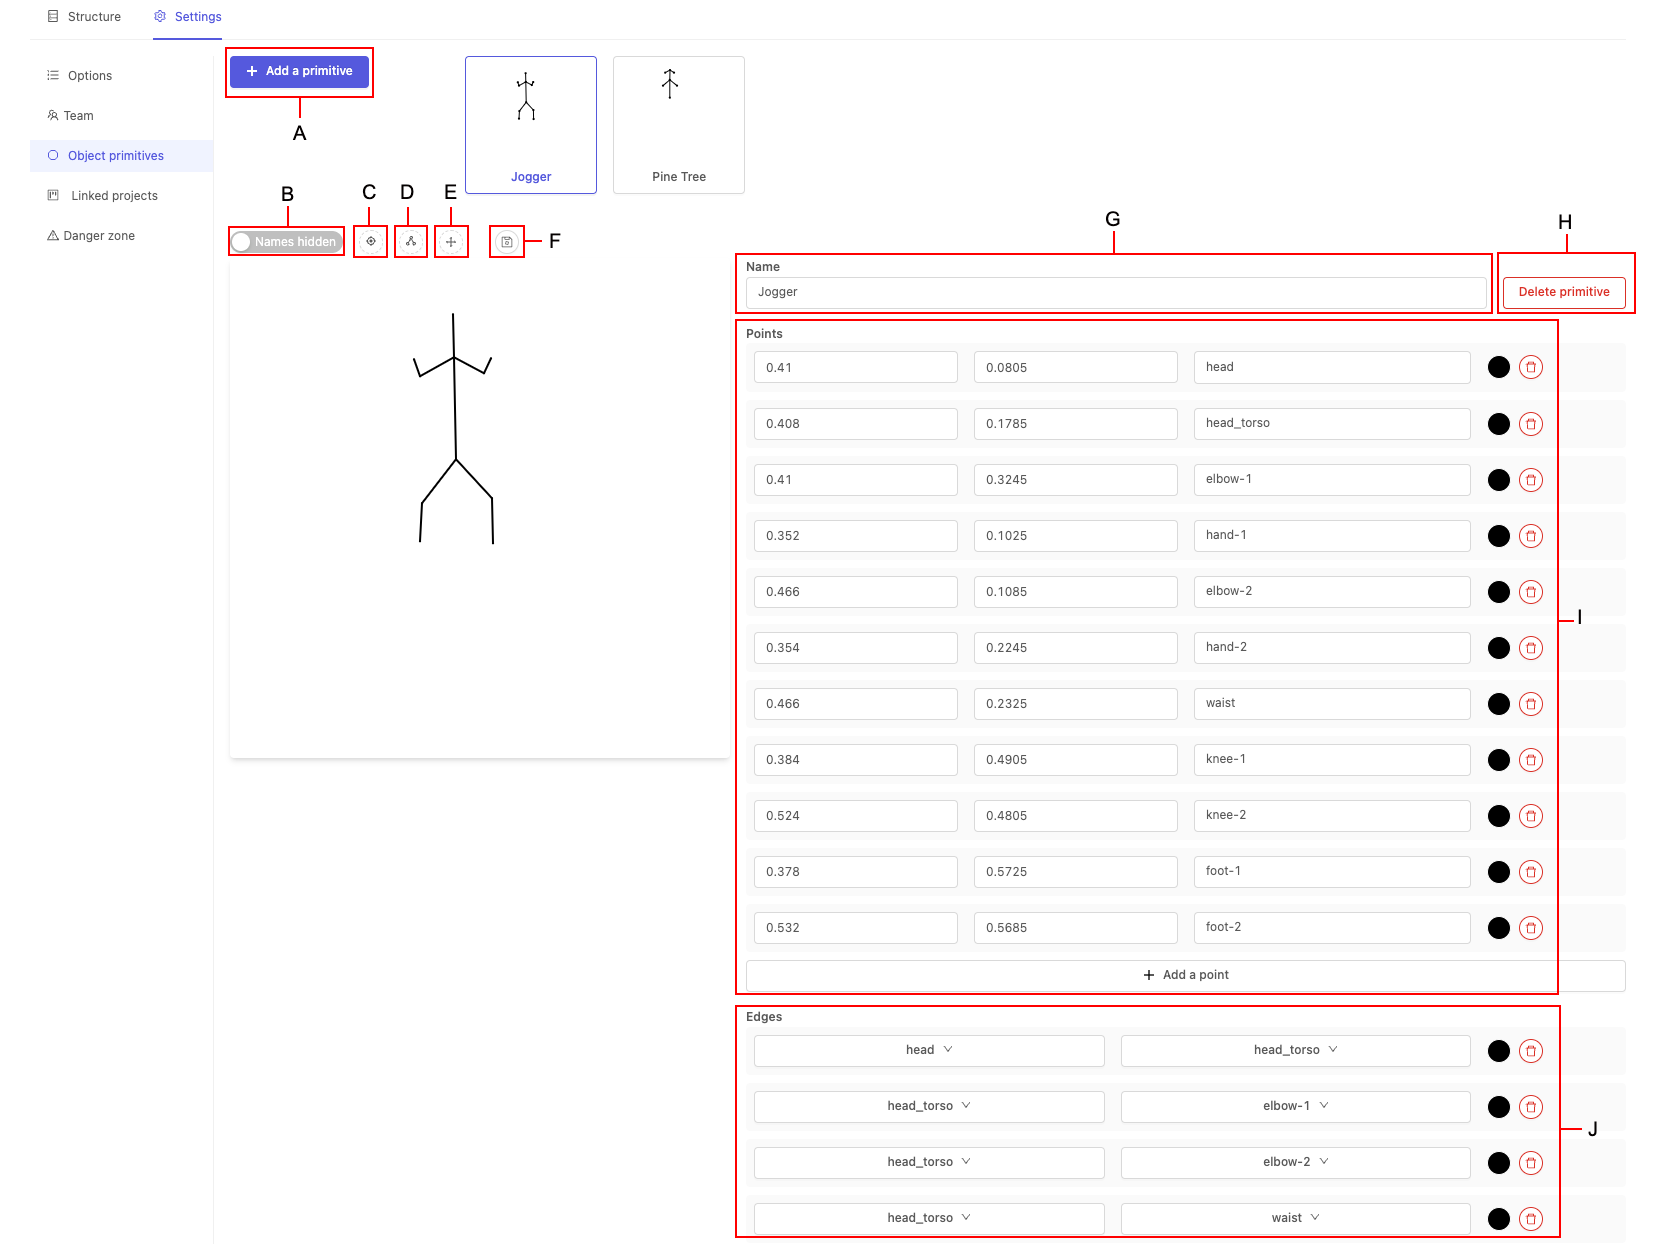
- A. 'Add a primitive': start creating a new object primitive template.
- B. 'Names hidden': show or hide the vertex names in the canvas.
- C. 'Add a point': add more points on the canvas. Points are added to the list of points as they're made.
- D. 'Add an edge': add more edges. Mouseover the first point and click once before clicking over the end point of the edge. Edges are added to the list of edges as they're created.
- E. 'Move/edit': move vertices. Mouseover the vertex you wish to move. Click and drag to move the target vertex to the new desired location.
- F. 'Save current state': save the template. If you exit the editor screen without saving all your work will be lost.
- G. 'Name': enter a name for this object primitive. This name will be displayed in the ontology structure object annotation type selection.
- H. 'Delete template': delete this object primitive. Please ensure you've removed this object primitives from all connected objects before deleting, or the ontology structure may enter an unstable state.
- I. 'Points': list of points with their coordinates and names. Coordinates are defined as (0, 0) in the upper left. You can also add points using the + Add a point button at the bottom of the list.
- J. 'Edges': list of edges. You can also add edges by using the + Add an edge button at the bottom of the list.
Projects
The 'Projects' pane shows a list of projects using the ontology. You can jump to any of the projects displayed by clicking the View link.

Danger Zone - Delete
Delete ontologies from the 'Danger zone'. In order to prevent accidental data loss, you can not delete ontologies that are still attached to one or more projects. Remove an ontology from any connected projects before attempting to delete it.
Please note, deletion is a permanent action. Deleted ontologies can not be restored, so be sure you want to delete before taking action.
Structure
Configuring a proper structure is the essence of creating a useful ontology. Recall that ontologies are composed of classes, which may be either objects or classifications, and that both objects and classifications can have nested classifications. Read on for the details about the various components of Encord's ontologies, and how to use them to create powerful representations of your data.
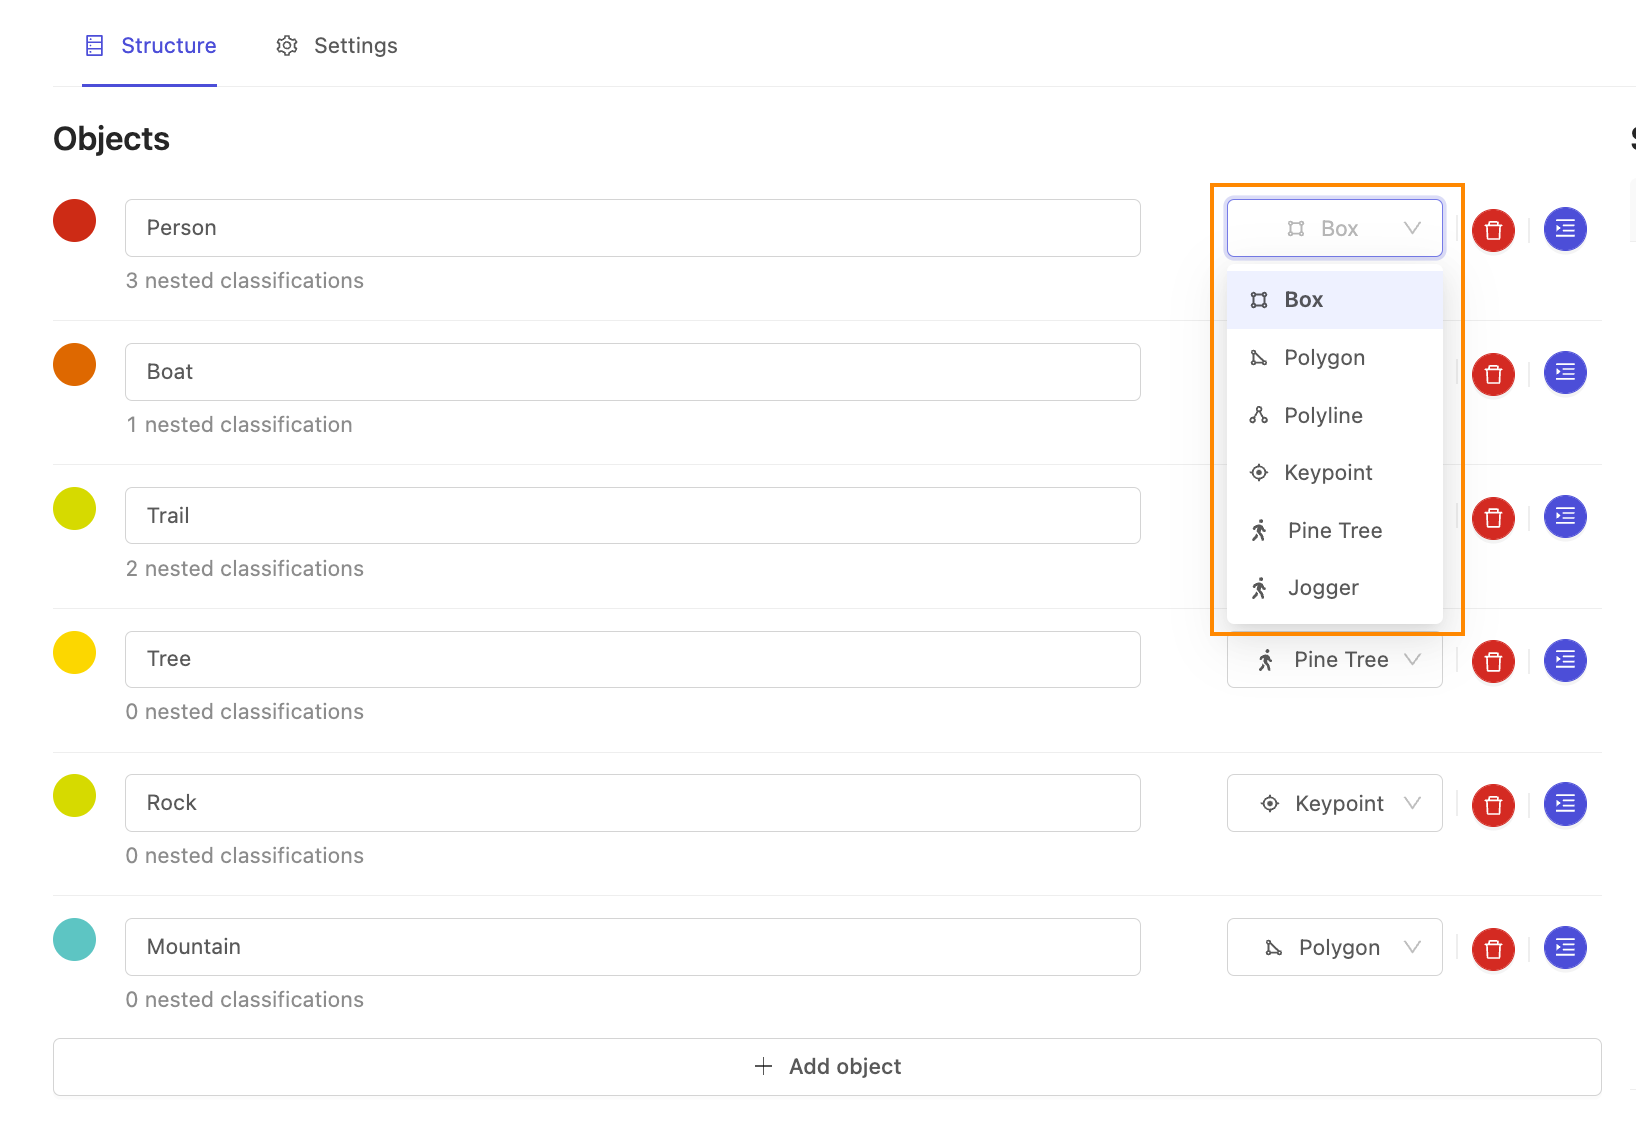
Objects
Objects are configured with a title, an object annotation type and optionally any nested classifications you wish to assign. You may also change the color if you wish. Object annotation types are as follows:
- Box: frequently known as a bounding box, they are quick to draw and work with many advanced automated labeling techniques.
- Rotatable box: also known as a Rotatable bounding box, allows you to draw bounding boxes that can be rotated to create more accurate labels.
- Polygon: useful to capture complex shapes for which a bounding box is not sufficiently precise. They are sometimes known as segmentations.
- Polyline: an unclosed polygon, useful for representing long, thin annotations.
- Keypoint: a simple geometric point which can be useful for tracking small objects or particular points of interest on larger objects.
- Bitmask: create labels using a brush tool to select parts of an image, which may be topologically separated from each other. Optionally you can select a range of intensity values within which labels will be created.
- Object primitive: a collection of geometric points connected in the manner of your choosing, primitives excel at representing particularly complex shapes such as those found in pose estimation problems.
Classifications
Classifications are configured similarly to objects, with a title, classification annotation type, and any desired nested classifications. Since classifications are not present in the frame however, there is no need for a corresponding color. Classification annotation types may be any of the following:
- Checklist: for multivalued classifications. An example could be talking about weather features -- for example, it could be both cloudy and rainy.
- Radio: single-valued classifications. A canonical example is scene classification: is that an office? home? etc.
- Text: the annotator fills in the value freely in each situation.

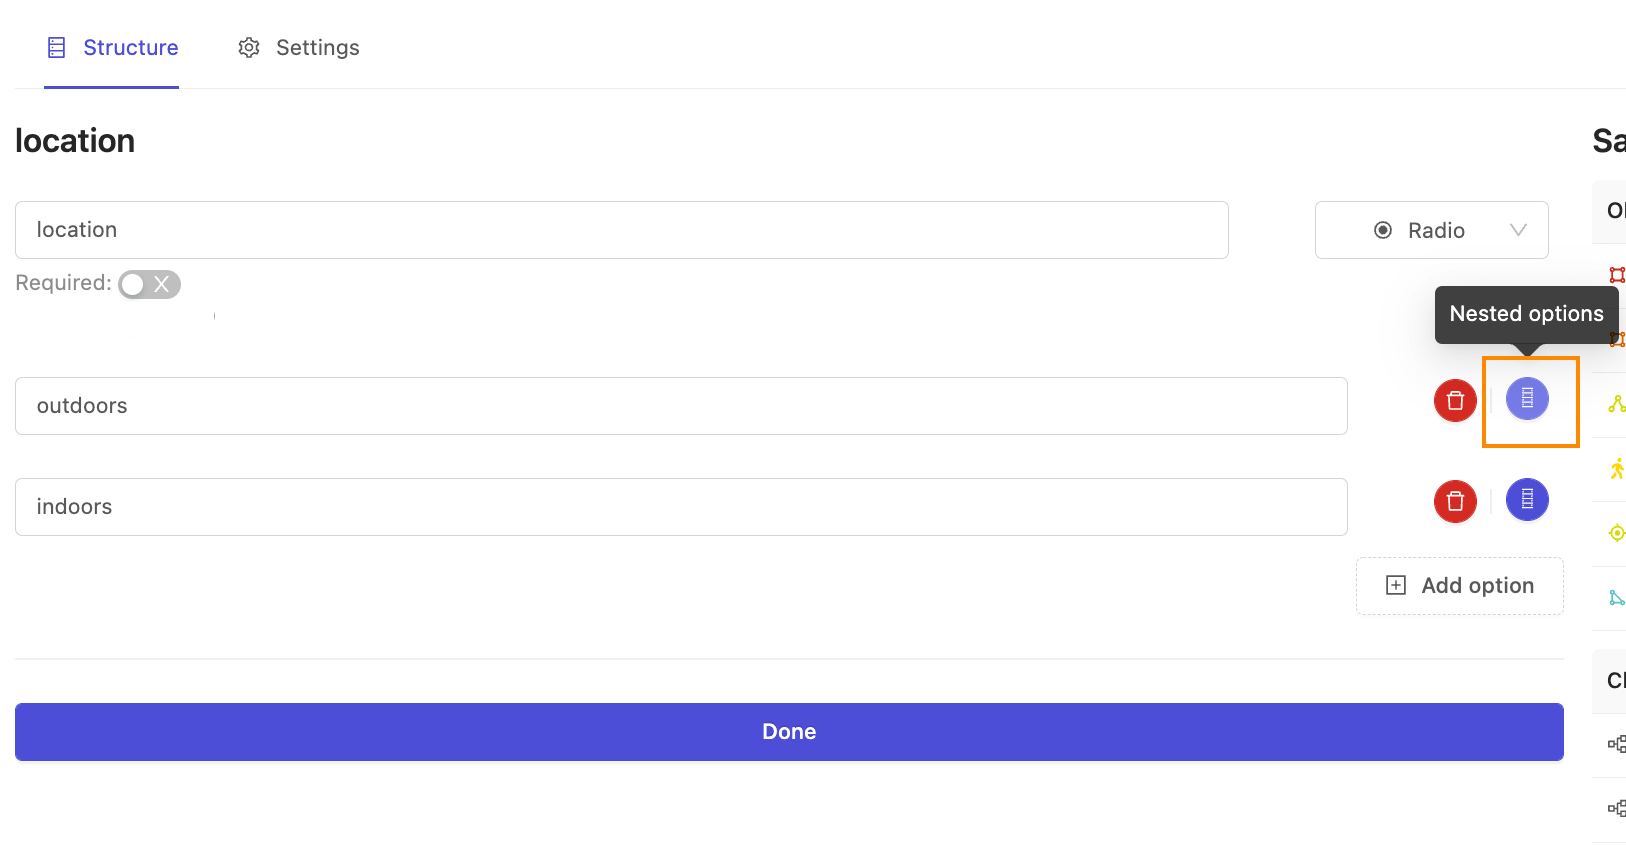
Nested Classifications
Classifications can be nested either under objects or under any classification with a classification annotation type of Radio. After setting the type as Radio, hit the configure button (stacked data items which display Nested options on mouseover) next to the value under which you wish to create a further nested classification. This allows for deep hierarchies and conditional annotation structures, which can help describe even the most complex annotation scenarios.
Nested classification Modifier - Required
Any nested classification -- that is, a classification attribute on an object category type, or any level below a top-level classification, can be marked as required. This means the task can't be submitted until all nested classifications have a value.
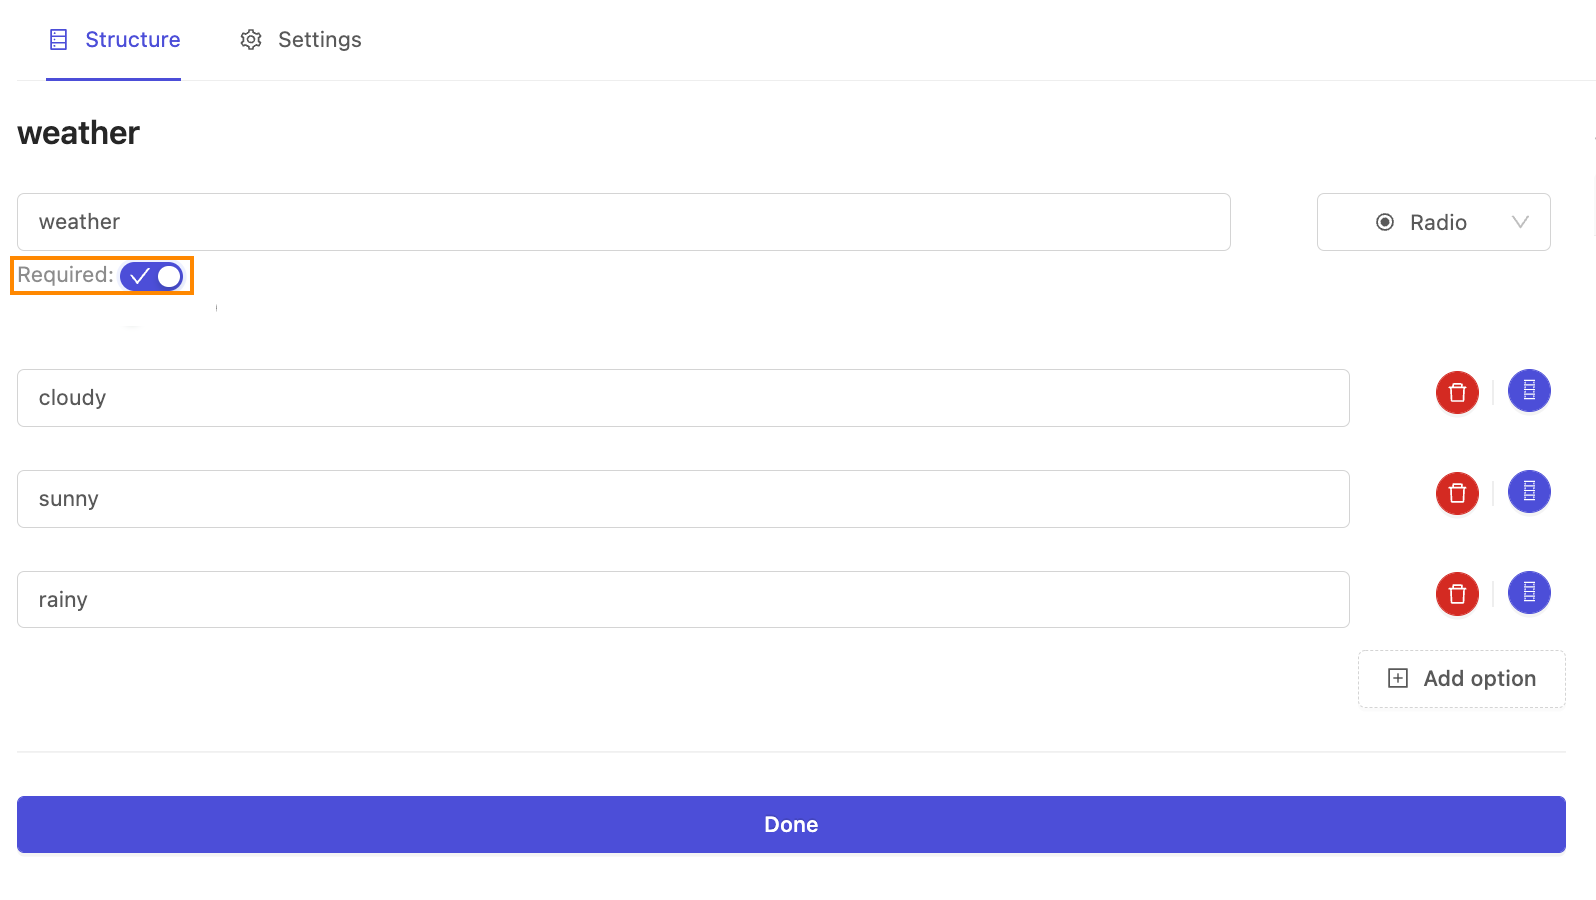
Currently, top-level or scene-level classifications can not be made required.
We’re actively investigating adding the ability to make at-least-one required for top-level classifications in a given annotation task — that is, whether you’re annotating a video, an image, or DICOM series, at least one of such a required top-level classification would be required before submission is possible. Please contact product@encord.com to discuss your use-case with us.
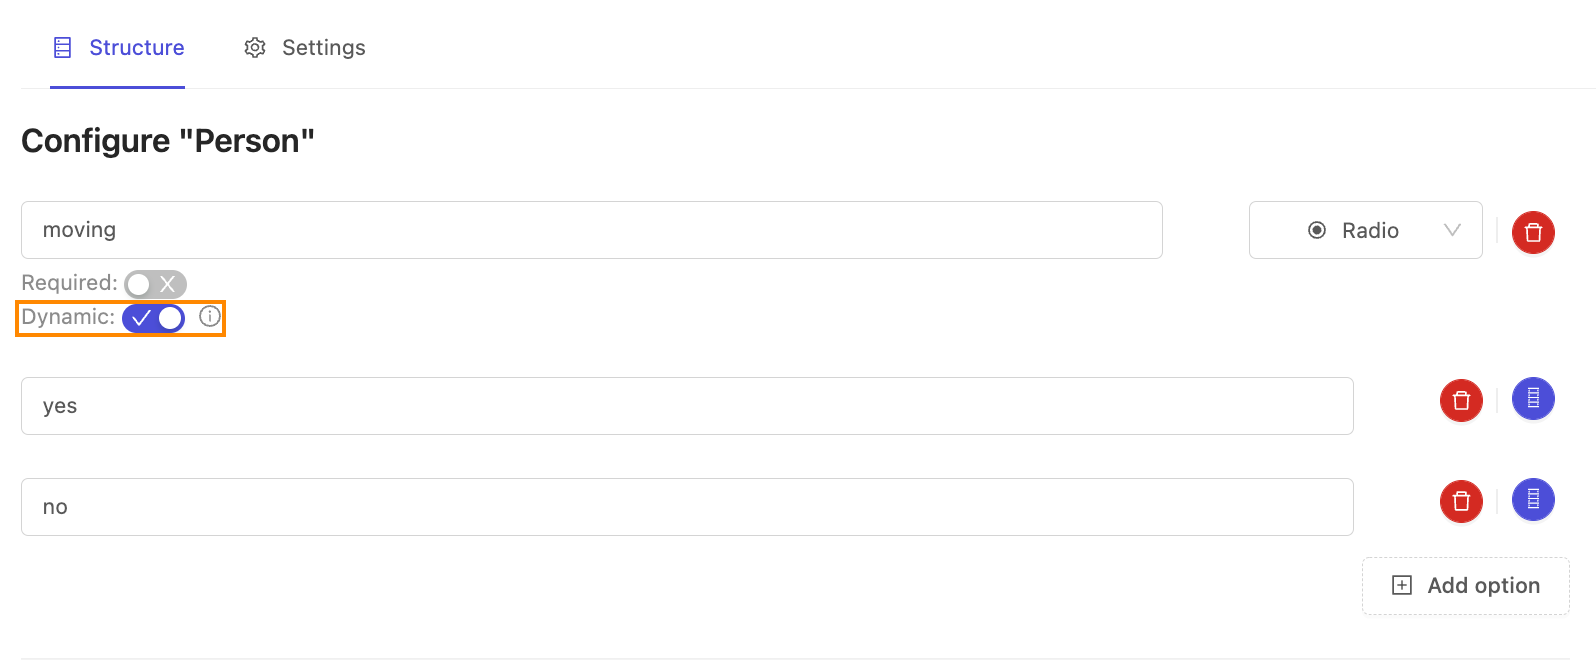
Nested classification Modifier - Dynamic
First-level nested classifications on objects can optionally be marked as dynamic classifications. Normally, nested classifications on objects are static -- that is, they apply across the lifetime of the instance. By marking a nested classification as dynamic, it's possible to apply that particular attribute to only a selected subset of frame ranges. This is very useful for indicating temporary attributes on an object, such as mode of transport, direction, state of occlusion, etc.
Preserve current state
A 'Preserve current state' checkbox will be available for the first instance of a label with a dynamic classification. Selecting this option will propagate the classification for all future instance labels. This means that all labels created for this instance will have the same classification as the initial instance label.
The 'Preserve current state' functionality also holds for instance labels created automatically with interpolation.