Creating and training models
Models are powerful tools designed to automate labeling in a variety in different ways. They are top-level entities, which means they can be attached to several projects to detect and label objects they have been trained to recognize.
This document will teach you how to:
- Create and set up a model.
- Train the model on previously labeled data.
- Use the model to create labels or classifications.
Video Tutorial - Building micro-models
Creating models
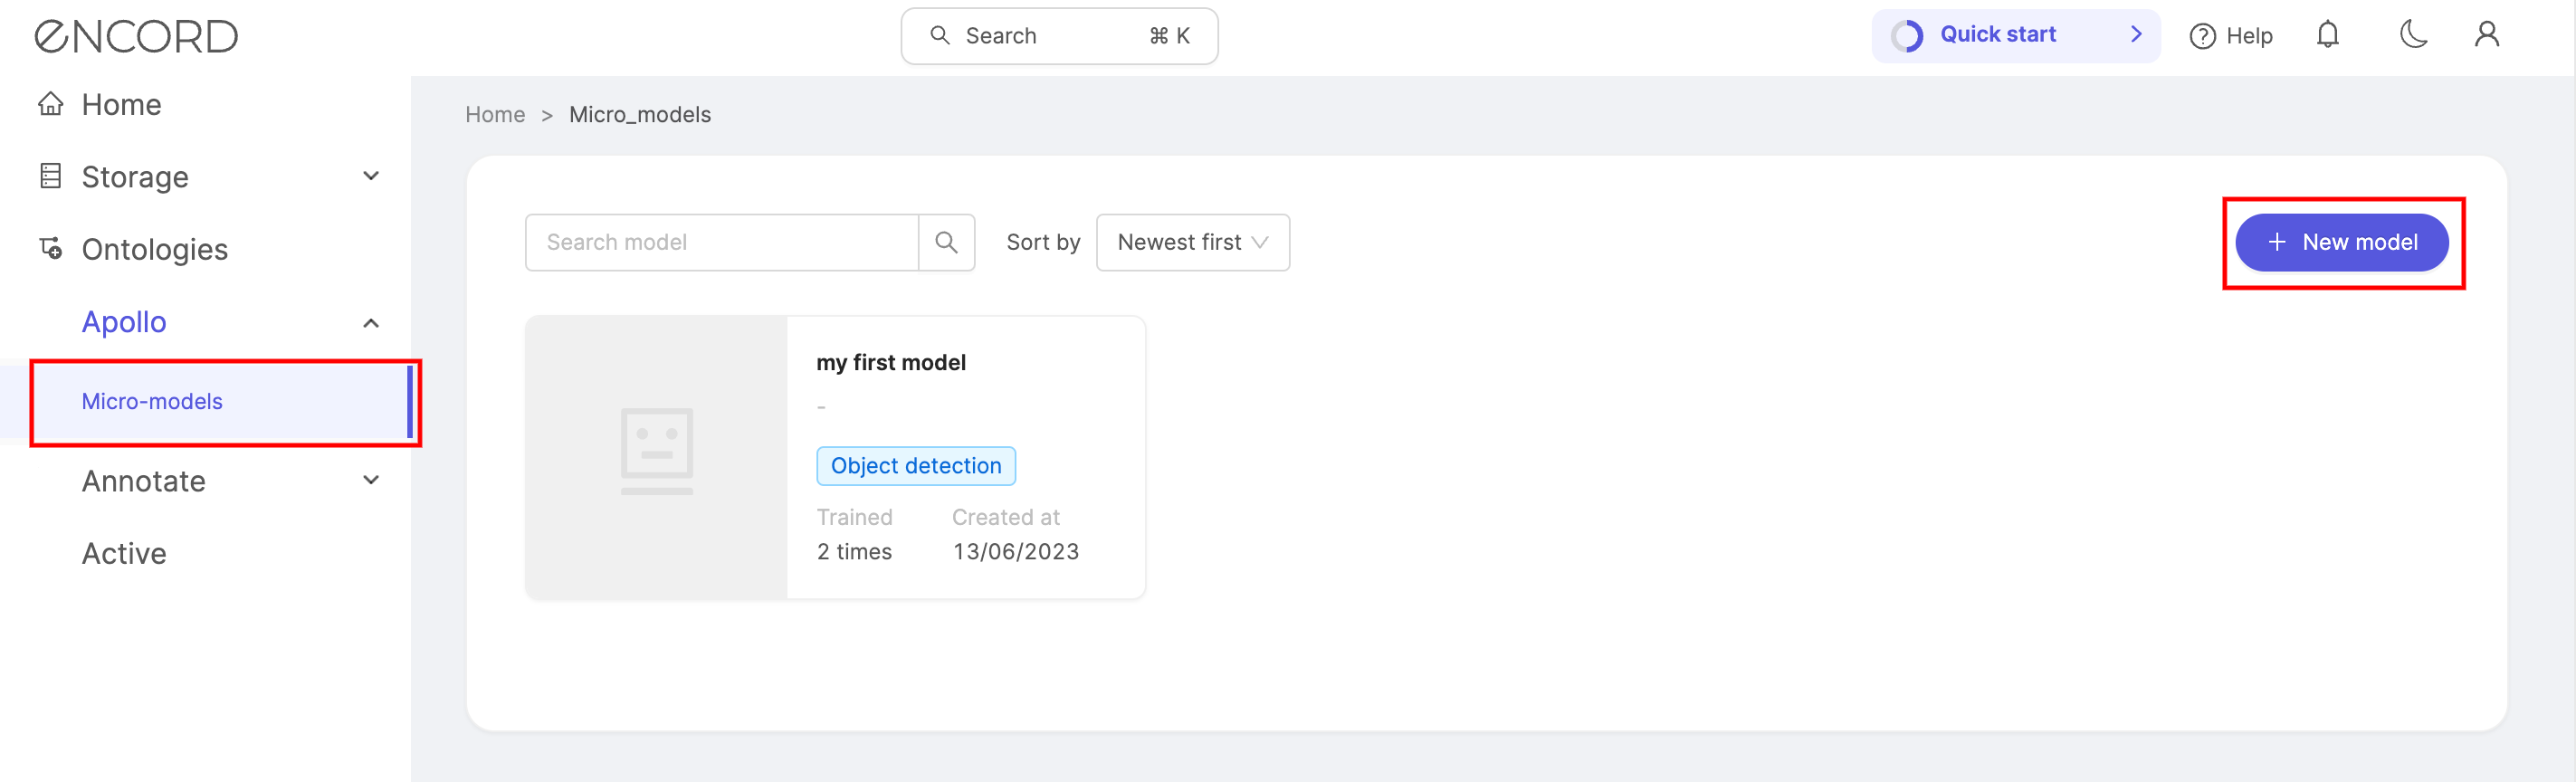
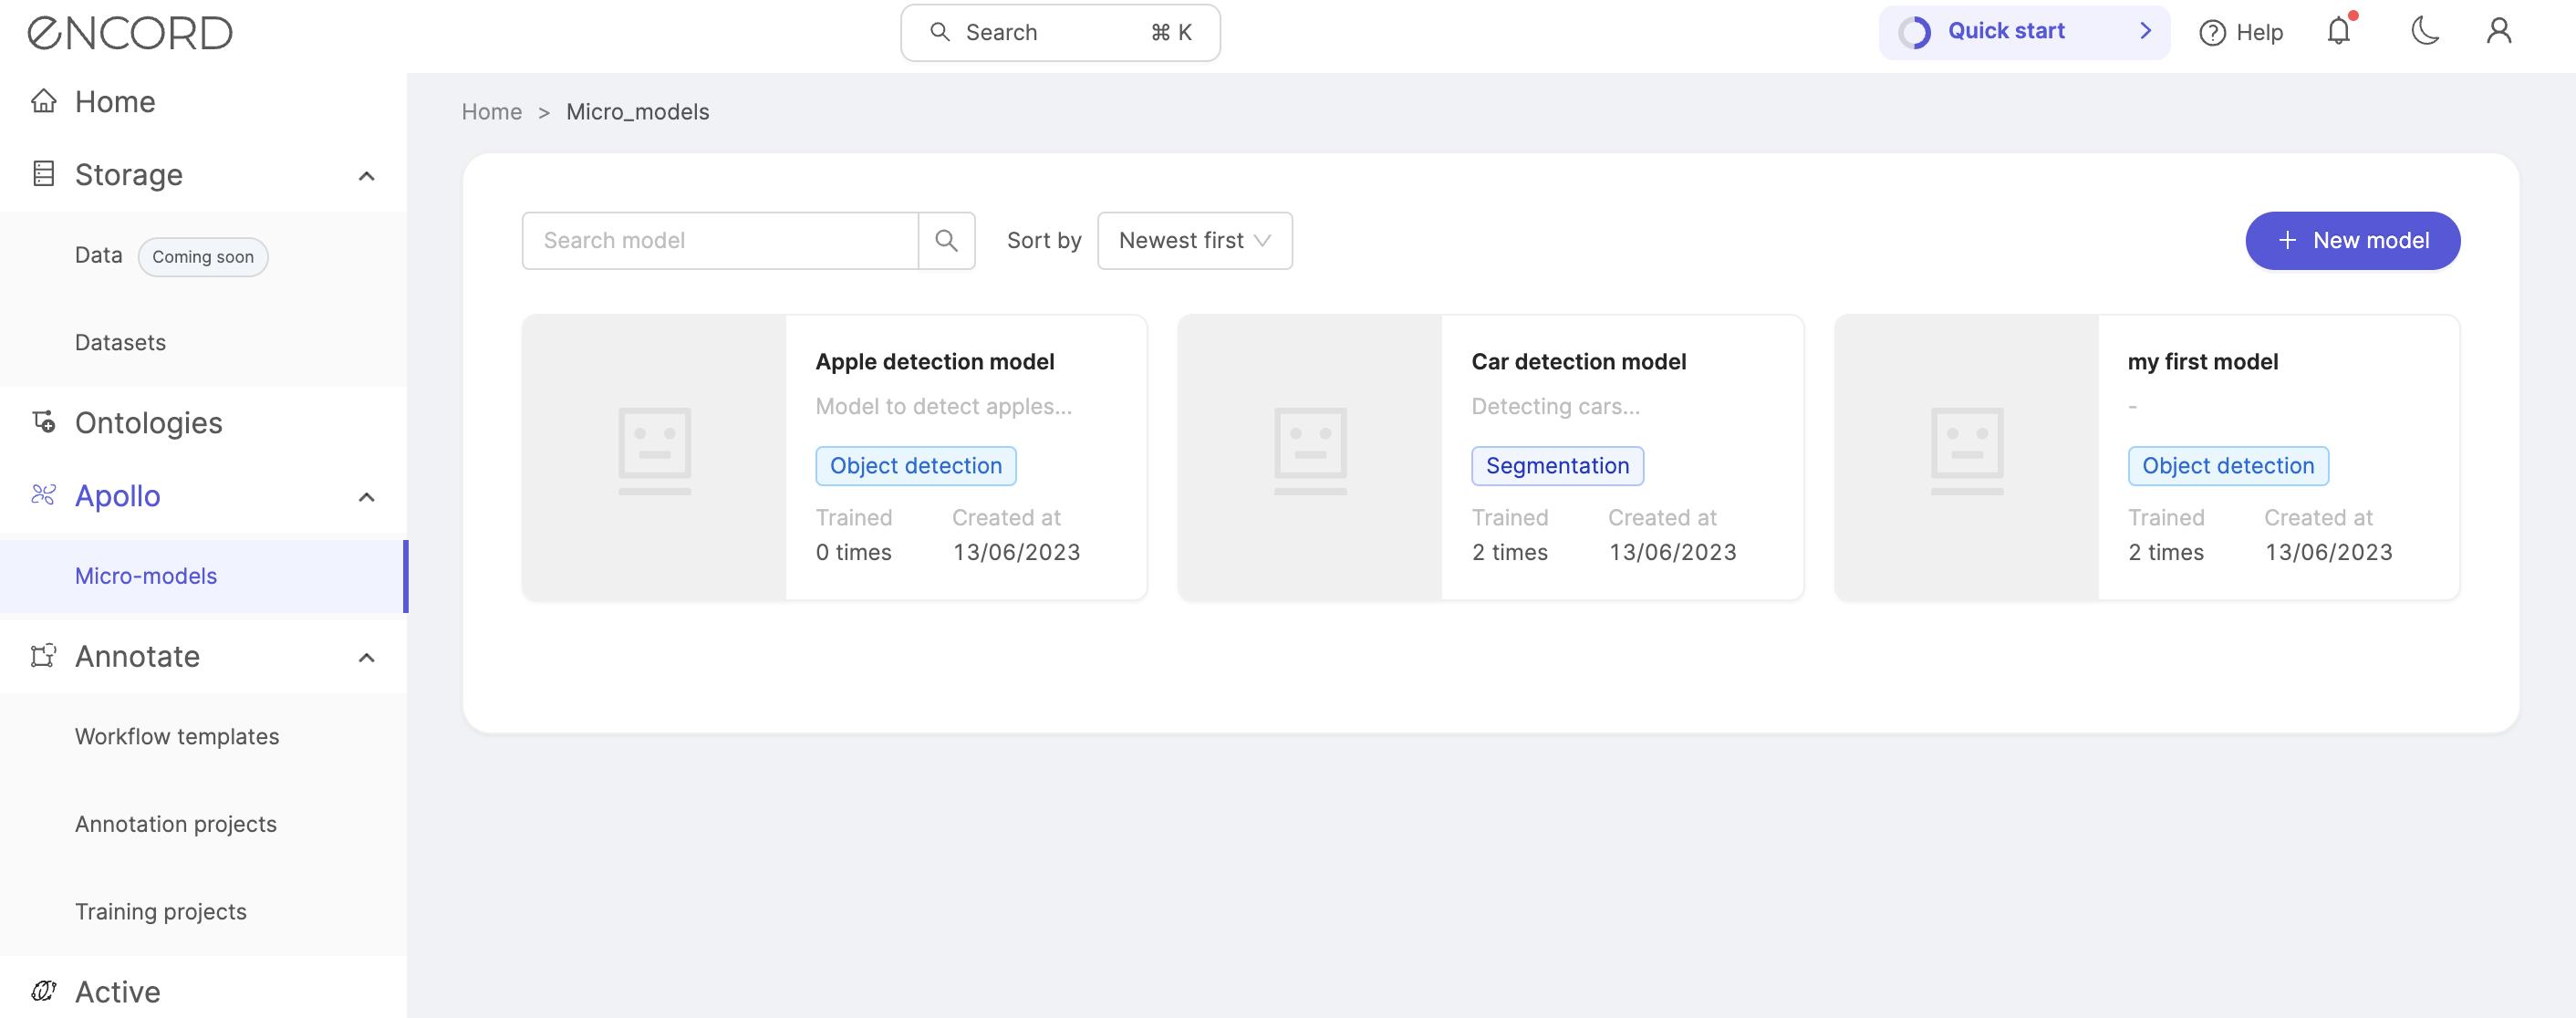
To create a model, navigate to Micro-models in the Apollo section of the sidebar in the Encord web-app, and click the + New model button.
Next, enter details for your model such as a title and optionally a description. Information on other details is given below. When all details for a model have been selected, click the Create model button to complete the model creation process.
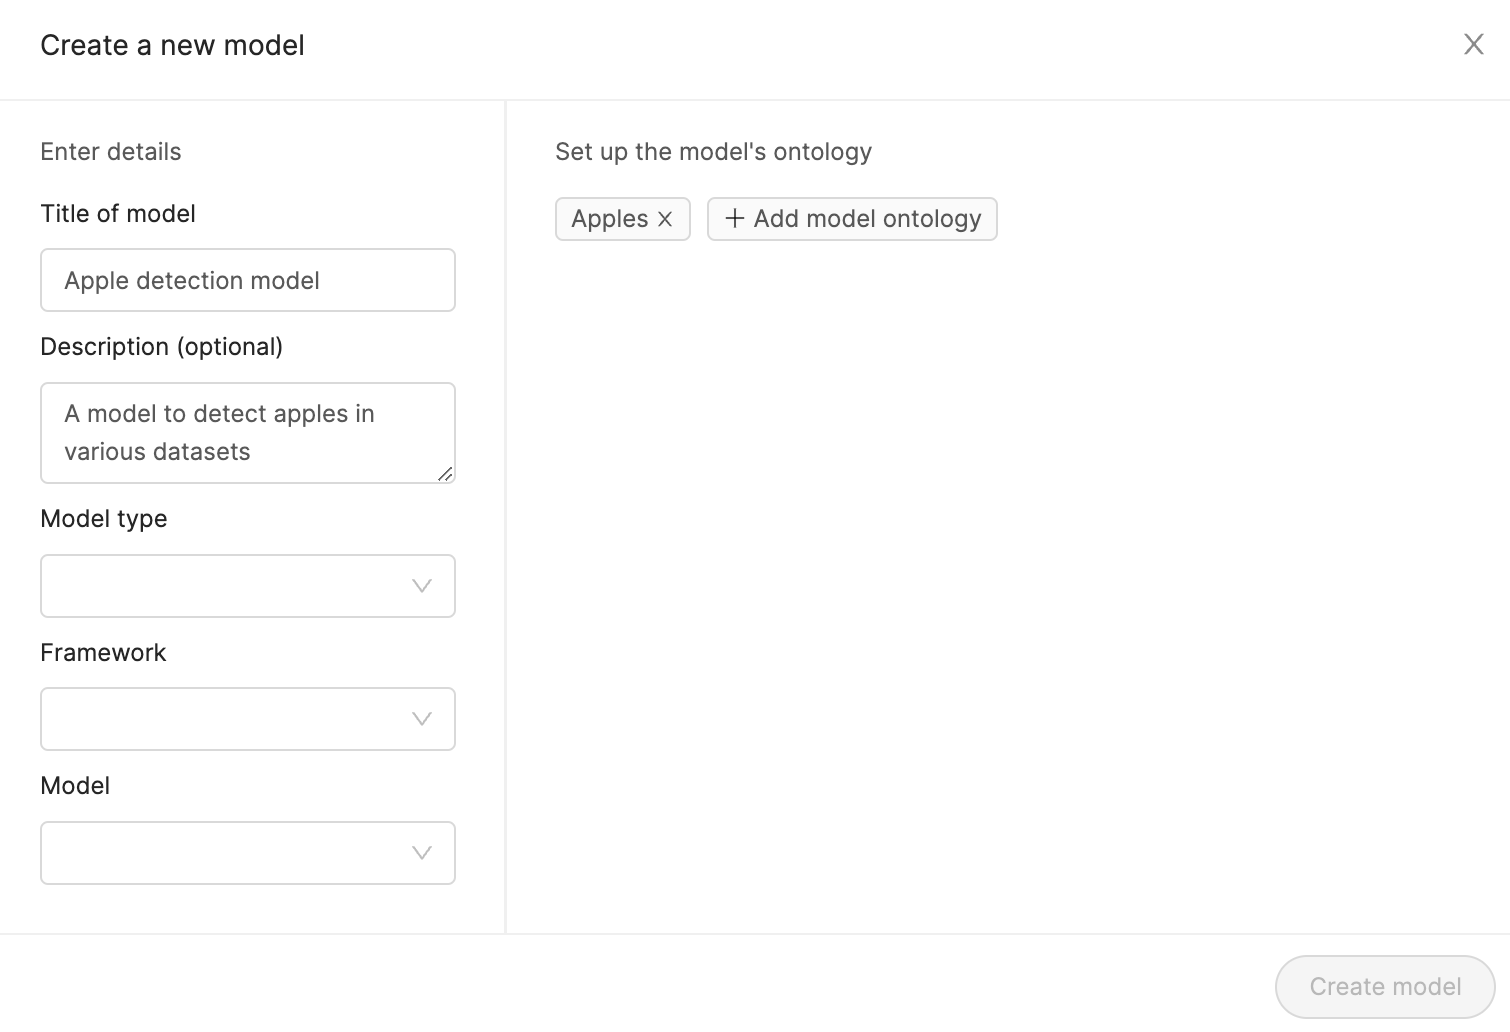
Model type
The type of model determines the function you would like your model to perform. Click the links below to learn about the different micro-model types available to use within Encord, as well as which frameworks and models are available for each.
Model ontology
The model ontology should consist of the objects and classifications you would like your model to detect and label. Functionally, these are strings of text which will later be associated with particular objects in a project's ontology when the model is trained.
Each object and classification you would like your model to learn how to label should have its own model ontology.
Your project ontology should have a descriptive name that easily allows you to determine what your model is trained to detect, or classify.
Training models
After creating a model it will have to be trained to learn how to classify, or detect / segment objects within frames or images. Begin by selecting the model you wish to train from the list of models.
Then click the Train model button to begin setting up your model's training.
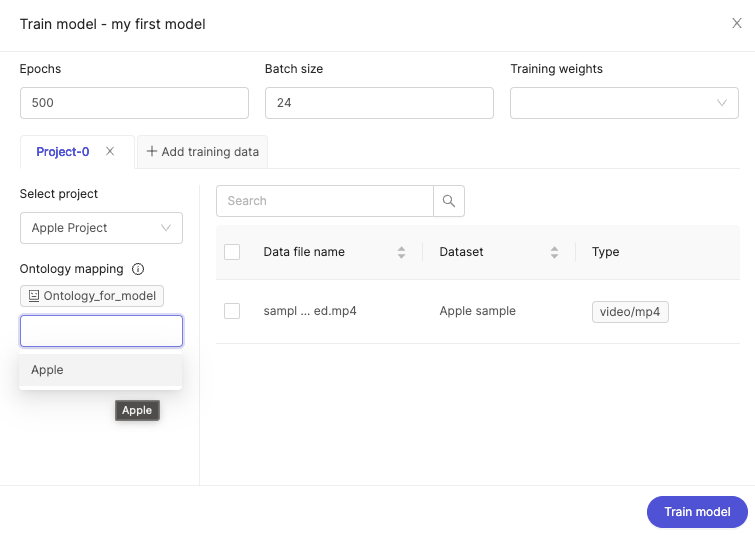
Select the project you would like to train your model on. Make sure to select a project with accurate labels, as high quality labels result in better performing models.
Map each model ontology to an entity in the project's ontology. This step associates the model ontology to a set of labels or classifications in the project which is can learn from.
Select all project tasks you would like your model to train on by selecting the checkboxes in the list. A minimum of 5 labels are needed for your model to be trained.
Select the number of Epochs you'd like to include in this training. Epochs refer to the number of interactions through the entire training dataset that should be included in the training process. The default number of epochs is set to 500.
Select the batch size for this training. The batch size refers to the number of training examples processed by the model in a single forward and backward pass.
Select which training weights should be used. This refers to the model's initialization weights, which determine how many parameters a model has, as well as their weights. Please visit the PyTorch website for more information on this topic. Training weights are not available for classification models.
If you would like to add training data from a different project, click the + Add training data tab.
Once all the above has been set and selected click the Train model button. Your model in now being trained - and you can monitor the progress by clicking the ![]() icon in the top right corner of the Encord app. The
icon in the top right corner of the Encord app. The ![]() icon will appear next to the task when the process has completed.
icon will appear next to the task when the process has completed.
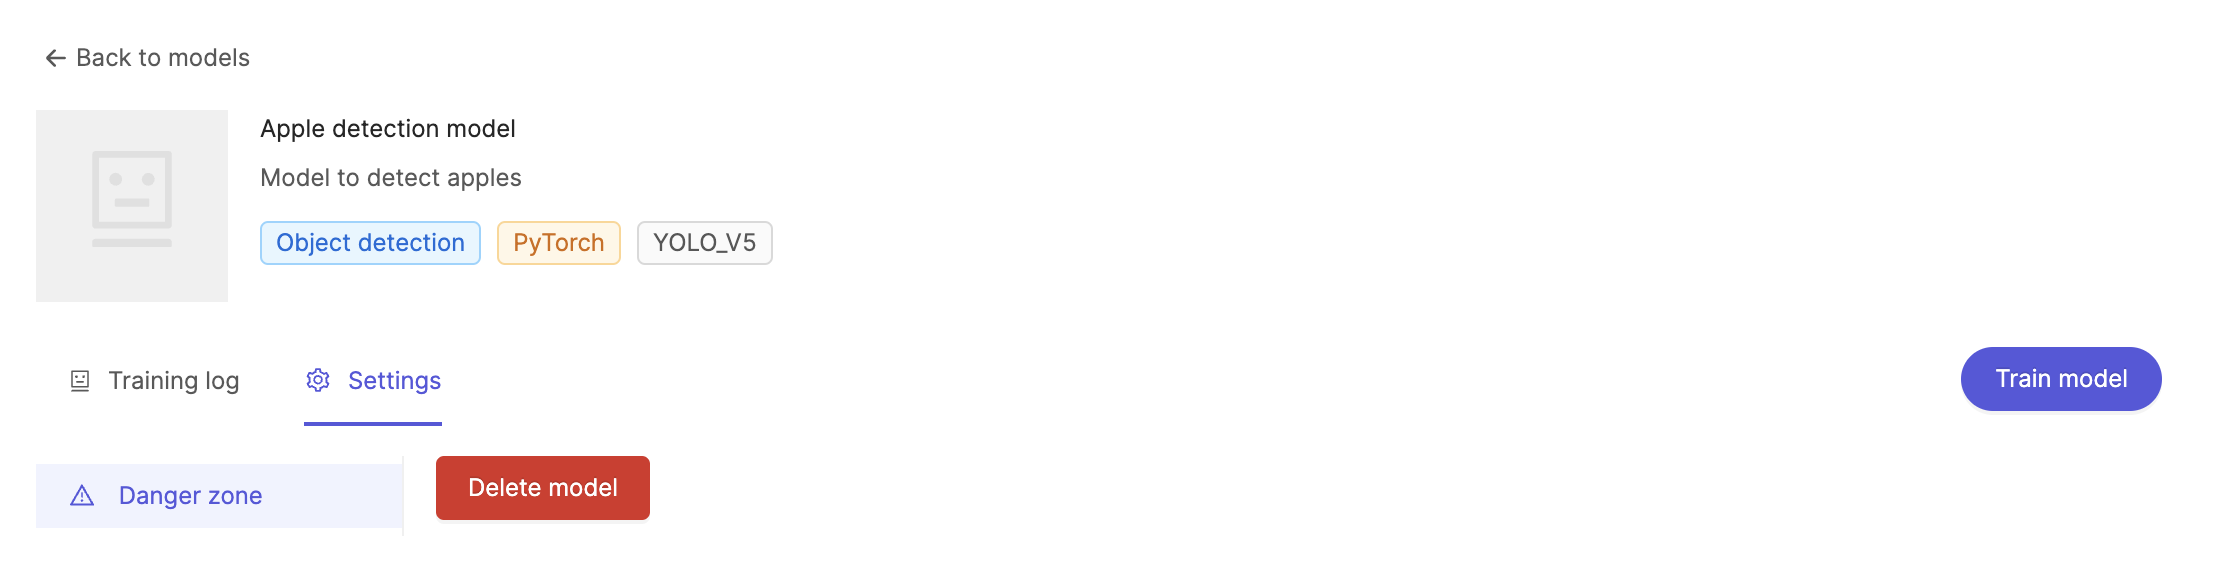
Training log
After a model has finished training, the 'Training log' allows you to study each training iteration and determine how differences in training data affect the model's performance over time.
It displays the batch size, the number of epochs, and a graph showing how the model's loss evolved during the course of each training iteration. Training loss will not be recorded for classification models.
Settings
The 'Danger zone' is where you go to delete a model.
Please note that deletion is a permanent action and can't be undone.
Using Models
Once you've created and trained a model, it is ready to be used inside your project.
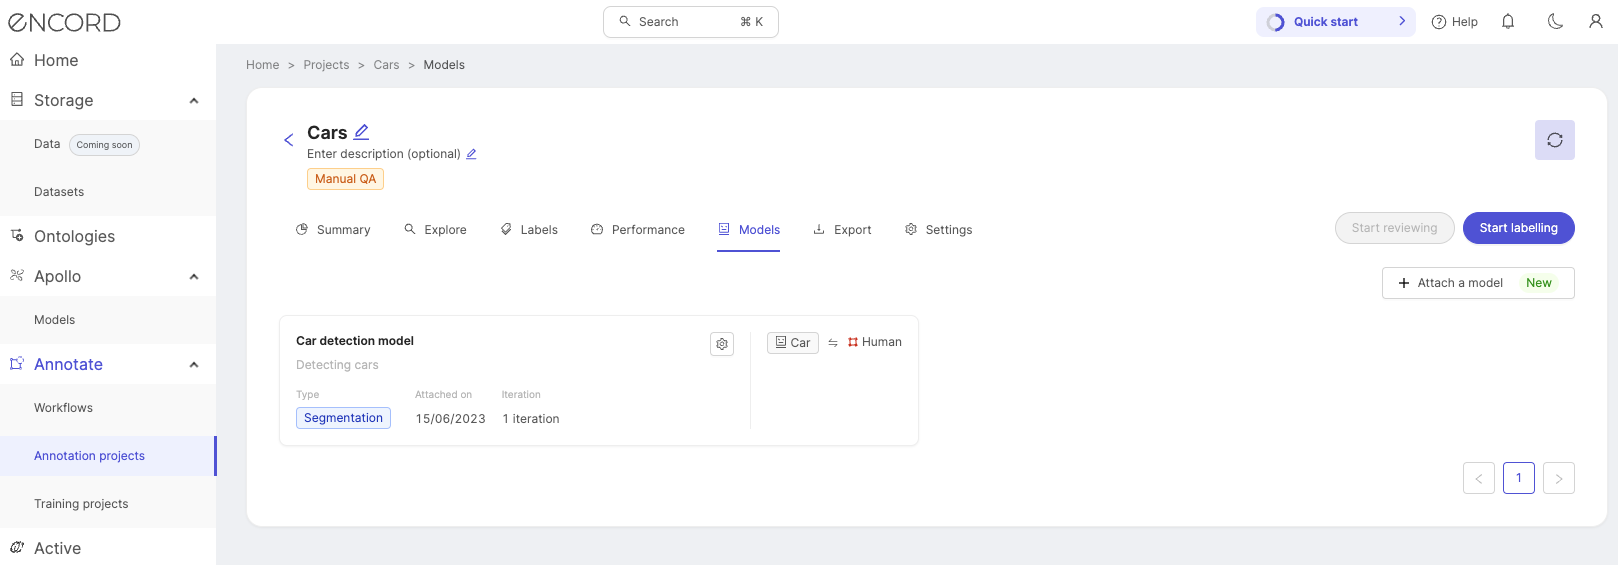
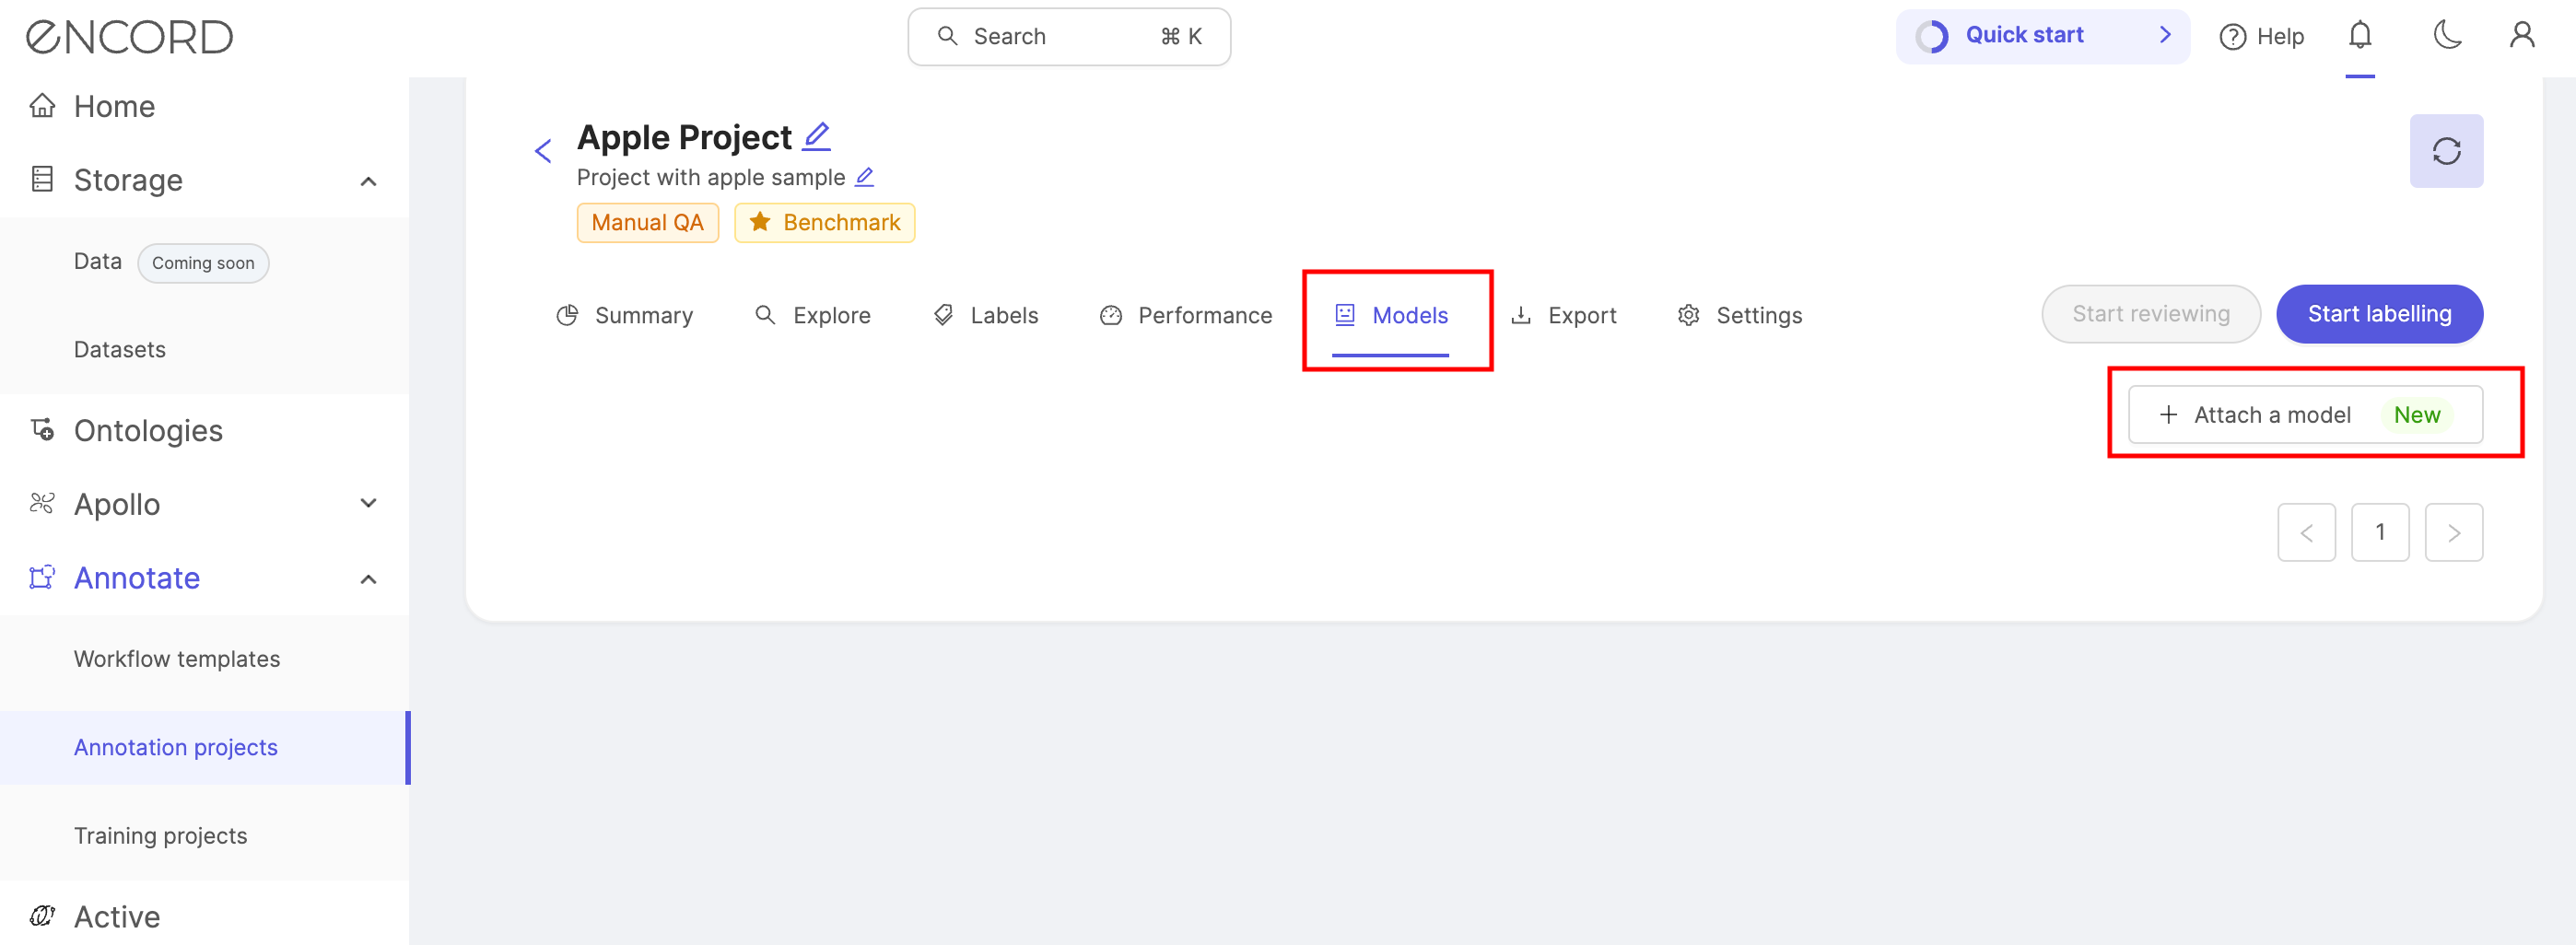
Attaching models to projects
Open the project you would like to attach your model to and navigate to the 'Models' tab. Click + Attach a model.
Select the model you would like to attach to the project, and map each model ontology to the entity in the project's ontology you would like to associate it with. In the example below we want the 'Apple' model ontology to correspond with 'Apple' in the project's ontology.
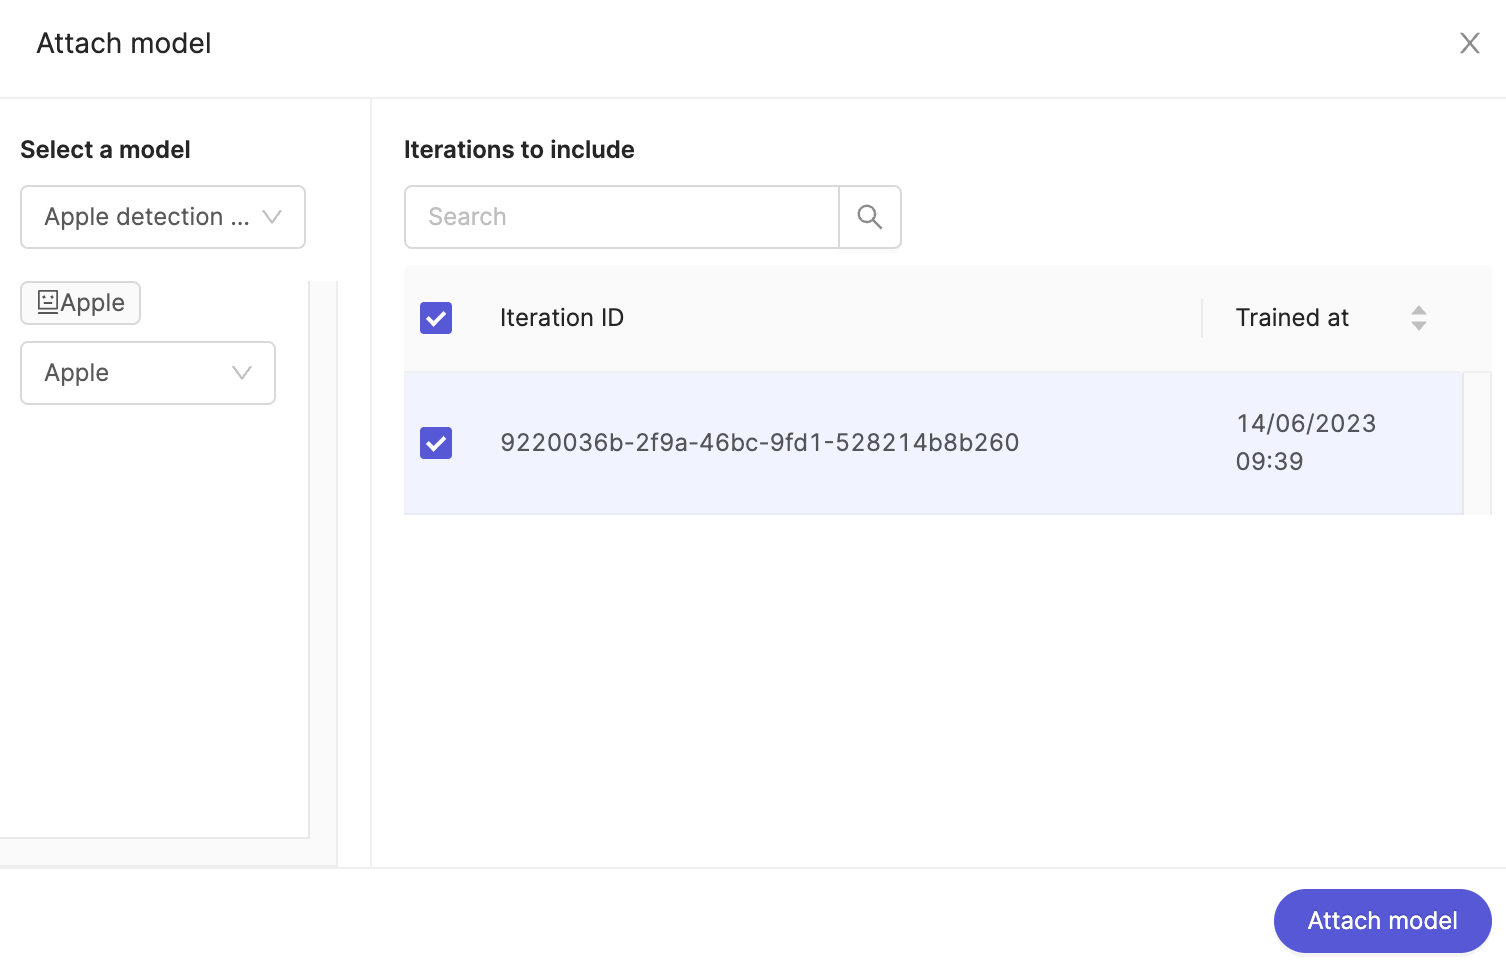
Next, select which training iterations you would like to include from your model. Click Attach model when you are done.
Detaching models from projects
Open the project you would like to detach your model from and navigate to the 'Models' tab. Click the ![]() icon and select Detach model as seen below.
icon and select Detach model as seen below.